Top Picks for Living Ground Covers (Part 3)
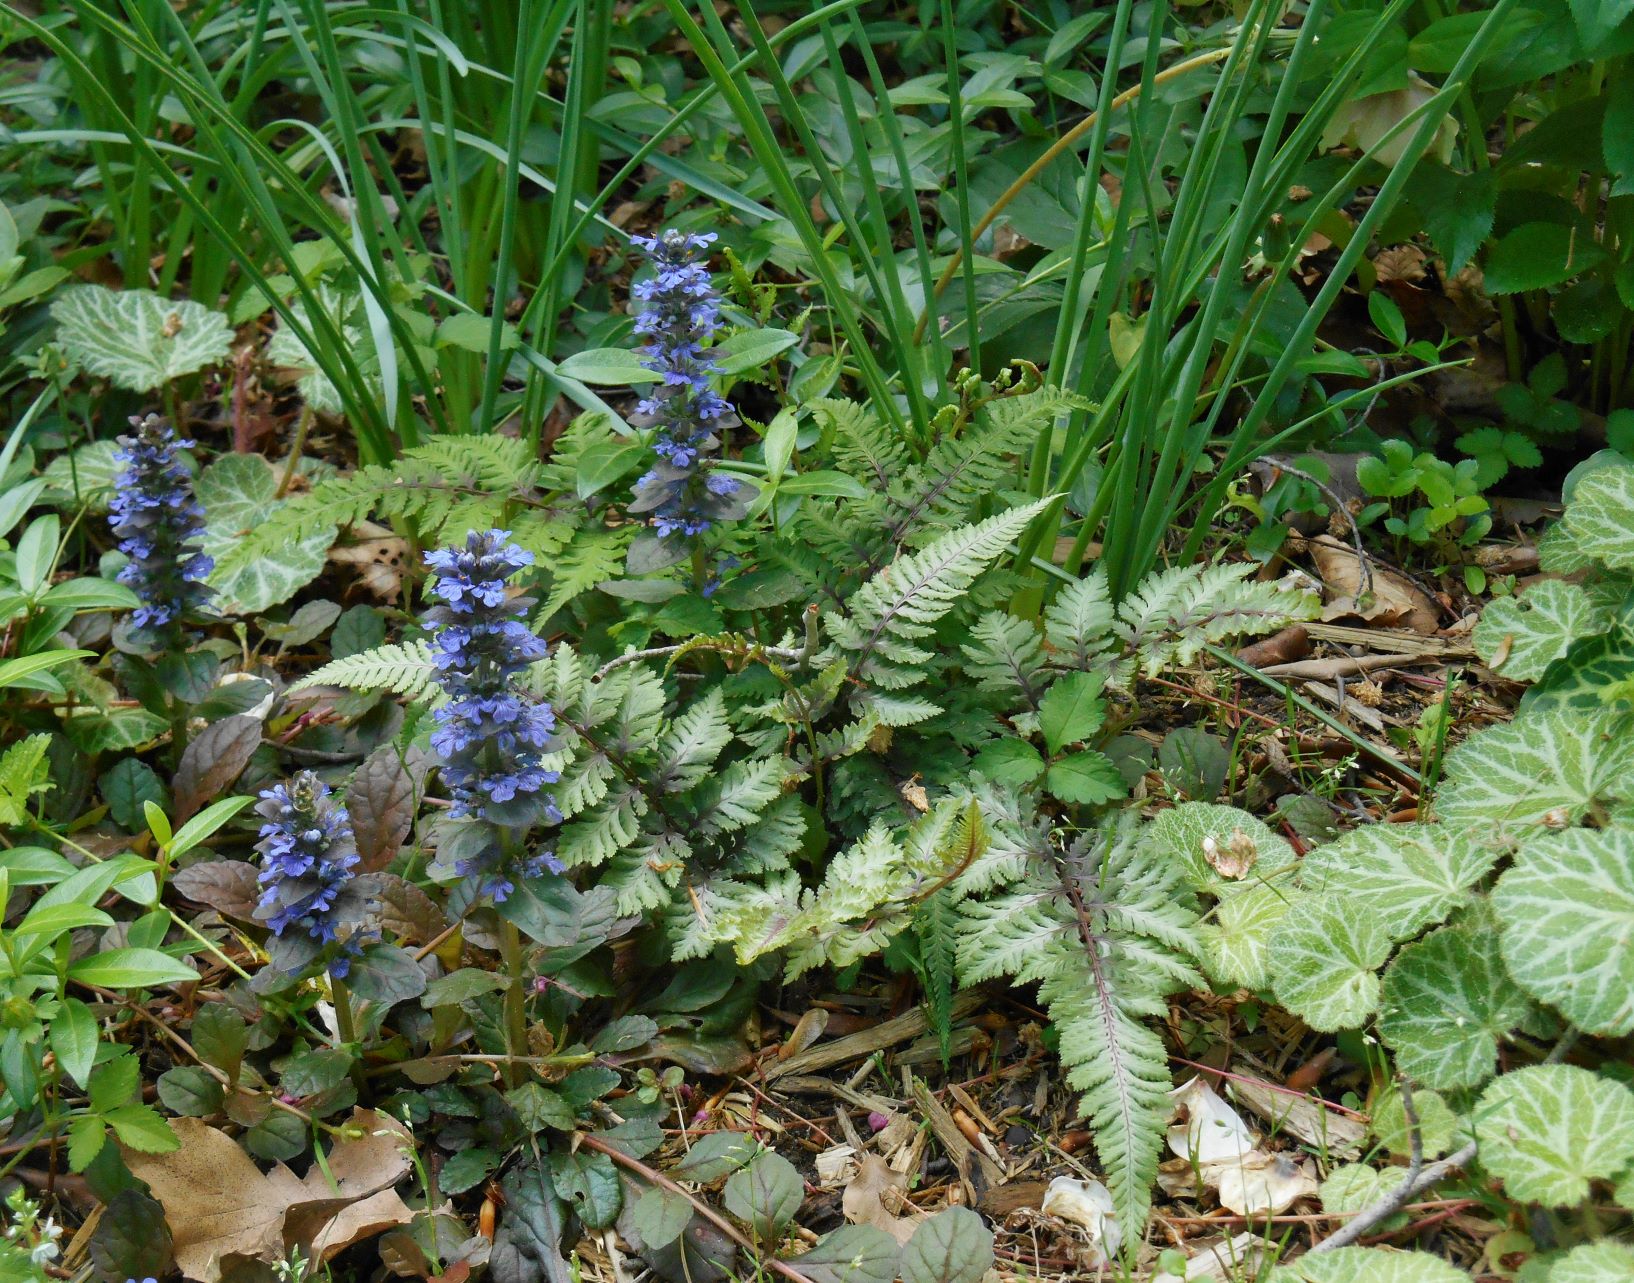
Ajuga reptans, Saxifraga stolonifera, Vinca minor and Athyrium niponicum ‘Pictum’ form a living ground cover with interesting textures and colors.
How do you deal with a patch of bare ground in your yard? That is the existential challenge of gardening, isn’t it? The first, most logical choice for many is to plant a lawn. We see lawns everywhere in our neighborhoods and public spaces. Grasses may be the default ground cover for many people.
But a grassy lawn gets expensive. It costs time to maintain. It requires ongoing investments in grass seed, fertilizers and other chemicals to feed it and kill the weeds. Since most lawn grasses aren’t native to North America, it takes a lot of effort to maintain them. But the real costs are environmental: the exhaust from the mower and the run-off of lawn drugs into local waterways.
Bark mulch may be the simpler solution for covering bare ground. It protects the soil from erosion and slows down the weeds. It is common to spread mulch between shrubs in planting beds and create islands of it around trees.
A living ground cover provides key benefits other choices do not. It won’t decompose, harbor fungi, or wash away like shredded wood mulch. Living ground covers sequester carbon as they grow, while wood and pine straw release carbon back into the atmosphere as they break down. Over time, organic mulches may also make the soil they cover more acidic.

Unlike lawn grasses, living ground covers don’t require regular mowing or chemical maintenance. Once planted, many ground cover plants look after themselves with minimal intervention from the gardener. They hold soil against erosion, particularly on banks, provide beauty under and around shrubs, and offer year-round color and texture.
Living ground cover plants support a variety of animal life. Many bloom and support pollinators. Birds find insects in them. They support the rich life in the soil and protect the roots of trees, shrubs and herbaceous plants growing through them. Studies have proven that most ground cover plants compete less with trees than do grasses, while protecting trees from damage from lawn mowers.
Ground cover plants are planted as plugs or small potted plants. Small plants are planted in a grid across the planting space with the expectation that they very quickly will grow to fill the space. Many ground covers are vines and root anywhere a leaf node touches ground. Some grow as expanding clumps of upright leaves. Others send out rhizomes or stolons, special stems that end in a new plant taking root nearby. This is why some popular ground cover plants, like ivy, creeping Jenny and Vinca minor, are now on the Invasive Plant list for many localities.
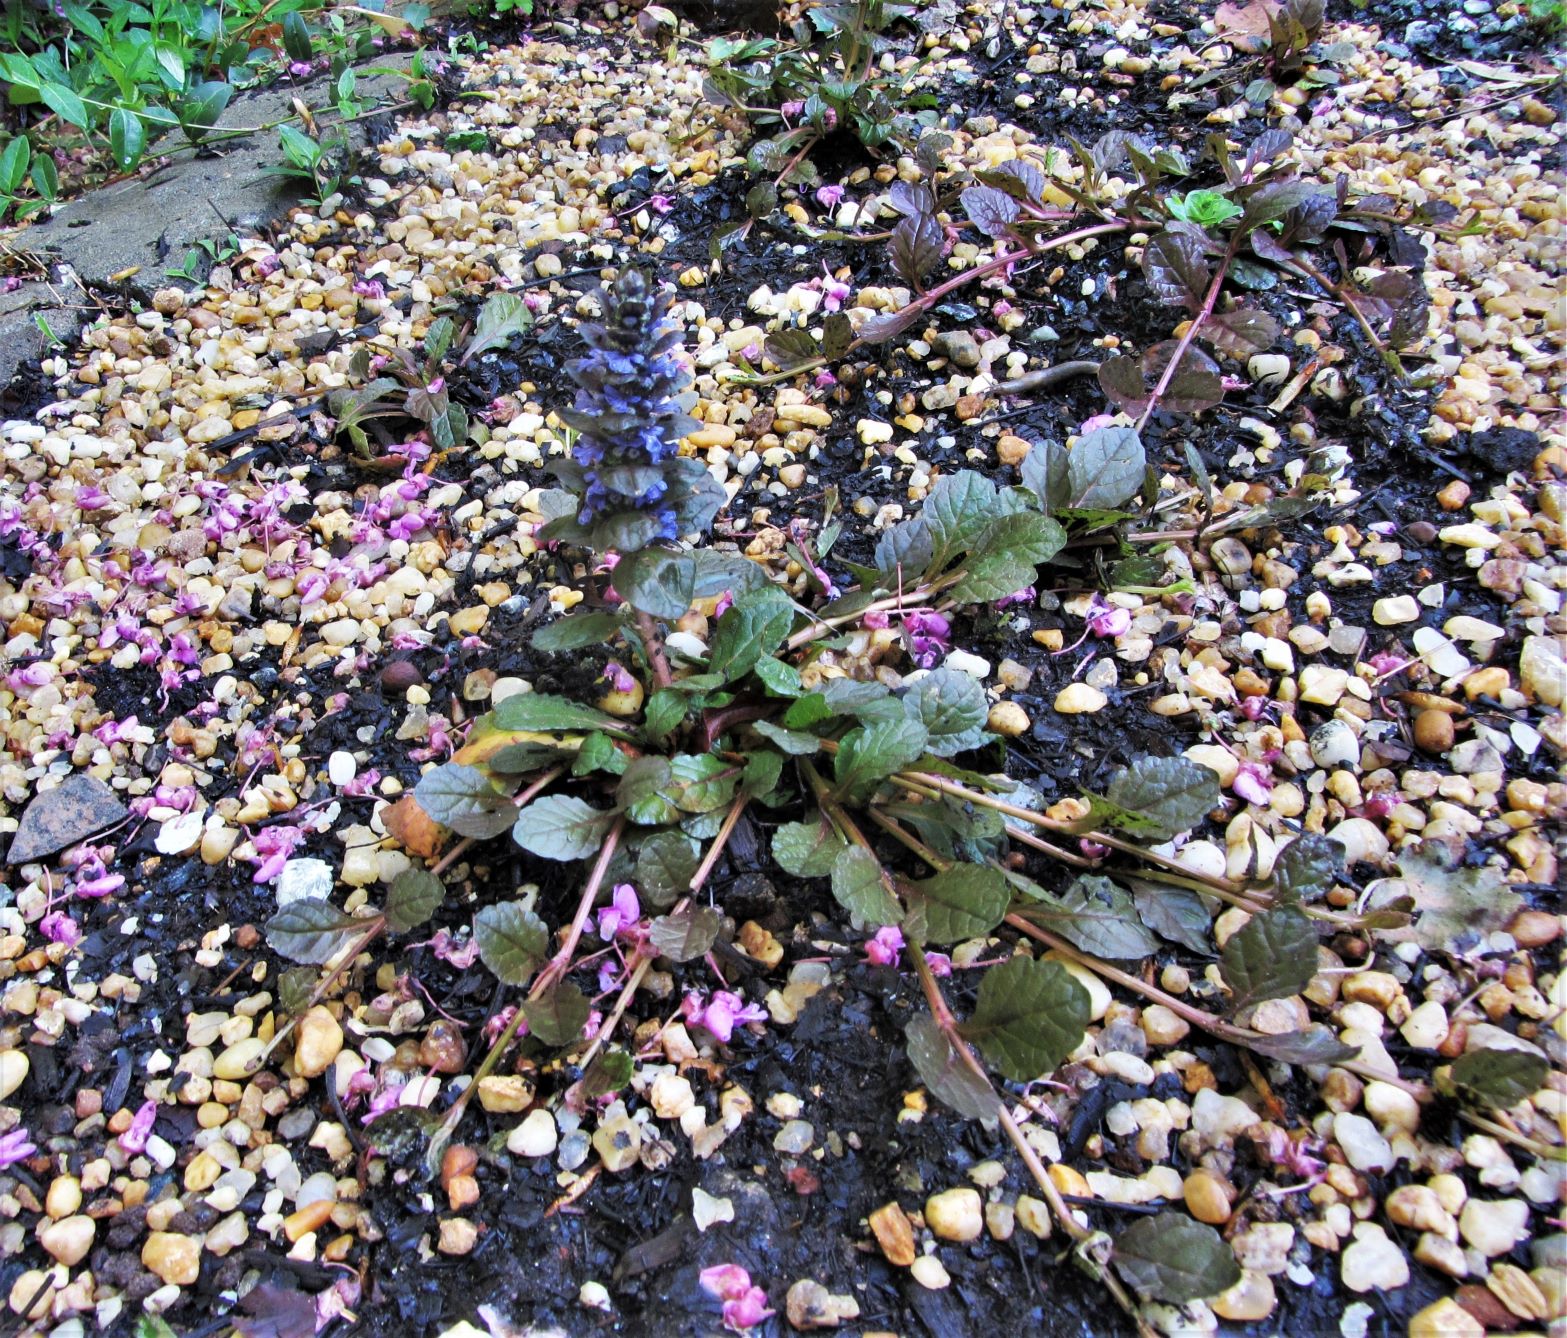
Some ground cover plants spread more aggressively than others. Ajuga reptans sends out stolons to spread new plants around the mother plant. This is an excellent plant to hold sloping ground against erosion. It is considered invasive in some areas, but not yet in Virginia.
Older properties frequently have ivy, Vinca, and other ground cover plants already growing from a time before they were considered invasive. They have performed so well, over many decades, that they persist and may spread beyond where they are wanted. These plants can be very difficult to remove, once established.
Ivy has grown in our area for centuries. It is easy to see some of the problems it causes as it overtakes mature trees and eventually kills them with its weight. Some homeowners may make the effort to remove all invasive plants and make better choices. Anyone starting out fresh has the opportunity to make better choices form the beginning.
Good ground cover plants remain low, no more than a foot or so tall. Many want ground cover to remain under 6 inches, and not require regular maintenance. It should solidly cover the area where it is planted, have a dense root structure to hold the soil, and have seasonal interest throughout the year. Evergreen ground covers are the most popular because deciduous plants just disappear for months of the year. Install a border around the planting area to contain the more aggressive ground cover plants so they don’t claim more real estate than you intend for them.
Ground cover plants come in many shades of green, but also blue, purple, red, chartreuse, and variegated combinations with green. Most have interesting texture that make them even more beautiful in combination with other plants. Ground cover should be considered the ‘Ground Layer’ in a well-structured planting. They may be mixed, and combined with larger ferns, perennials, shrubs and trees for a more interesting and functional landscape.

Delicate fern moss makes an excellent living ground cover. It appreciates shade and moisture for its best growth.
Each gardener has their own preferences, but here are some reliable choices for our area:
Ajuga species / Bugleweed /partial sun to shade /native to Europe
Rosettes spread with stolons to form a dense mat / 3”-4” tall / space 12” apart / Zones 3b-9
Evergreen/ Critter resistant/ wildlife value: spring flowers attract pollinators
Notes: Several species are available with varying degrees of spread. Leaf colors range from tri-color variegation of cream, pink and green to bronze, purple, green and near black. Blue flowers are showy and may set seed. This pairs well with spring bulbs and perennials. Ajuga reptans may be invasive in some areas.
Carex may look like a grass, but is a very tough, evergreen perennial sedge. It looks good year to year with minimal maintenance.
Carex species (more than 2000)/ Sedge / full sun to deep shade, depending on type / some species are North American natives: Carex amphibola, Carex pensylvanica, Carex flaccosperma/glaucodea, Carex laxiculmis, Carex plantaginea
Clumping, spreads slowly / height varies, most less than 1’/ space 12” apart / Zones 5-8
Evergreen/ Critter resistant/ wildlife value: nesting, attracts pollinating insects, seeds feed small animals
Notes: Slow growing and not invasive
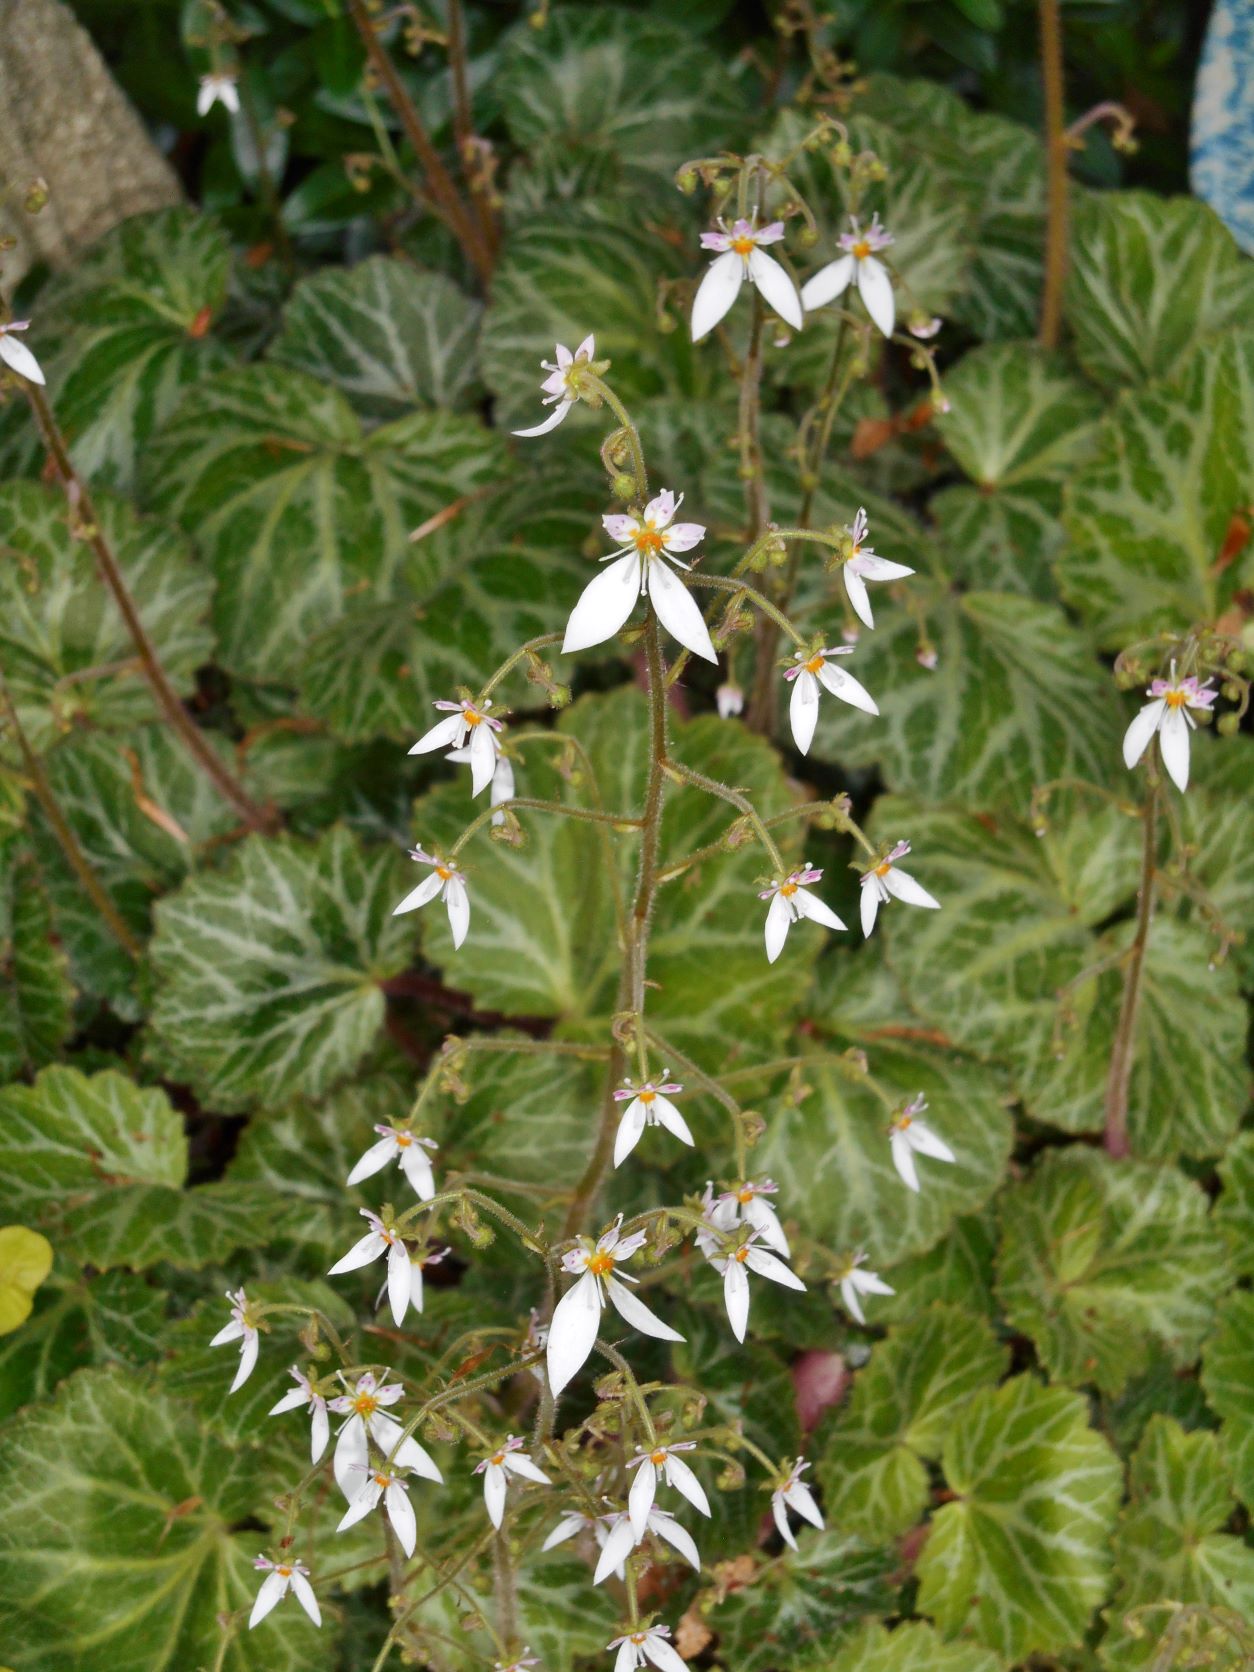
Saxifraga stolonifera blooms in April and May. Foliage persists year round.
Saxifraga stolonifera / Strawberry Begonia /partial sun to deep shade /native to Asia
Rosettes spread rapidly with stolons / 3” tall / space 10” / Zones 7-9
Evergreen/ Critter resistant/ wildlife value: spring flowers attract pollinators
Notes: Small, variegated leaves and wands of small white flowers are highly ornamental. Prefers consistently moist, rich soil. Not drought tolerant.
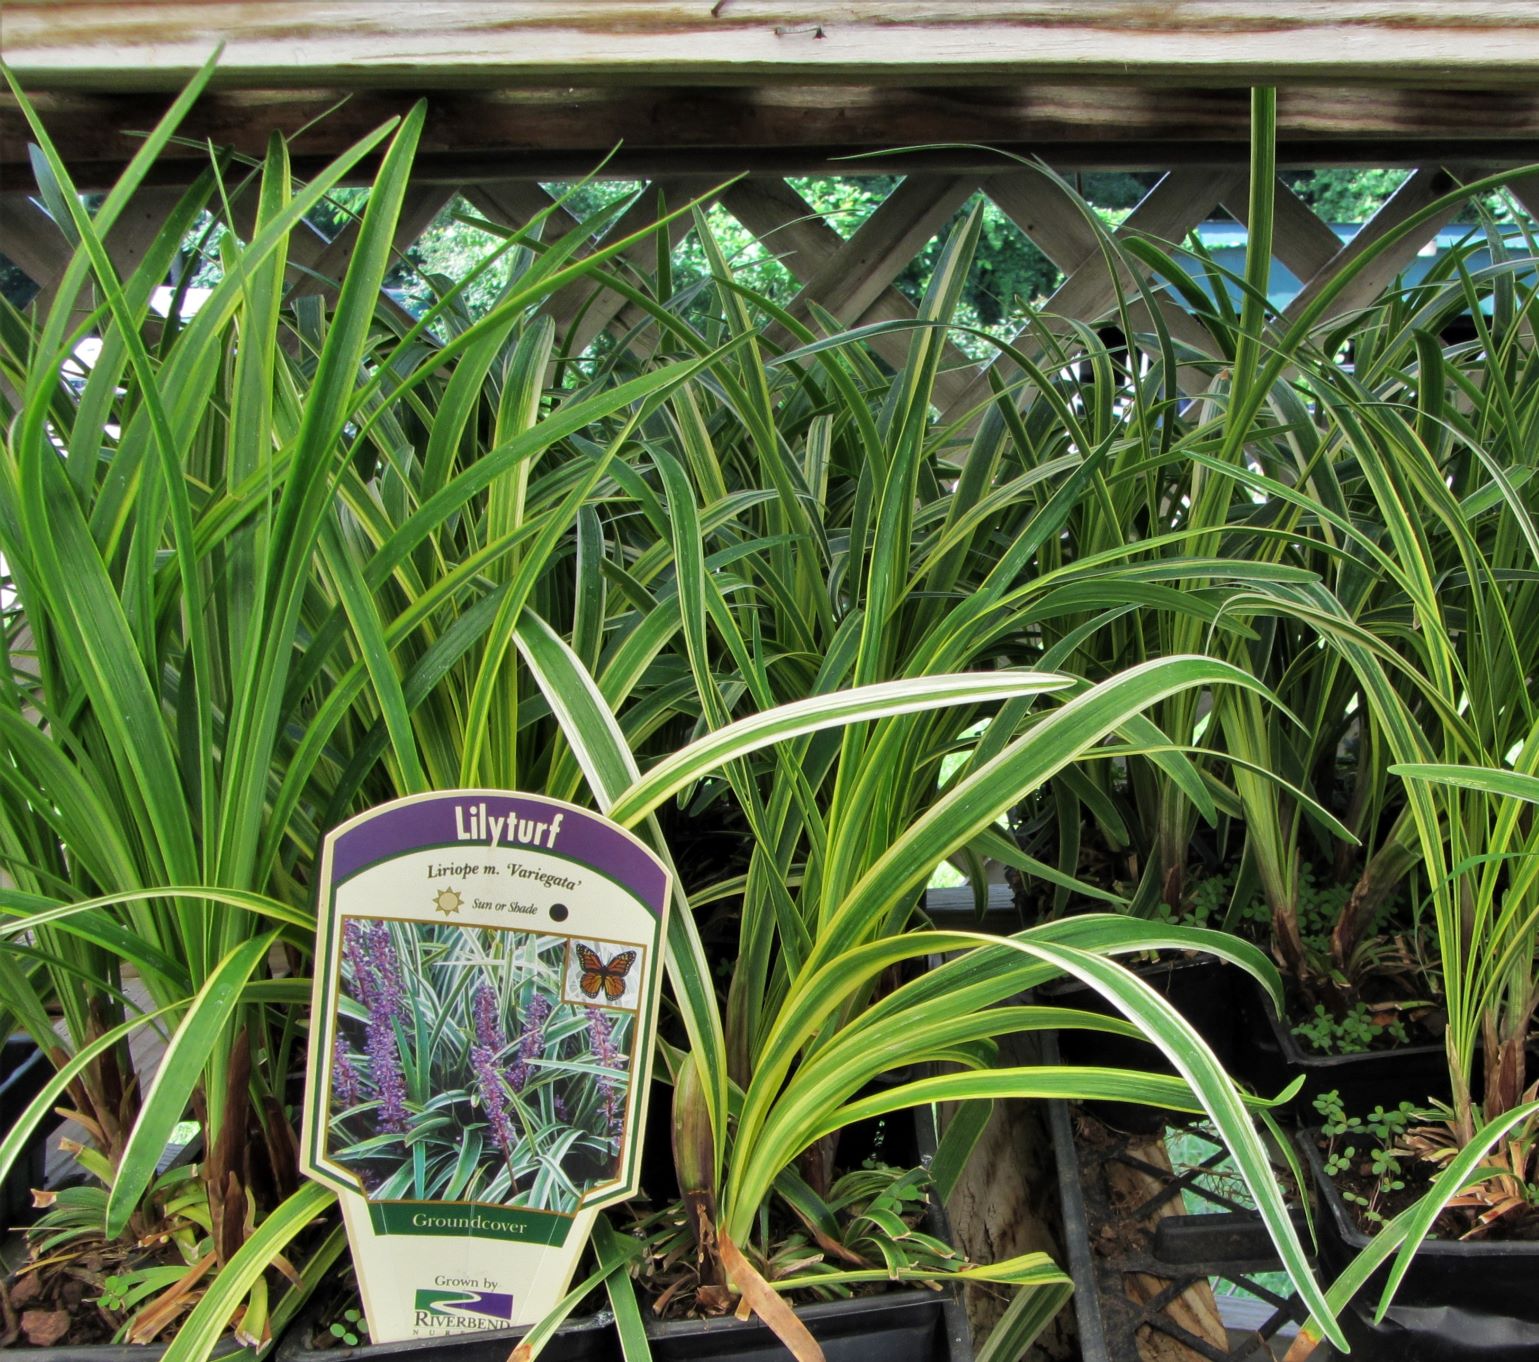
Liriope muscari ‘Variegata’
Liriope muscari/ Lilyturf/Full sun to full shade /native to Asia
Clumps / 12”-24”, taller in the shade / space 12” / Zones 5-10
Evergreen/ Critter resistant/ wildlife value: nesting, summer flowers attract pollinators and seeds feed small animals
Notes: Blooms white, blue or purple in mid-summer, followed by small black fruits. Drought tolerant once established. Not to be confused with Liriope spicata, also from Asia, which spreads aggressively by rhizomes, forms a dense cover, and is considered invasive in some states, including NC.
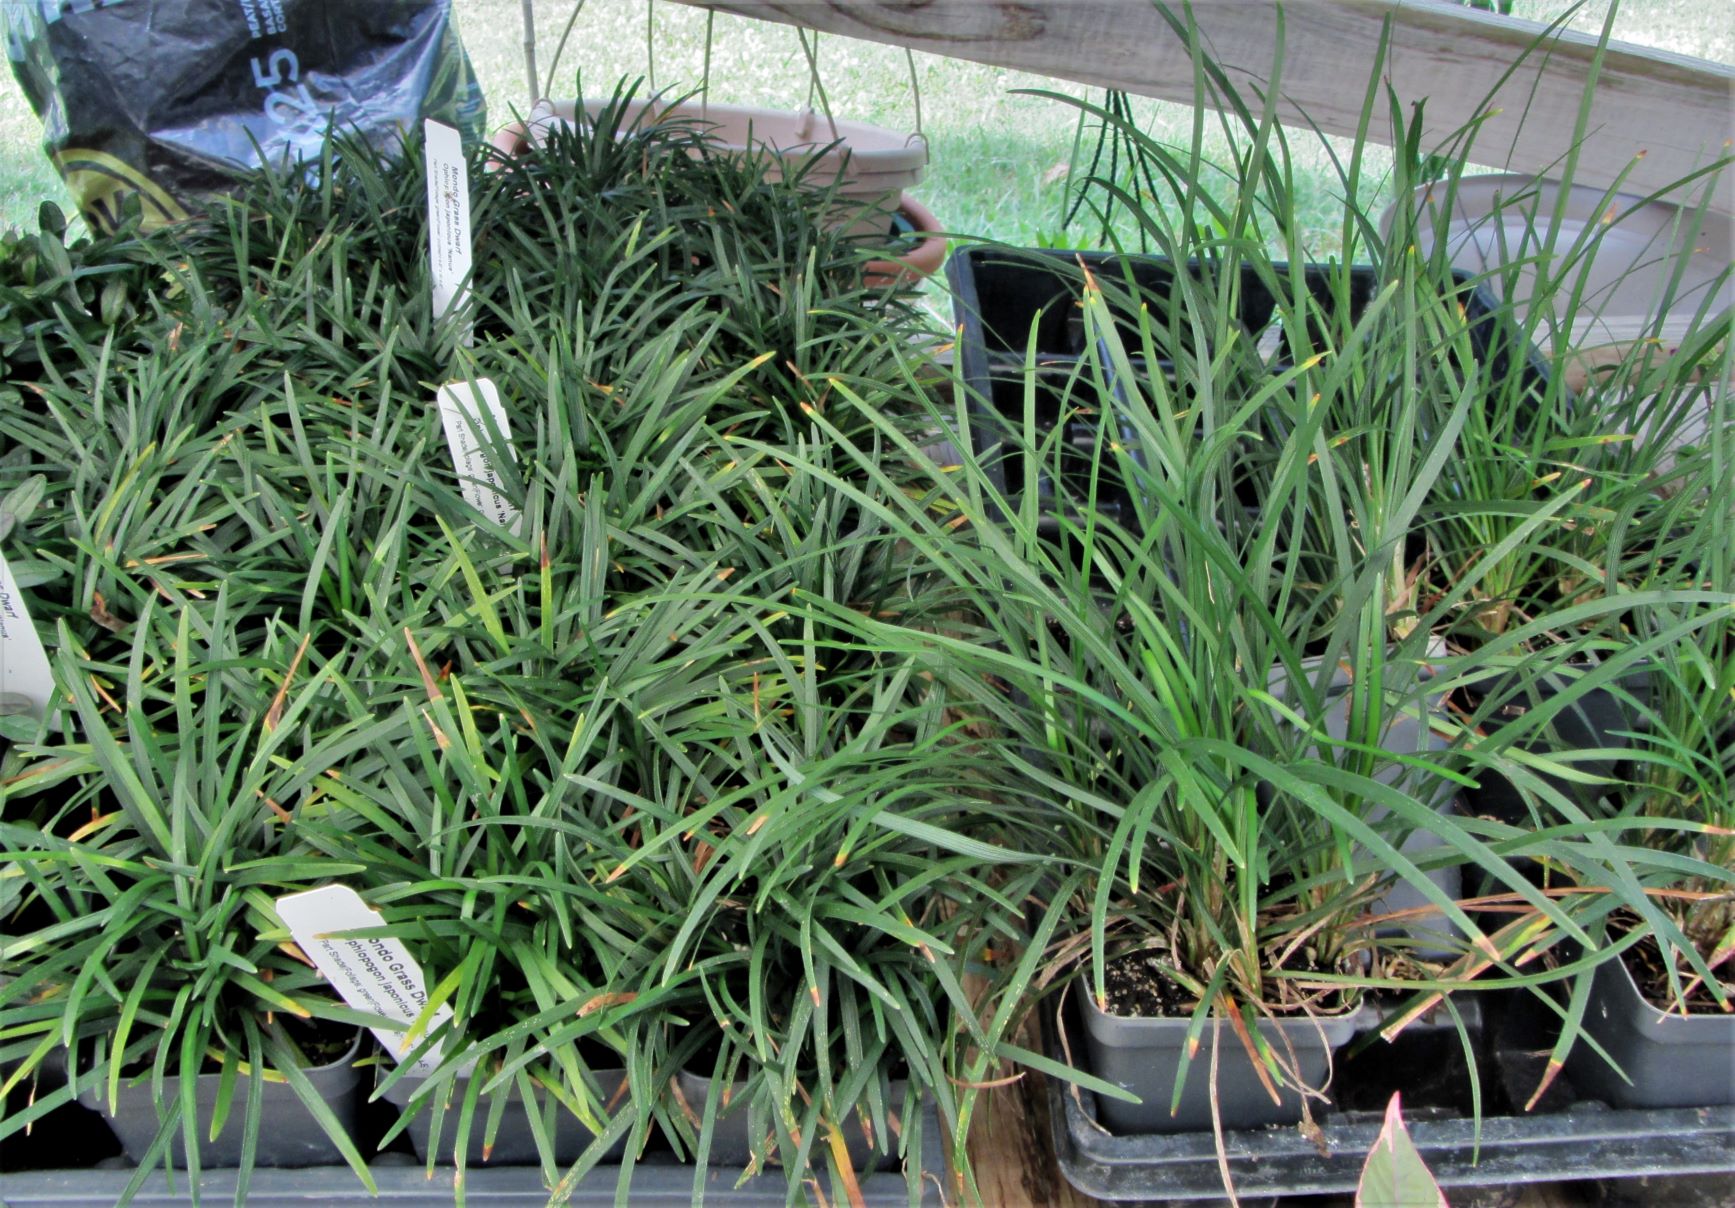
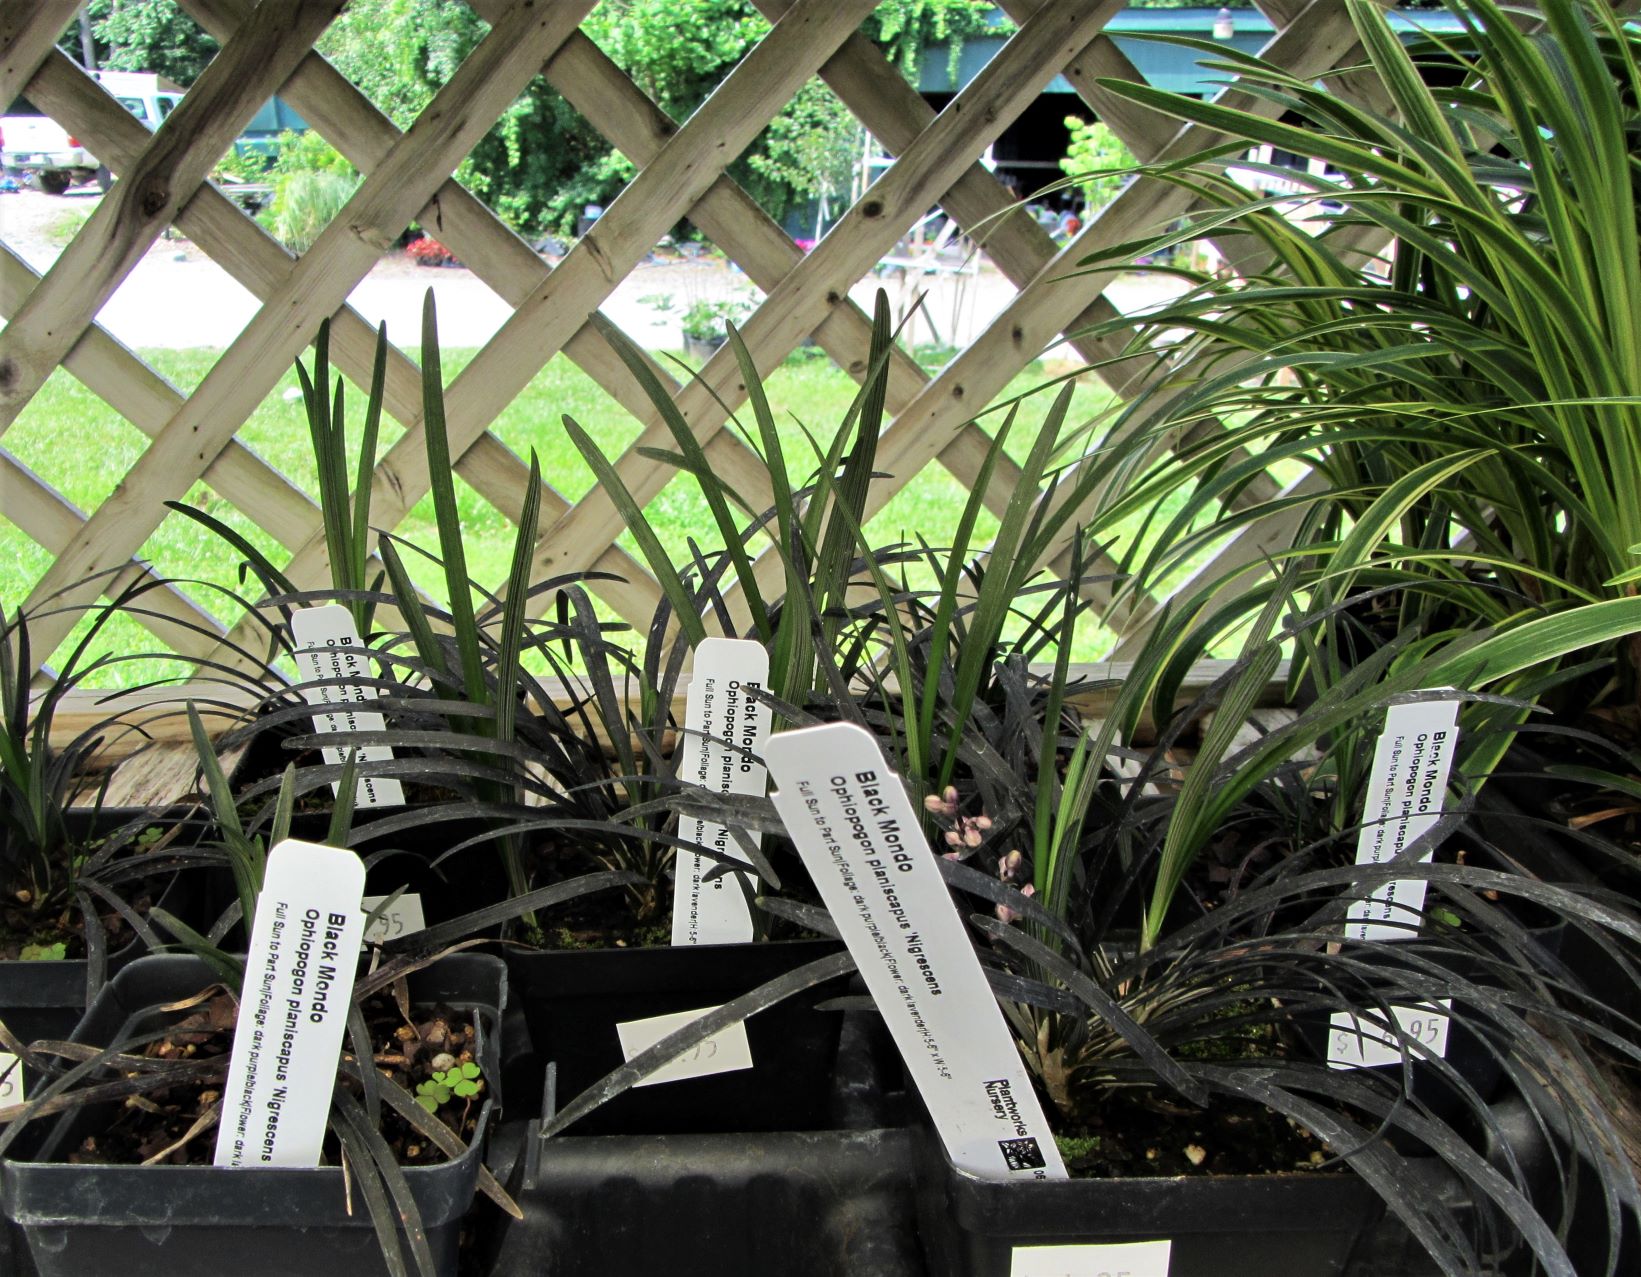
Dwarf and regular Mondo grass
Ophiopogon planiscapus, Ophiopogon japonicus/ Mondo grass/part sun to shade /native to Asia
Clumping / 6”-12” / space 12” / Zones 6-10
Evergreen/ Critter resistant wildlife value: nesting, summer flowers attract pollinators and seeds feed small animals
Notes: Dwarf mondo grass is available. Plants may be grazed by deer and rabbits. Plant in moist acidic to neutral soil rich in organic matter.

Phlox stolonifera, Phlox subulata, Phlox divaricata / Creeping Phlox, Eastern Blue Phlox / Full sun to part shade /Native to Eastern N. America
Dense and spreading/ 4”-12” tall, depending on type / space12”-18” apart / Zones 3-9
Semi-evergreen/ NOT critter resistant/ wildlife value: Spring flowers attract pollinators
Notes: Phlox forms a dense carpet of vegetation and covers itself with bright flowers in the spring. It is drought tolerant once established. It roots at leaf nodes, is easy to divide and propagate. Phlox may attract rabbits, deer and voles in areas where they are common.
Tiarella cordifolia/ Foamflower /Part sun to deep shade /Native to Eastern North America
Spreading perennial/ 5”-12”/ space 12” apart / Zones 3 -8b
Deciduous / Moderately critter resistant/ wildlife value: Spring flowers attract pollinators
Notes: Spreads slowly by underground rhizomes to form dense mats of plants. Not drought tolerant. Grow on moist woodland soil rich with organic material.
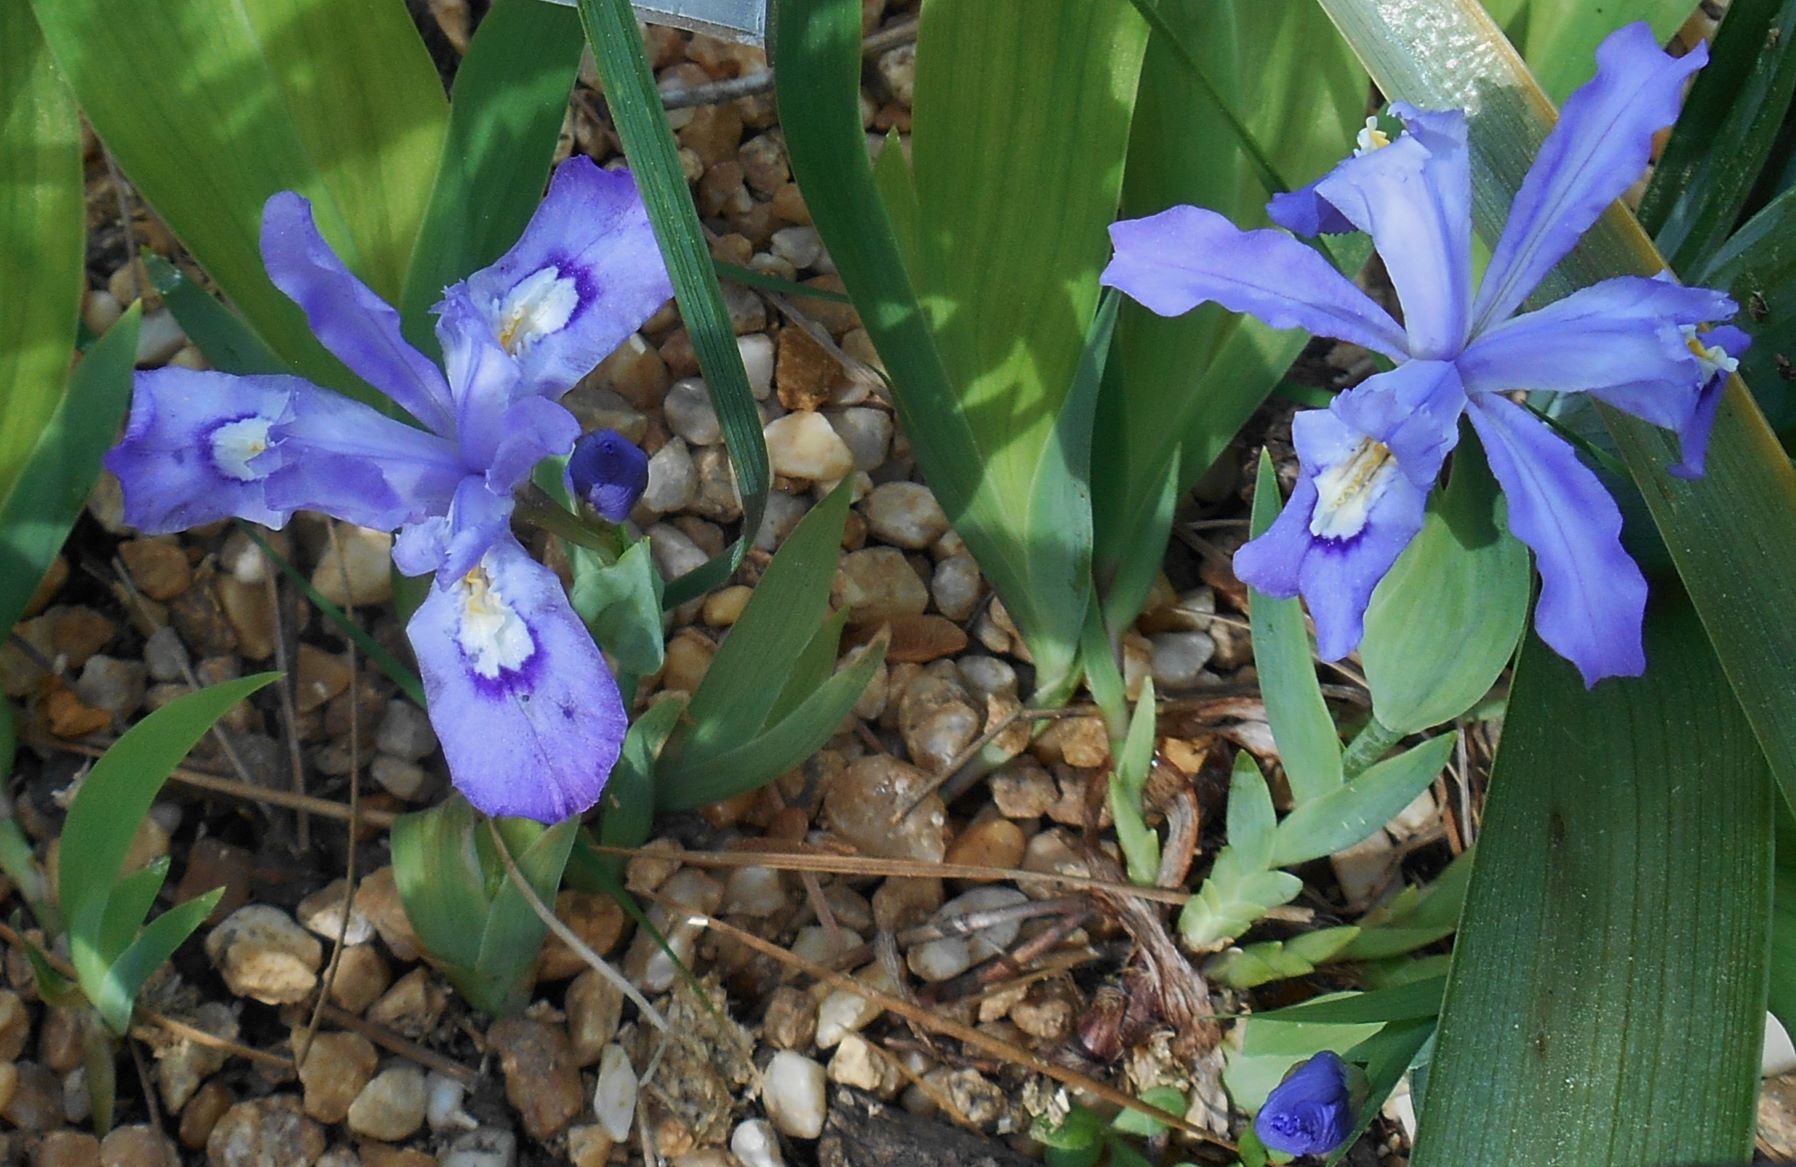
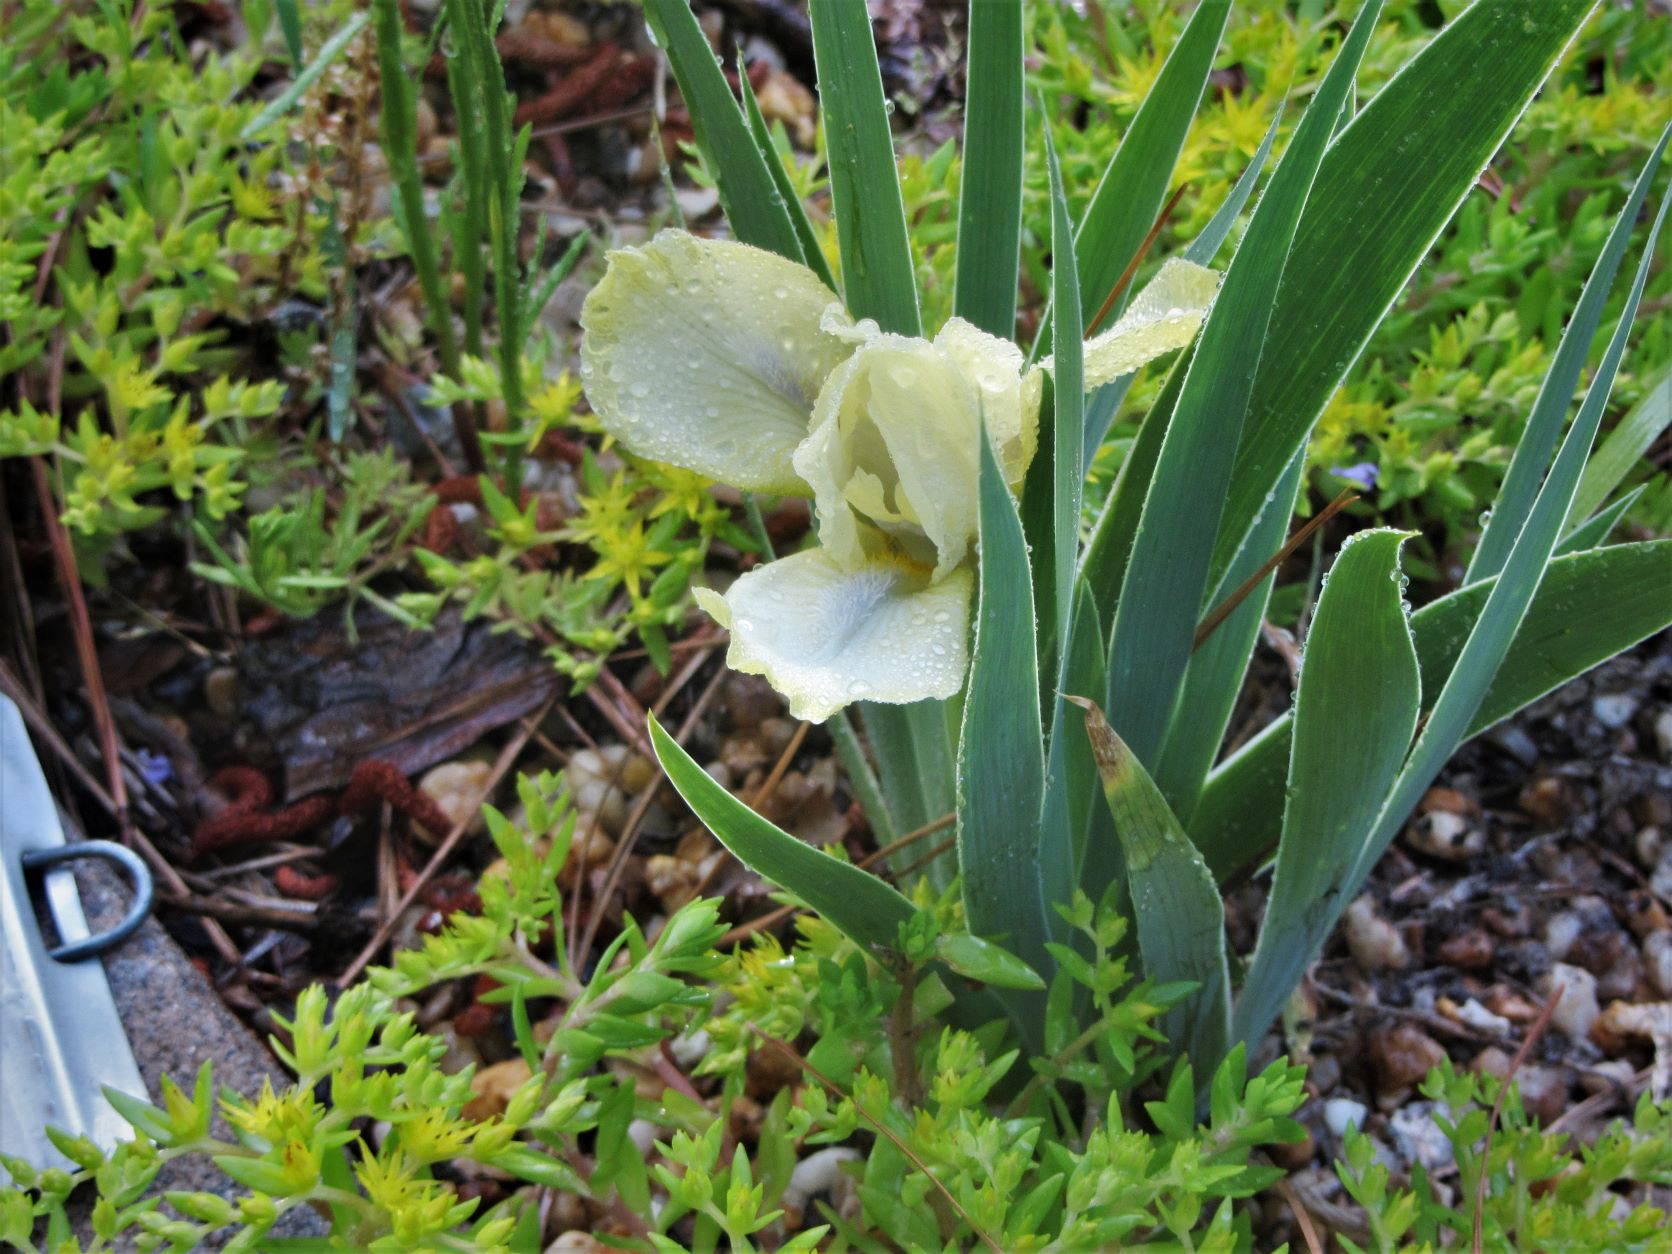
Iris cristata
Iris cristata / Dwarf crested Iris /full sun to shade /native to Eastern North America
Spreading perennial / 6”-9”/ space 12” a[art / Zones 3-9
Deciduous/ Critter resistant/ wildlife value: Spring flowers attract pollinators
Notes: Grown for its beautiful flowers (white, blue, lavender, yellow, depending on variety), Iris cristata spreads by rhizomes to form a dense ground cover in the shade. Prefers consistently moist soil rich in organic matter, it blooms best on a slightly lean soil. Never invasive, this delicate Iris is poisonous to eat, the rhizomes may cause mild contact dermatitis, and grazing animals leave it strictly alone. It has shallow roots and performs well under deciduous trees.
Stonecrop with dwarf Iris
Sedum acre / Stonecrop / full sun to part shade / Native to Europe
Creeping mat / 1”-4” tall / space 12” apart / Zones 3-9
Evergreen/ Critter resistant/ wildlife value: Spring and summer flowers attract pollinators
Notes: This succulent ground cover thrives in thin, sandy, neutral to alkaline soil. May be used in rock gardens and is drought tolerant once established. Propagates easily from broken pieces and may spread to 2’ or more over time. Rabbits may nibble leaves.
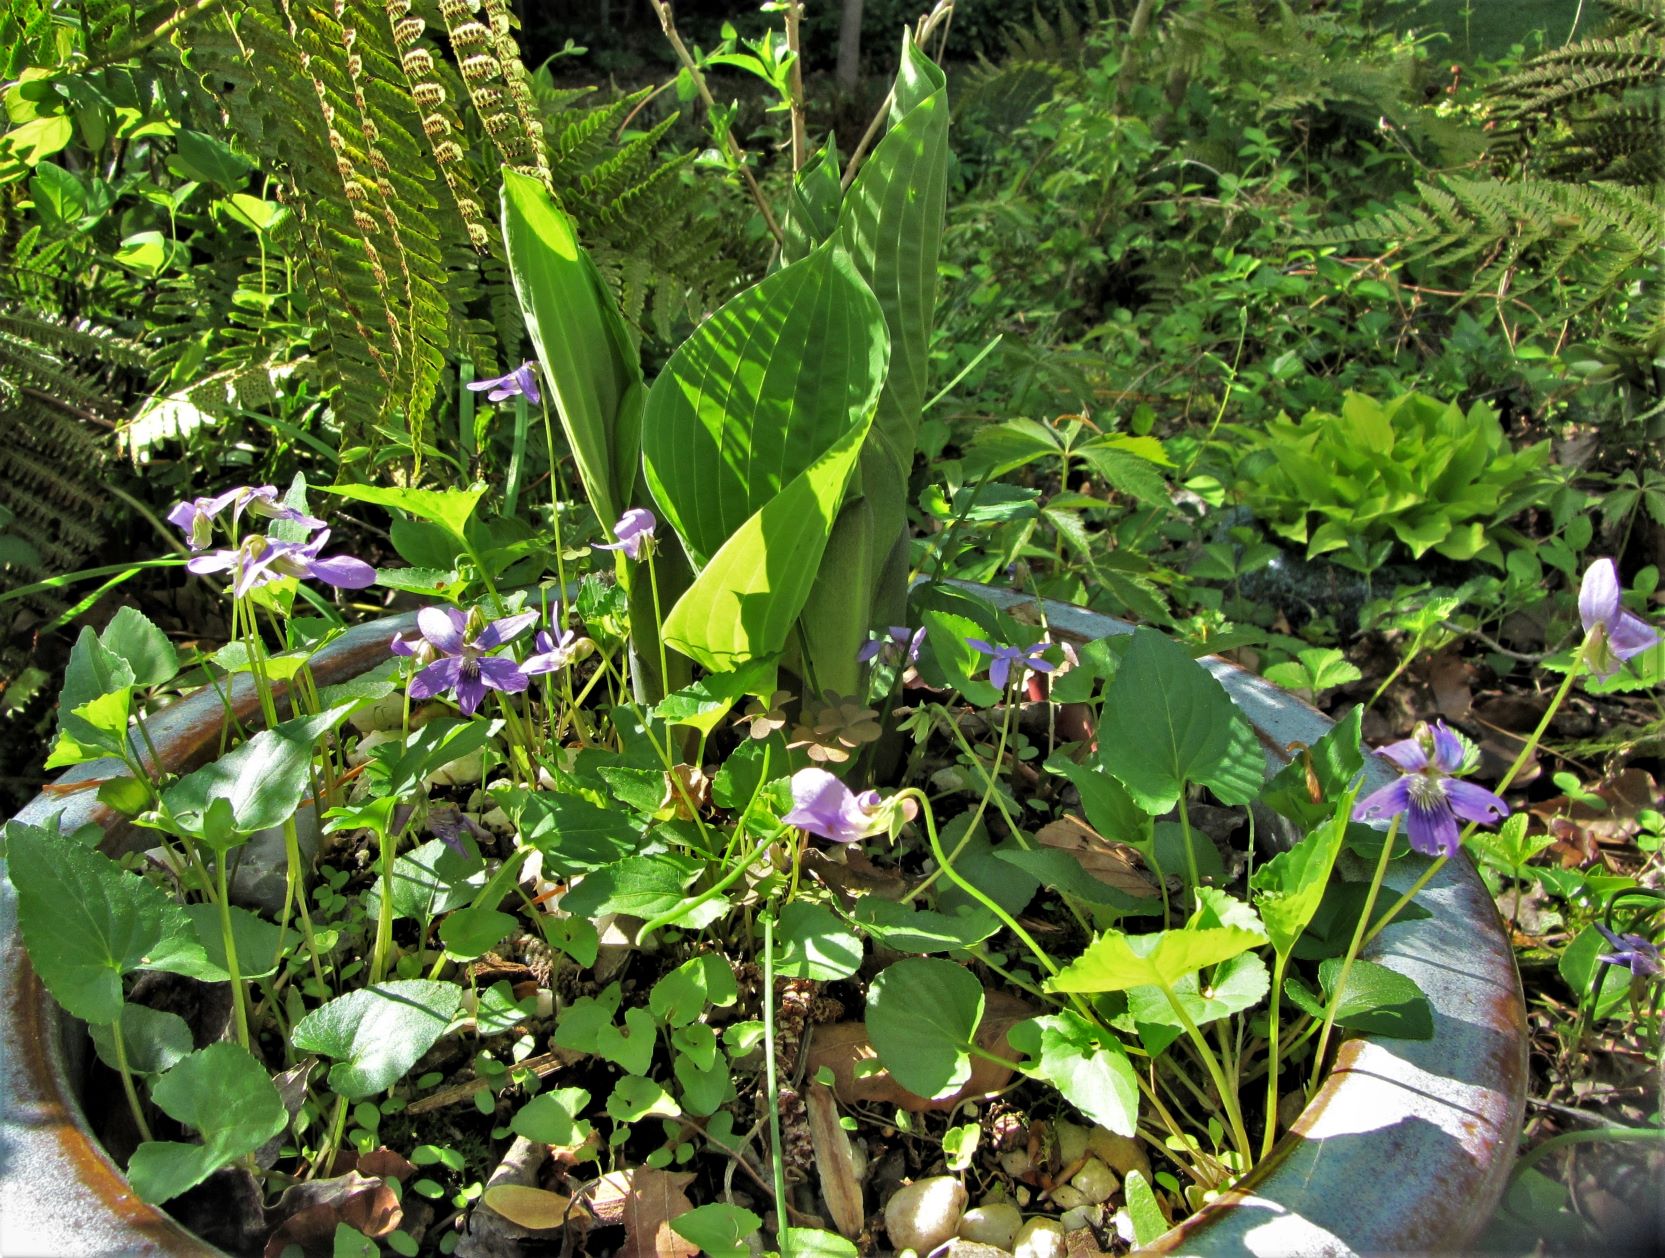
Native violets and Hosta both make good ground covers during most of the year. Deciduous, they both disappear in the winter.
Other ground cover choices not covered here in detail include:
Mosses: find more information, here
Japanese Pachysandra and Allegheny Spurge, Pachysandra procumbens, work in some situations. Both demand shade, and once established can be very hard to remove. They are members of the Boxwood family and can contract Boxwood blight, along with several other plant diseases. There are better choices for our area.
Ferns perform well as ground cover, but most are more than a foot tall. Christmas fern remains evergreen our area, but many other good choices, like Japanese painted ferns are deciduous. Ferns growing in part sun require more water to flourish than do ferns in the shade. Ferns may be the best choice for many situations of deep shade.
Wild Ginger, Asarum canadensis, is a beautiful, low growing native plant. It is deciduous and may be an expensive option to establish.
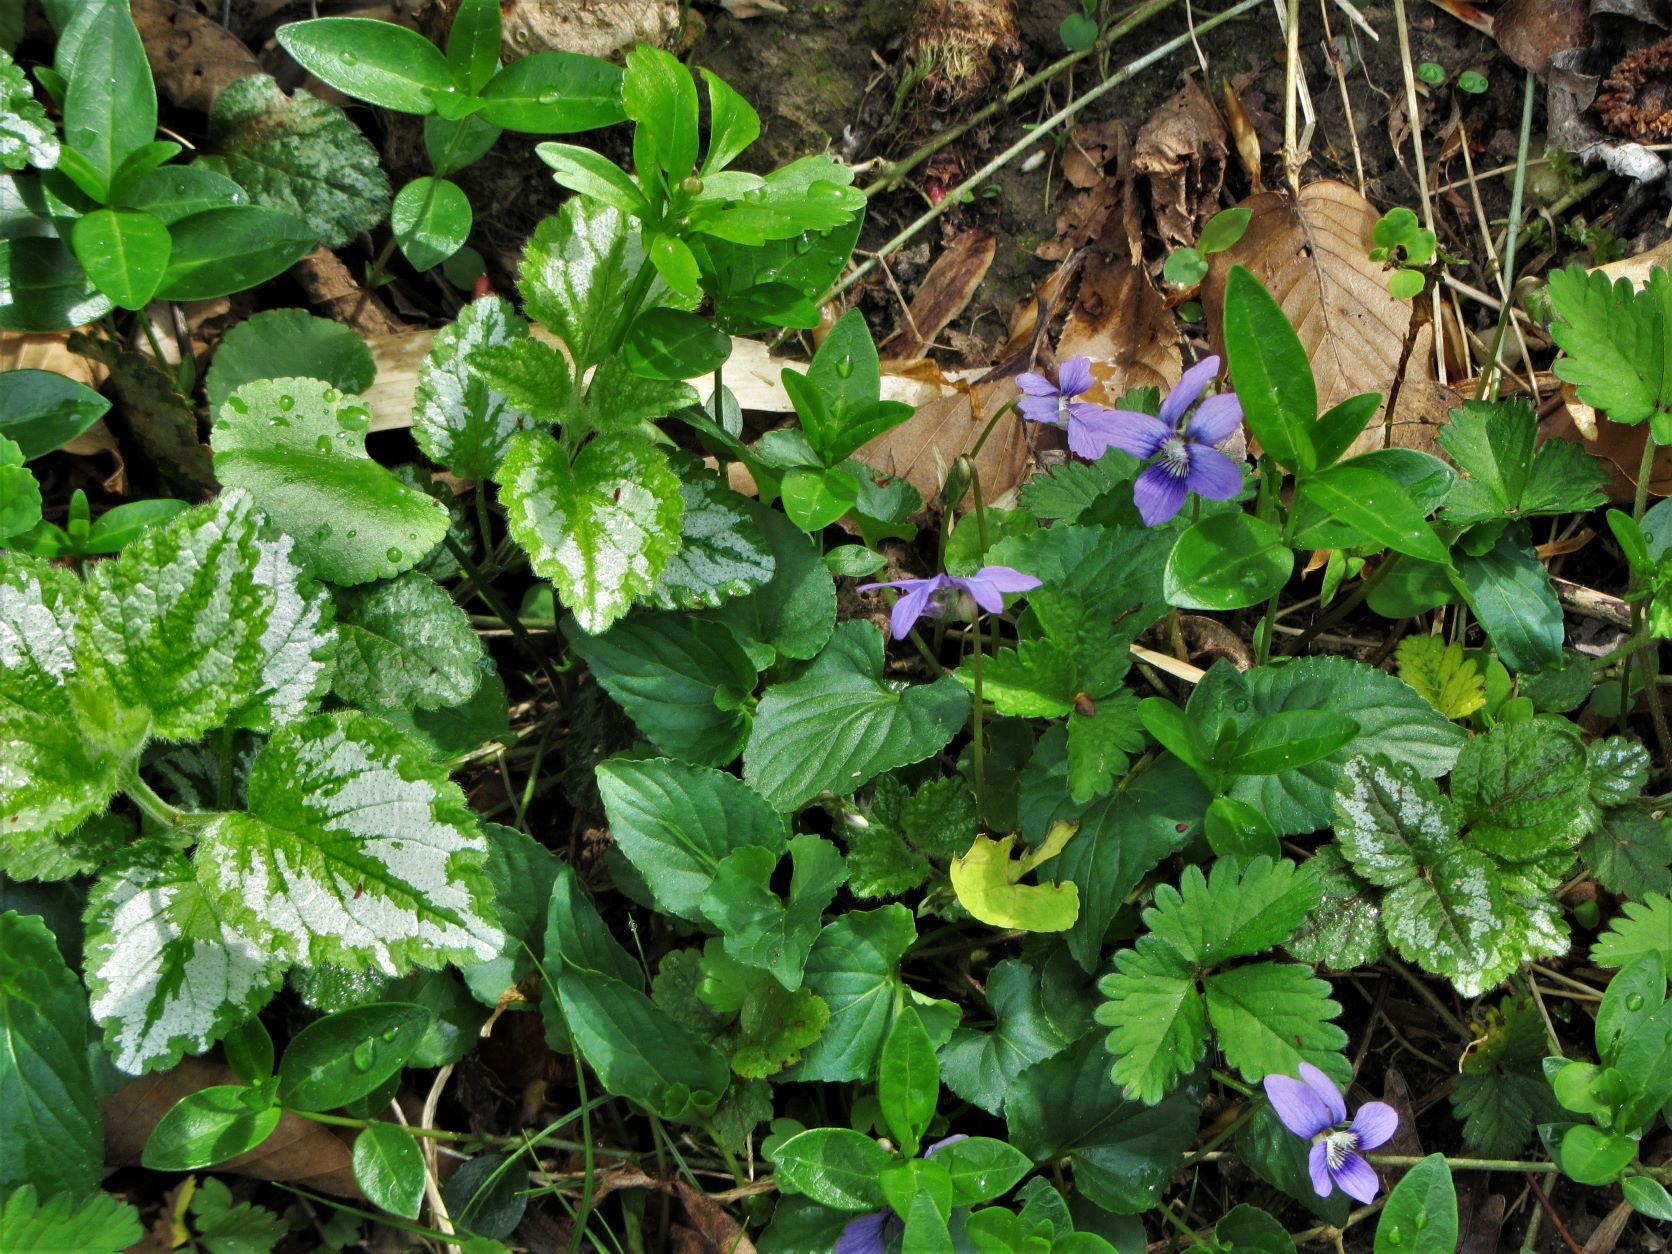
Violets mix with Lamium maculatum, Vinca minor and native strawberries. Lamium, while highly ornamental with variegated leaves, is a member of the mint family and spreads far and wide. It blooms in mid-spring.
Violets Viola sororia, will grow into a dense and attractive ground cover over time. They compete well and bloom each spring. They also serve as a host plant. Since they are deciduous, use them in combination with other choices.
Partridgeberry, Mitchella repens, is evergreen and supports wildlife. It is very small and delicate and thrives in moist, organically rich woodland soil in the shade. It won’t compete well against grasses and weeds.
Top Plant Picks for Summer Color: Flowers (Part 1)
Top Plant Picks for Summer Color: Foliage (Part 2)
All Photos by E. L. McCoy