The Real Magic Is Starting With Seeds
Growing our own plants from seeds opens up a wide horizon of choices never even imagined by those who depend on the big box stores for their starts each spring. There are many varieties of vegetables, herbs, flowers, and trees that have never been marketed in our area as seedlings. Even within a popular type of vegetable, like tomatoes, there are many delicious named cultivars, many of them heirloom, not in commercial production as seedlings.
Malabar spinach, a vining leafy green vegetable, grows well in our area. Trained on a trellis, it takes up very little space, and is both highly nutritious and easy to use. It is available from several seed suppliers. Many of the best beans, varieties of herbs like basil, and ethnic specialties like trombone squash, okra and quinoa are available each spring exclusively as seeds. I’ve spent many winter evenings pouring over the Totally Tomatoes catalog, trying to whittle down the number of selections I planned to grow the following summer. That is tough work, but totally rewarding months later while tasting some new variety for the very first time.
Growing from seed feels a little intimidating for some. It seems like some mysterious alchemy of soil mixes, lighting systems, peat pots, fertilizers and tiny print on seed envelopes that one must master to produce a harvest. Popping a seed into the earth and watching it grow is real, Earth based magic, and likely the oldest. It ties us to hundreds of thousands of years of our ancestors, and to the seasons and cycles of our planet. Yet, it is so pure and simple that blue jays and squirrels do it every fall with peanuts and acorns.
Sown by nature- no planning required.
To make seed starting a bit more accessible, I will touch on a few topics that may prove helpful to beginners, and suggest those wanting more detailed and specific information look to the excellent books published over the past fifty years by Rodale Press and Timber Press on seed starting and vegetable gardening. Many good seed companies, like Pinetree Garden Seeds, offer extensive support information online.
A variety of borrowed spaces can support seedlings for a few weeks, until they can move outside.
Growing Space
Where will your seedlings grow to maturity? This is our starting point. Before ordering and starting seeds, you want to know that you have a defensible space with the proper lighting and room to grow. Why order corn seeds unless you have room for a corn field?
I did that once. I dug my new garden in the loamy rich soil of my back yard, just feet away from the high tide line of the Rappahannock River. I spent weeks piling up the gathered sea weeds that washed up on the beach as mulch on my new garden, and ordered a long list of seeds, including a variety of corn I wanted to try. My garden was about 30’ x 30’ laid out in a pretty pattern of raised beds and paths. And I planted corn and okra along two of the outside edges.
That garden grew so well that I had to commandeer my daughter’s little red wagon to harvest the vegetables each day. I canned and froze what we couldn’t eat fresh and gave away the rest. We grew happiness that year. Until the corn was nearly ripe, our anticipation of fresh ears keen, and we came out one morning to find the stalks stripped and chewed by… raccoons? The critters had discovered the garden. Since it hadn’t been grazed by deer for those long months, which animals wiped out the corn in a single night? It remained a mystery.
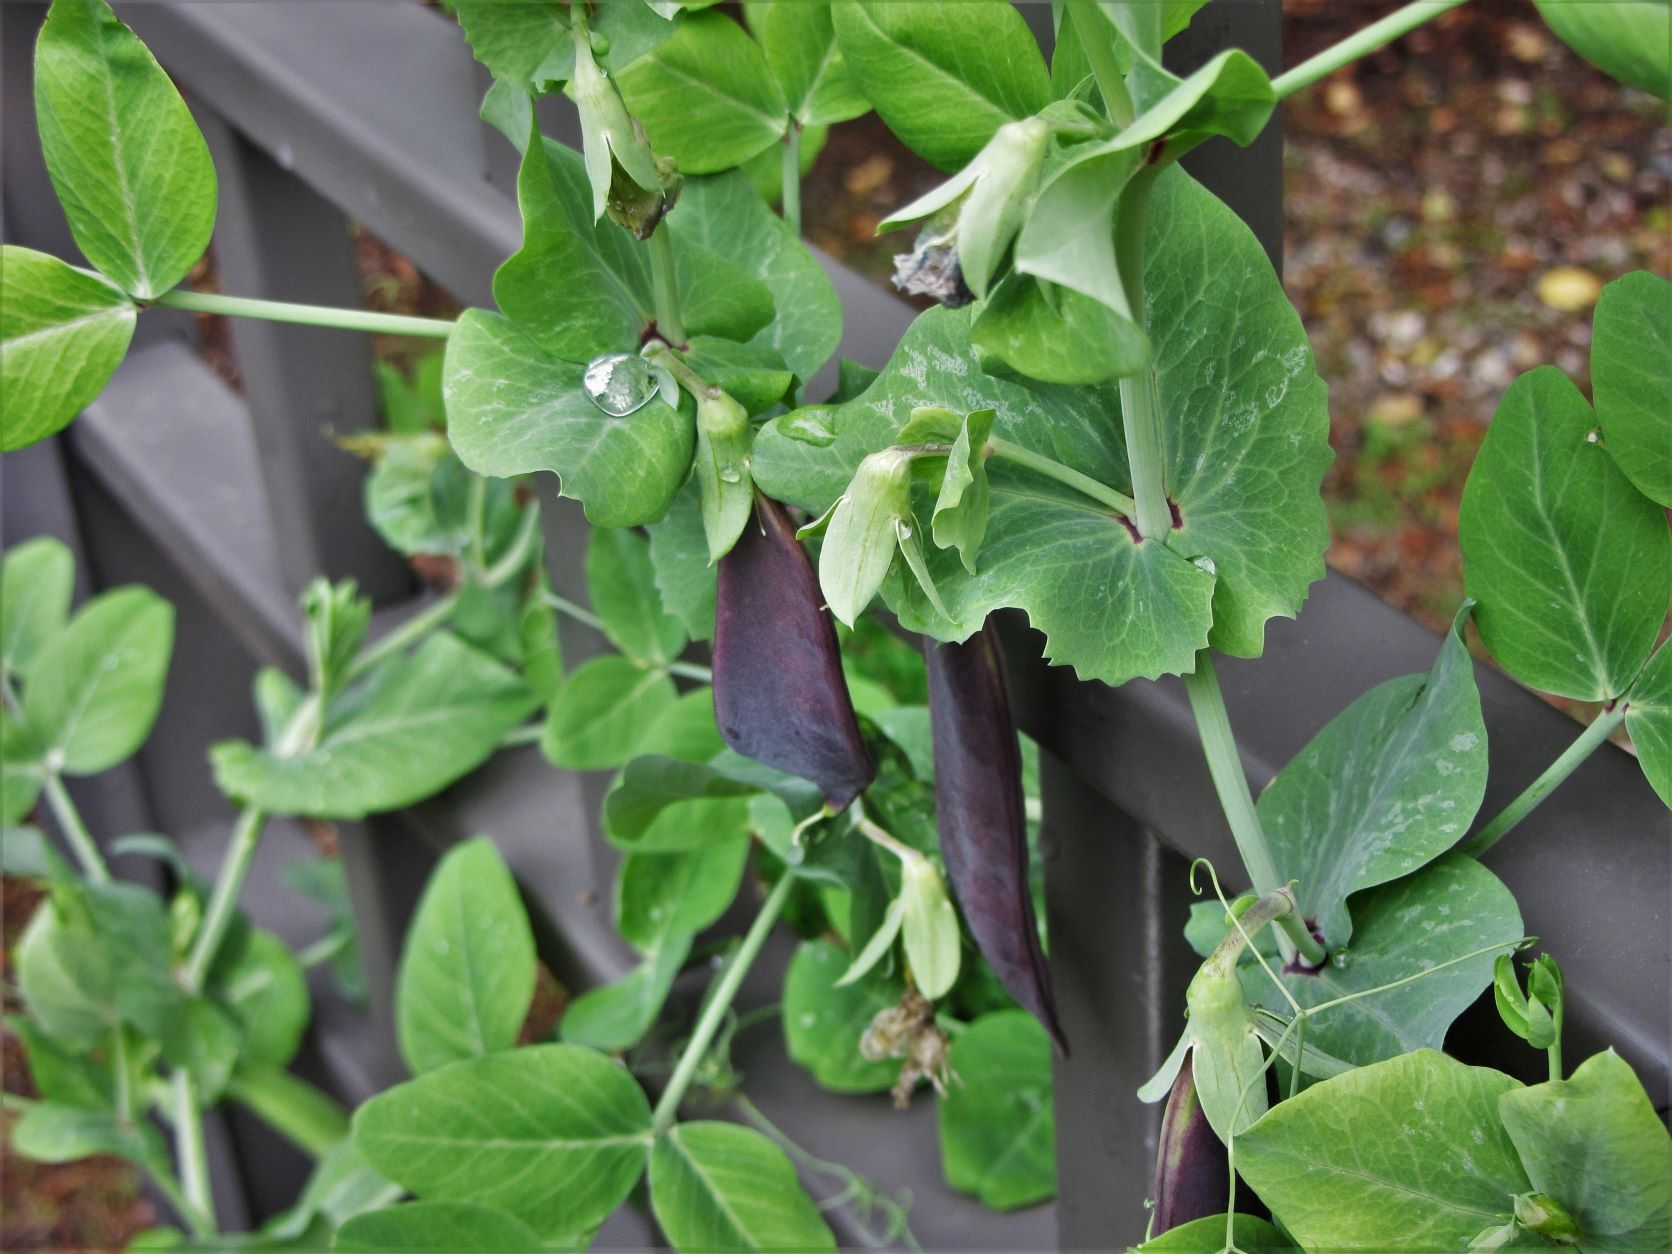
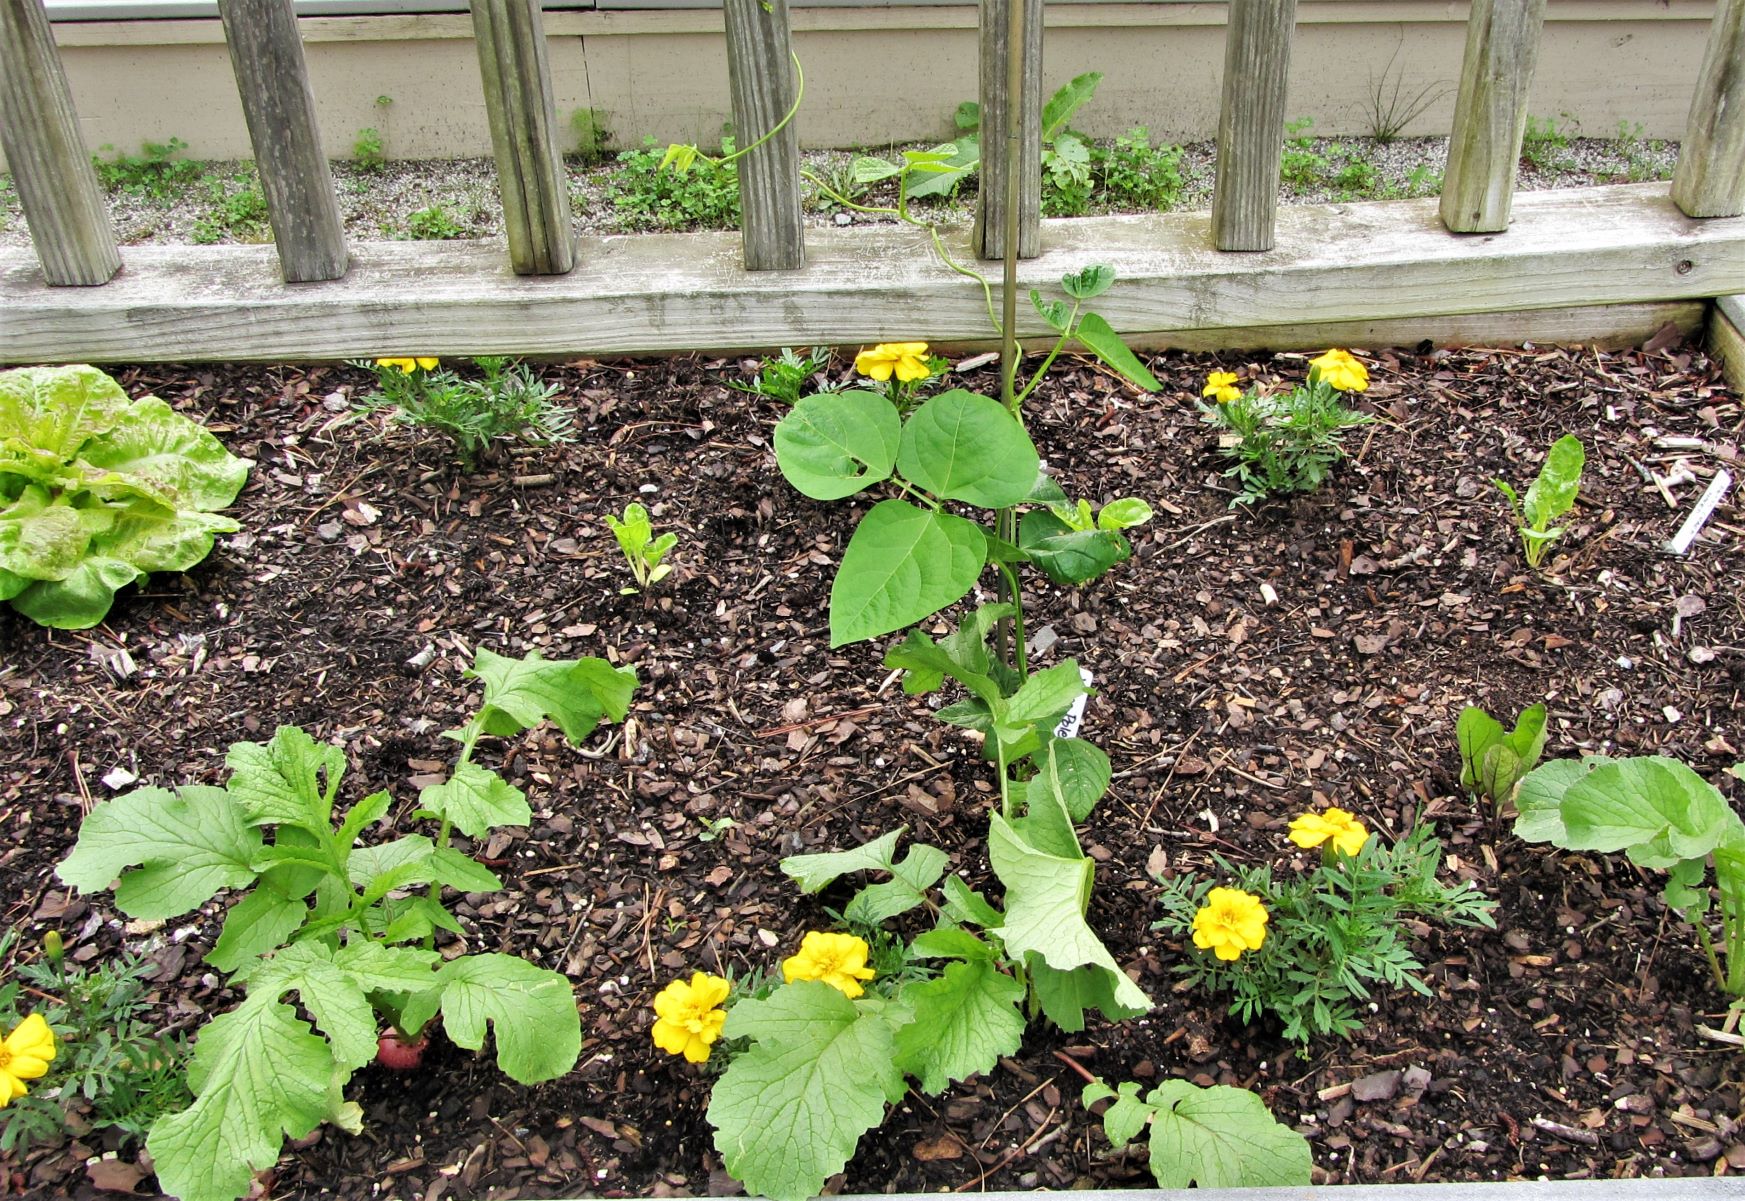
Heirloom blue peas
Most vegetables and many cut flowers need full sun. Full sun means six hours (or more) of sunlight bathing your garden each day during the growing season. Certain plants prefer morning, midday, or afternoon sunlight for best production. Some plants will grow in less, but won’t be as productive. If the open area you have for growing gets less than six hours of sunlight you won’t harvest as much of what you want. You can choose a crop that is productive in less light, like leafy greens, or find a better spot for your garden.
Space matters. A single hill of squash may require 16 square feet, or a square 4’ x 4’ growing area. If you can’t dedicate that much space to three or four squash plants, maybe you can grow a variety on a trellis, or choose a compact variety that grows in less space. You can grow a squash plant in a large plastic container on a porch or deck, but you won’t get the same production as a hill of squash in the ground.
Finally, it doesn’t matter how carefully you grow your seeds if deer or squirrels harvest your crop. Both are a real concern in our neighborhood, and throughout the Williamsburg area. You would almost need to build a huge wire cage, with a door and a roof, to contain a vegetable garden in our yard. I’ve watched squirrels steal cherry tomatoes from hanging baskets on my deck. Only grow what you can defend from the critters in your yard.
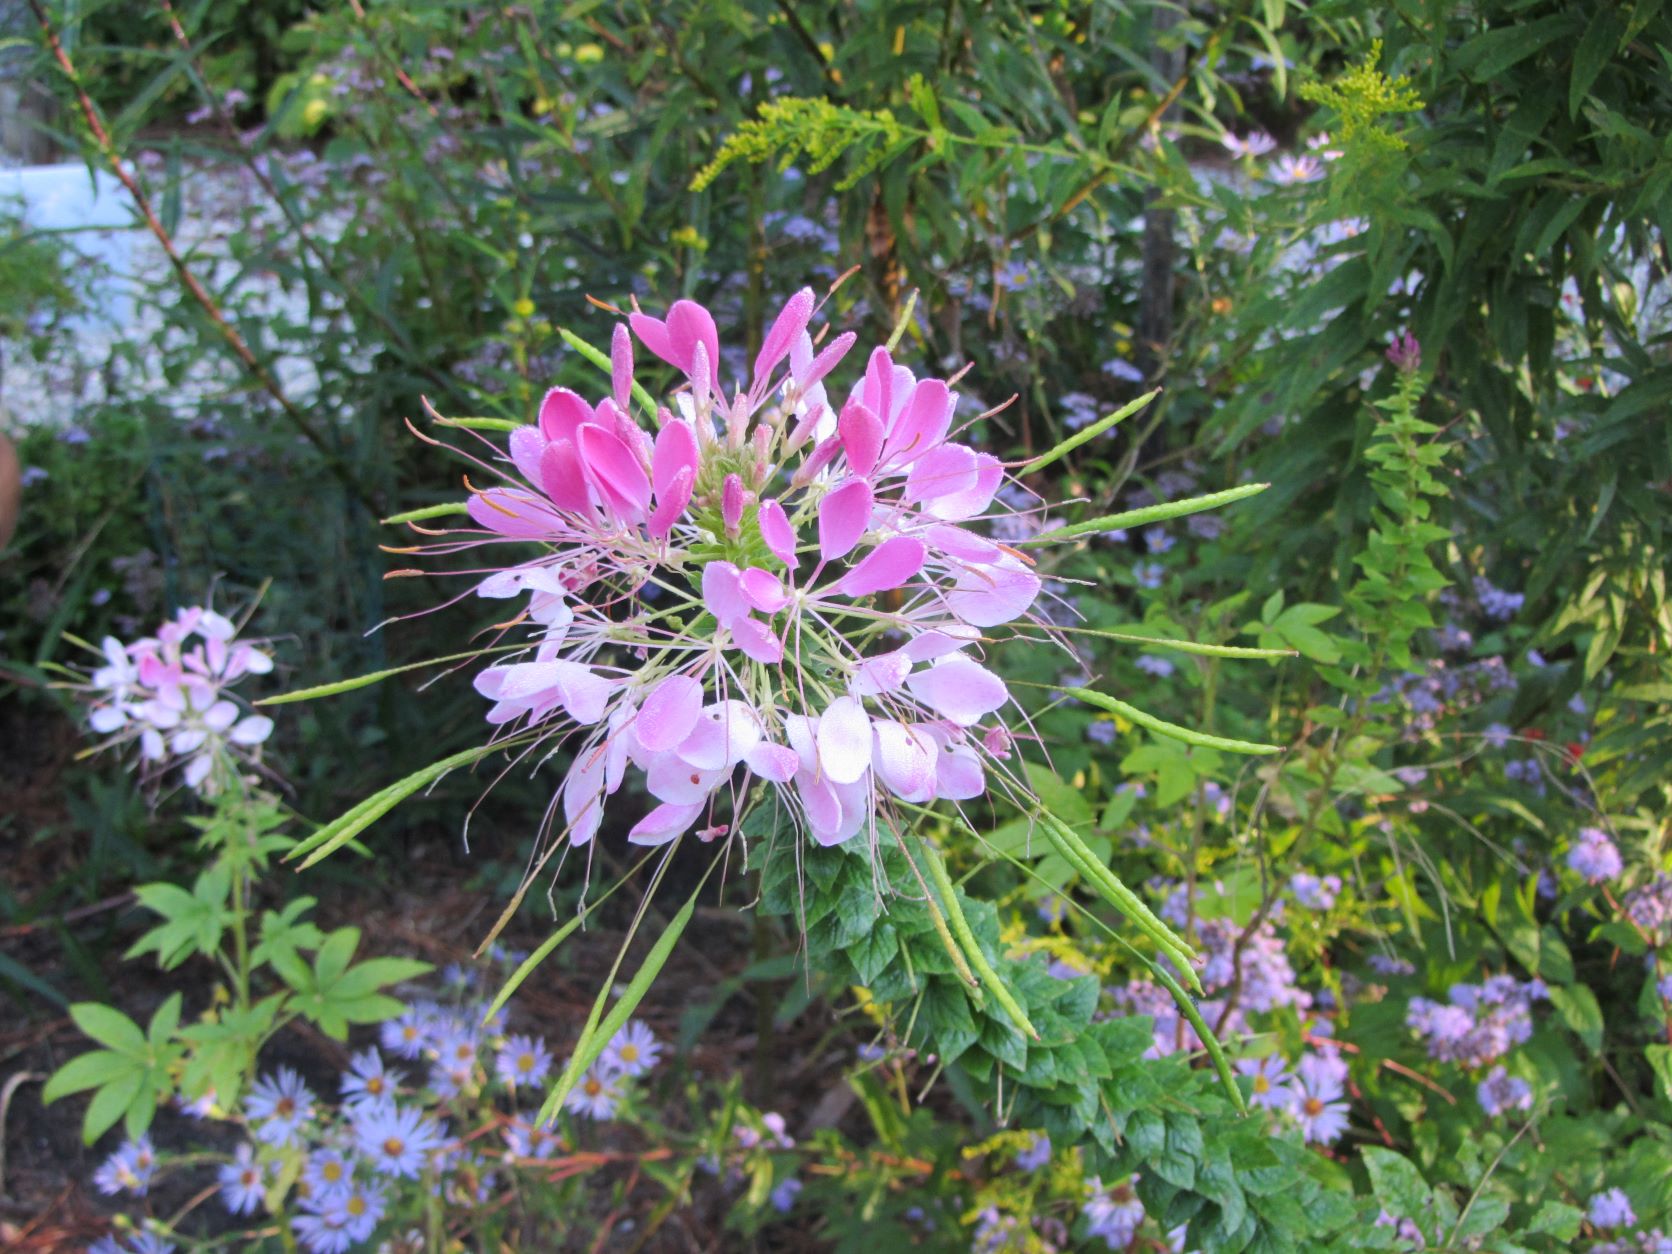
Flowers like Cleome grow quickly and easily from seed, and seeds dropped this year will likely grow next spring.
Seed Choice and Productivity
Crops can grow outside nearly year-round in coastal Virginia. We may get four or five crops from the same space each year with careful planning, using a combination of cool season crops with our main summer plantings, inter-cropping, companion planting, and by using vertical space creatively. Think of it like working a grand jigsaw puzzle.
Many leafy greens grow best in cool weather and some taste much better after a frost. Some crops, like lettuce, will bolt and go to seed once the weather gets too hot in summer. Planting each crop at the right time makes all the difference in productivity and success
Look at the vegetables that you are most likely to use, consider your space and how much time you want to invest, and come up with a plan that works for you. Seed catalogs and websites offer a wealth of information about each type of crop and how to grow it well. Use these resources to plan. Start small, enjoy some success, and then grow your garden with confidence and joy.
Once you begin to shop for seeds, you’ll discover heirloom varieties, specialized varieties bred to produce in small spaces, unusual colors of vegetable, super nutritious varieties, vegetables that resist common diseases or insect pests, and maybe even some vegetables you’ve never even tasted or seen before. You may prefer ‘organic’ or non-GMO seeds. Any new seeds, or specialized seeds in short supply, will carry a premium cost. Every spring is a fresh chance to grow and learn about something new.
Timing
When do you start each type of seed, and where? This is the next important decision that will determine your success. It pays to learn as much as possible about how each plant germinates and grows. Does it need cold stratification before it will germinate? If so, you need to plant the seeds in fall or winter and keep them outdoors for at least eight weeks. Does the seed germinate only when it is cozy warm? Then it may require bottom heat if you are starting it inside in early spring.
Some seeds, particular large seeds and seeds from trees, require a good soak in warm water before they germinate. Soaking pea and bean seeds overnight before planting them speeds along germination by as much as a week. Legumes grow better after they are inoculated with microbes which help them absorb nutrients and fix nitrogen on their roots.
The five things you need to know to decide when to start your seeds:
- What conditions does the seed need to germinate?
- How long does the seed need to germinate?
- How long does it grow before transplanting?
- When can it live outdoors?
- How long is needed for the crop to mature?
Once you determine these key facts, get a calendar and count backwards from when the plant can live outdoors. For example, count on moving a young tomato plant outside by mid-May. You probably want the seedlings to germinate in early April, which means planting their seeds by mid-March. Yes, you’ll see tomato plants shivering on stands outside of big box stores in mid March. Knowing that cold stunts their growth, and that they need the warmth of early summer to grow well, why would you buy a tomato plant in March, unless you own a greenhouse?
Some people plant squash or cucumber seeds directly in the ground weeks before it is warm enough for the plants to grow well. This works only if you warm the soil and protect the young plants from late frosts and cold nights.
Traditional cultures use phenology to decide when to plant. I learned early, “Plant corn when oak leaves are the size of a mouse ear.” By watching for signs of spring in other plants and animals, like when certain birds return from their winter migration, it is possible to decide when to plant a certain crop. Every year is a bit different.
Long season crops that take many weeks to maturity, like melons and pumpkins, needed the earliest start you can give them to have enough time to ripen in late summer. Start the seeds too late, and you may lose the harvest to late season storms or early frosts. Most of us want to start tomatoes and beans as early as possible to have a long season of productivity.
Containers
How did man grow seeds before the invention of plastic? Our commercial nursery industry produces an alarming amount of plastic waste each year. If your only reason for starting plants from seeds is to avoid buying more plastic containers, it would be enough.
An ancient, but still useful technique wraps seeds in balls of clay to form seed balls or ‘seed bombs.’ The clay is allowed to dry out, and then the seed balls are left where the seeds will take root and grow. This is a favorite technique of ‘guerilla gardeners‘ as well as foresters, who can drop the dried seed balls from a plane or helicopter to help re-plant areas of forest. The dried clay protects seeds from critters and erosion until the time is right for them to germinate, and helps the seeds get a good start without a prepared seed bed.
We can recycle a lot of plastic waste by re-using containers for seed starting. A favorite is the milk jug because it is easy to convert to a mini greenhouse. Clean an empty gallon milk or water jug, then nearly cut off the top several inches, just below where the handle is attached. Leave a 2-3” strip intact as a ‘hinge’ for the lid. Poke several holes in the bottom of the jug if you plan to move the jug around. Remove the bottom entirely if you plan to plant seeds in the garden where they will grow, and will only use the jug temporarily as a cloche.

Glass cloches are still used in Colonial Williamsburg gardens. December, 2017
Glass cloches helped many gardeners get a head start on the season before the invention of plastics. Floating row covers, temporary plastic covered tunnels of all sizes, and other gizmos do the same thing today to protect tender plants before the season settles in April or May.
To use the milk jug for starting seeds that you will transplant later, poke 5 small holes in the bottom (about the size of a large nail) and then fill it about 4” deep with seed starting mix. I lay a white paper towel underneath the soil to evenly wick moisture across the entire container. Plant your seeds on top of the mix and then dust more mix over the seeds to the depth recommended on the seed packet. Mist or water the seeds lightly, so the mix is just moist but not wet. Seal up the jug with duct tape and put it where the seeds will germinate, either indoors or outdoors.
This method is commonly used for seeds that need a cold stratification before they germinate, like native perennials and trees. The jug can sit outside in a protected spot all winter and the seeds will begin to grow at the right time. You can also use it for vegetable or flower seeds that don’t require cold stratification by simply keeping the jug in a warm spot while the seeds germinate. The plants can grow in the jug, protected from frost and cold wind, until they begin to outgrow the space. Remove the top of the jug as needed for ventilation during the day, replacing the top on cold nights.
When it is time to transplant the seedlings you can lift them out with a spoon or trowel, or cut the jug away to gently untangle the plants from one another for transplanting.
Soil blocks, peat pots, cardboard milk cartons, newspaper pots, and other recycled plastic nursery pots or containers offer a confusing range of choices for beginners. You may even see the idea to start seeds in cleaned eggshells. Don’t. On the other hand, every seed vendor is ready to sell you expensive propagation trays, many with ‘greenhouse covers.’
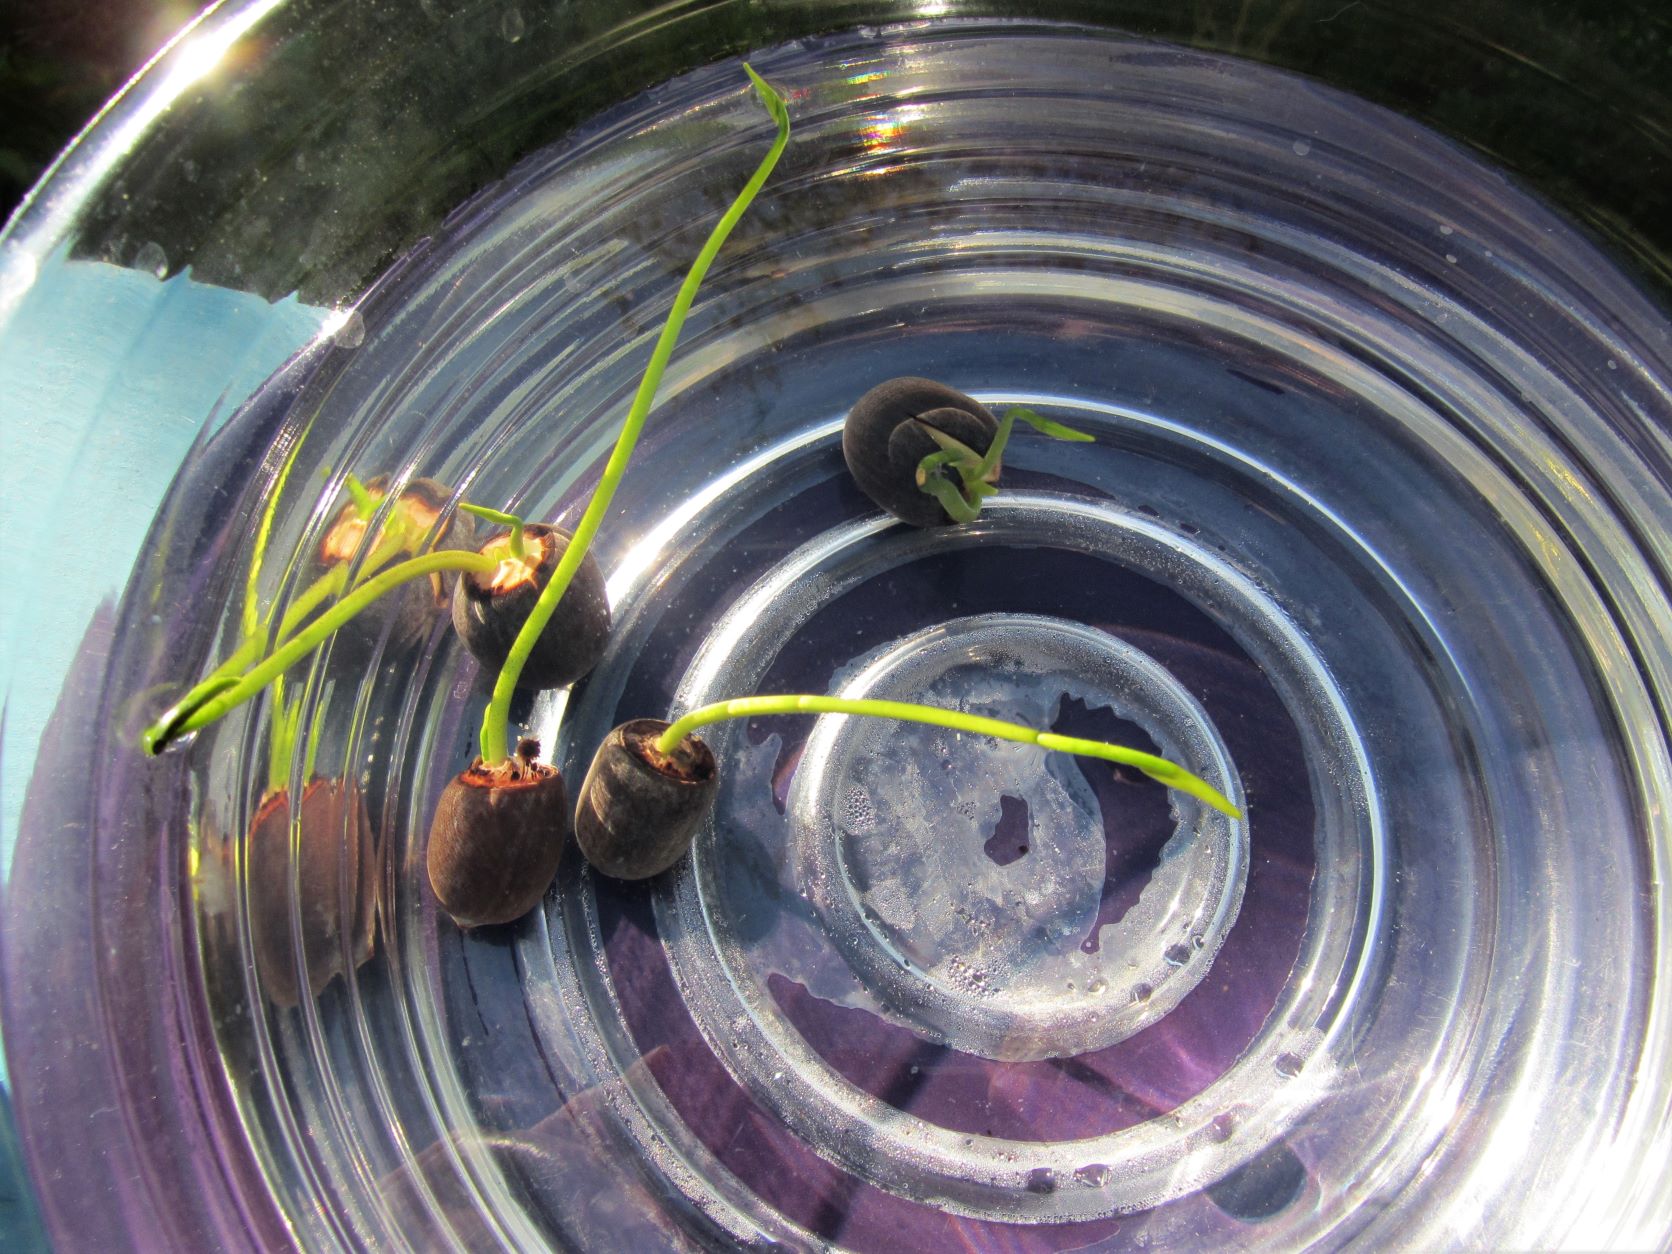
Lotus seeds germinate in water.
Choose a seed starting container based on the needs of the seed. Roots usually grow more quickly than the stem and first leaves of the plant, so providing a deep container produces the best roots. And it is important to transplant those tender seedlings with a minimum of damage to the fragile stem and tiny roots. It is better to handle a seedling by a seed leaf during transplanting than to grasp its stem because harming the stem generally kills the plant.
Peat pots protect seedlings because you plant them, knowing that the roots will grow through them as they decompose. But they also dry out more quickly than plastic containers, so they need daily attention as the seedlings grow. This is the same problem I’ve had with seed blocks or pots made from newsprint. Newer seedling pots made from coir, and other organic materials, come to the market from time to time. Some advertise ‘air pruning’ technology for roots to keep the root balls compact. None of these products are inexpensive.
I like to start seeds (and spores) in reusable plastic ‘shoe boxes’. You can find them at any discount store, with lids. Poke some holes for drainage, and then use the lid as a ‘saucer’ under the box. I often cover the box, as spores or seeds are germinating, with clear cling-wrap secured with a large rubber band.
These containers are large enough to space the seeds out and deep enough for good root growth. It is easy to dig the plants out to move them up to larger containers or plant them outside. You can also pack peat pots into a plastic box, fill them with mix, sow and water them, and cover the box to keep everything moist until the seeds germinate and begin to grow. It is easy to manage the peat pots in a plastic box and keep them hydrated until transplanting time.
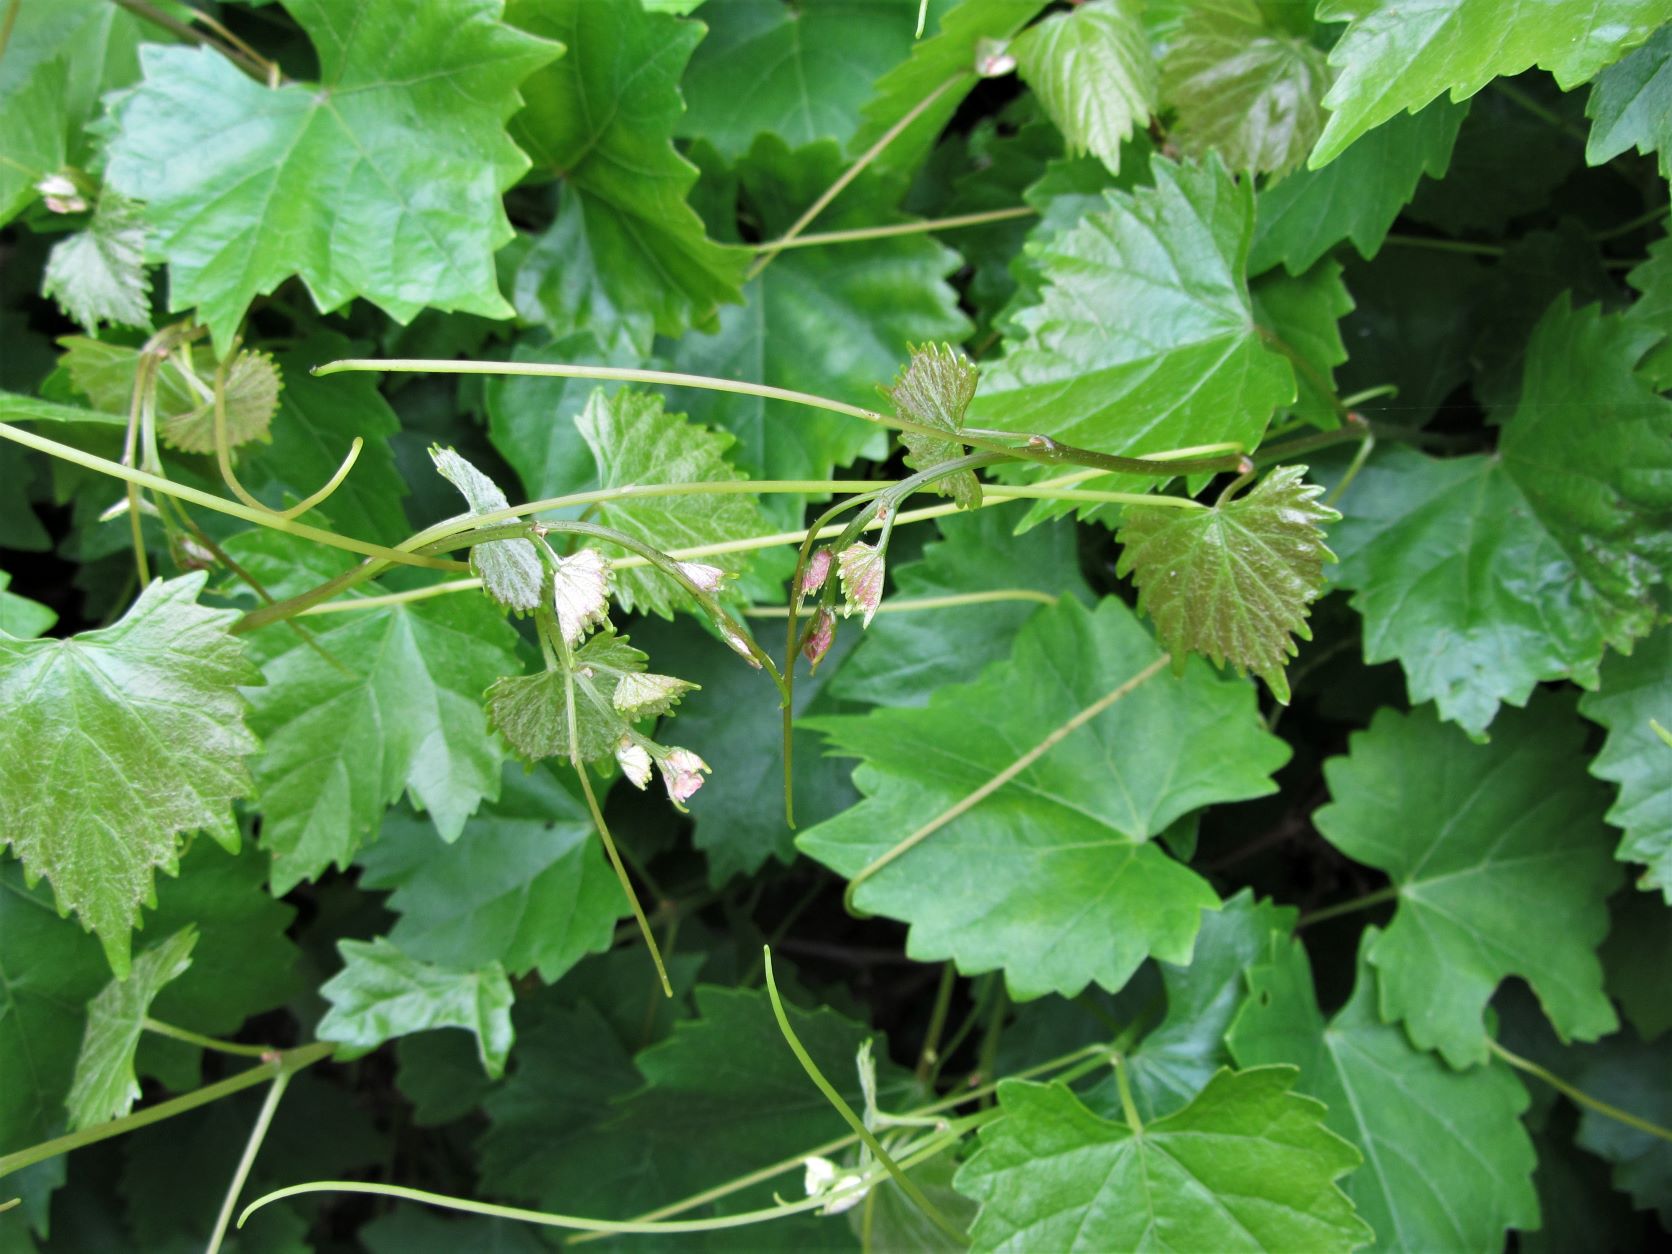
Seeds saved from muscadine grapes grow easily into productive vines.
Soil Mixes
Many people just use good potting soil for starting most seeds. It is the easiest choice for beginners. Screened or commercial leaf based compost can work, and you’ll find bags of ‘seed starting mix’ in late winter stacked beside the seed display.
The main considerations include the texture, Ph and fertility of the mix. The mix can vary based on the type of seed you are growing. Any mix needs to be light enough allow for initial root growth, but water retentive enough to stay evenly moist. There should be some nutrition available to support the plant once it grows beyond its seed leaves. A neutral Ph is helpful for most seedlings.
Alternative Technologies
It is possible to grow crops from seed to harvest indoors hydroponically, in a liquid nutrient blend under lights. Every variable of temperature, light, ventilation, and hydration is controlled where insect pests can be excluded or managed. Most anything from lettuce to Cannabis may be grown hydroponically in a controlled environment. There are many resources and a few local businesses that can advise on the equipment and supplies needed to get started.
Heat, Light and Nutrition
The main variables that support and limit plant productivity are heat, light, water, and nutrition. You may raise an eyebrow at ‘nutrition’ since plants make their own food through photosynthesis. Plants still rely on nitrogen, phosphorous, potassium, and other elements for growth and productivity. These may be in the soil already or may be added with appropriate fertilizers or soil amendments, like compost. Care must be taken to not burn tender seedlings with too much commercial fertilizer. Even organic fertilizers can be ‘too much’ if used too enthusiastically. I use a variety of organic fertilizers, but rely on a weak solution of Neptune’s Harvest, a fish and seaweed emulsion, for starting new plants. You can soak seeds in this solution before planting them, and use it when watering the seedlings.
Heat may or may not be needed for seeds to germinate, depending on each species’ needs. Most seeds will only germinate when conditions will support the new plant’s growth. That may be a pattern of cold and warmth or germination may be more dependent on day-length. Each seed packet explains conditions required for germination. Some seeds can’t be covered by soil, because light triggers their germination.
Seeds may germinate indoors on the dining room table at room temperature, or may require a week or more on a heat mat to simulate early summer temperatures. I’ve successfully grown tomato seedlings on a table near a window. It doesn’t matter if tomatoes get a little leggy indoors, because you plant them deeply, anyway, and roots form all along that long stem. Other species may never fully recover if they don’t get proper light in their first few weeks of growth.
Gardeners who grow their own seedlings every spring eventually invest in a shelving unit equipped with specialized adjustable lighting strips, and possibly heat mats, to raise their seedlings in optimal conditions. Others maintain back yard greenhouses to get tender crops off to a good start, or adapt what they grow to what conditions they can reasonably provide.
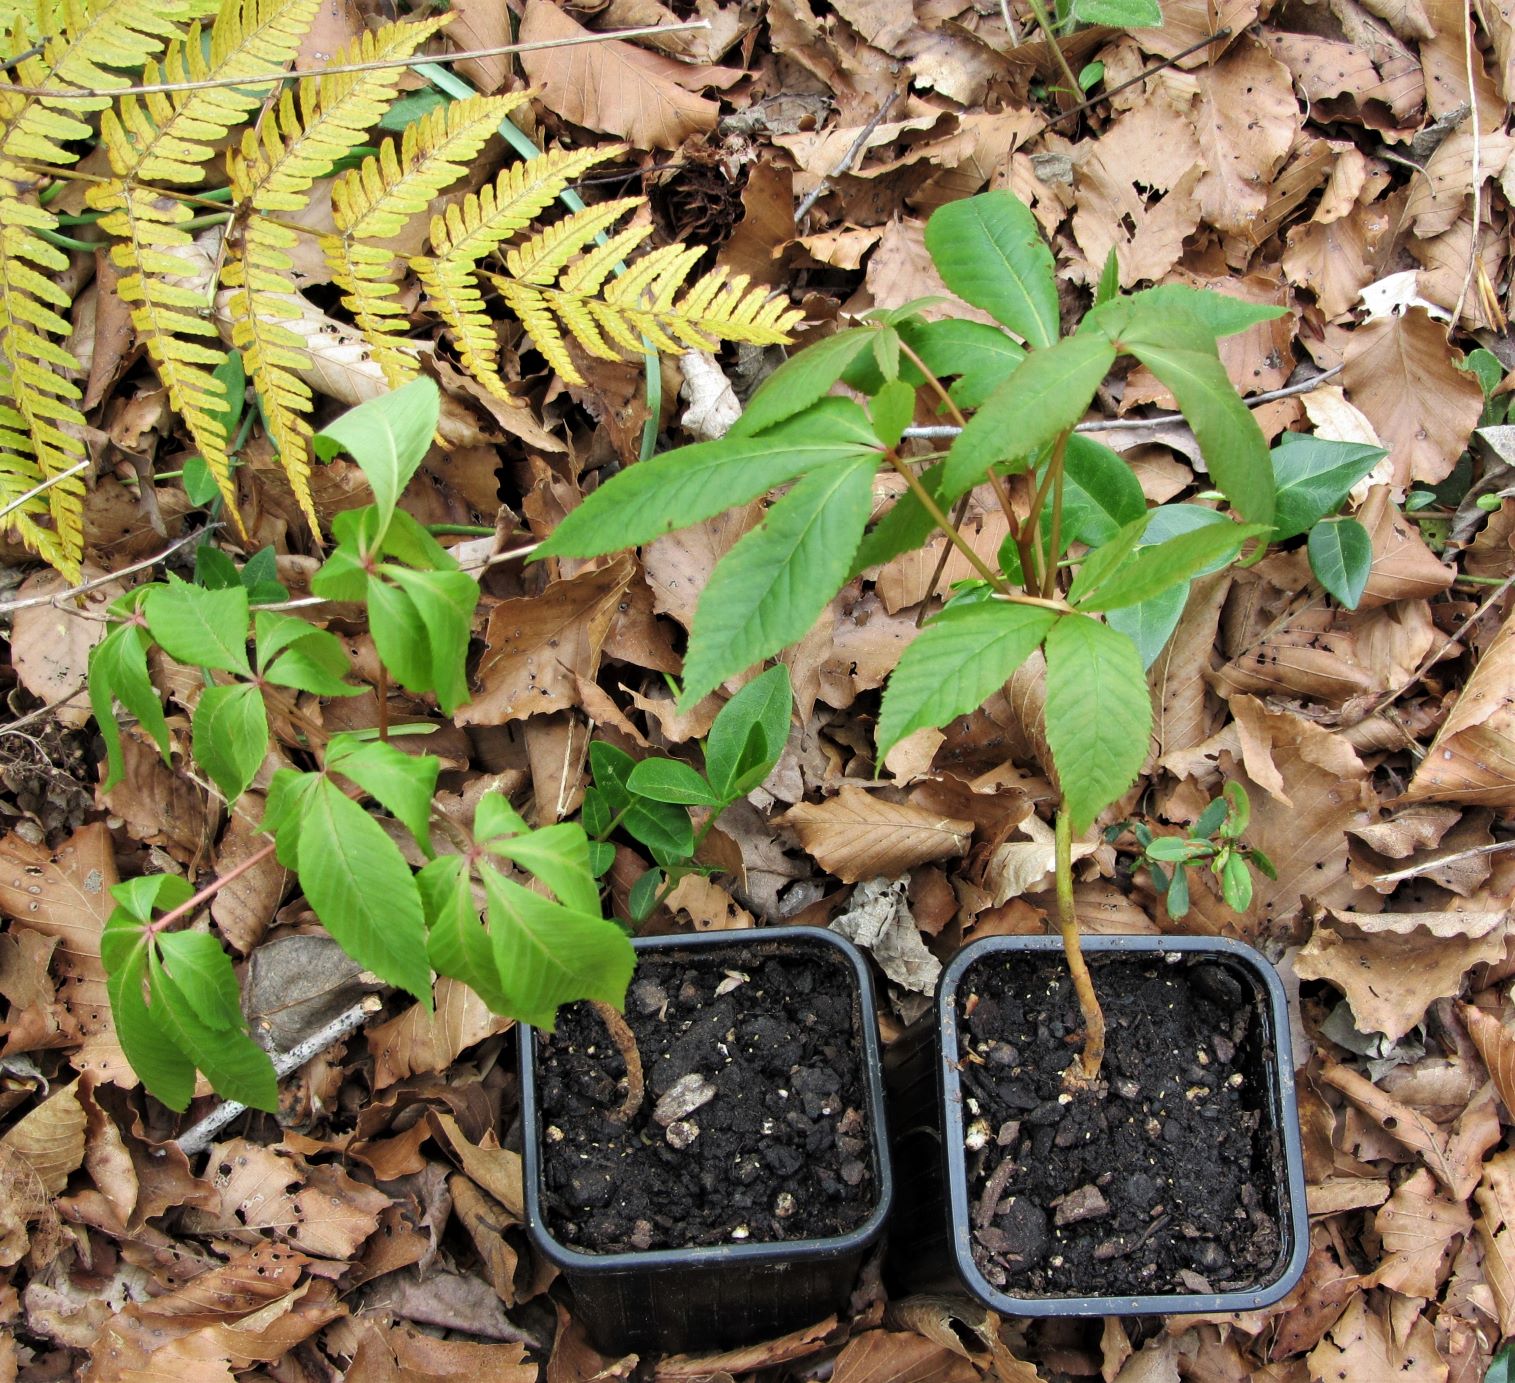
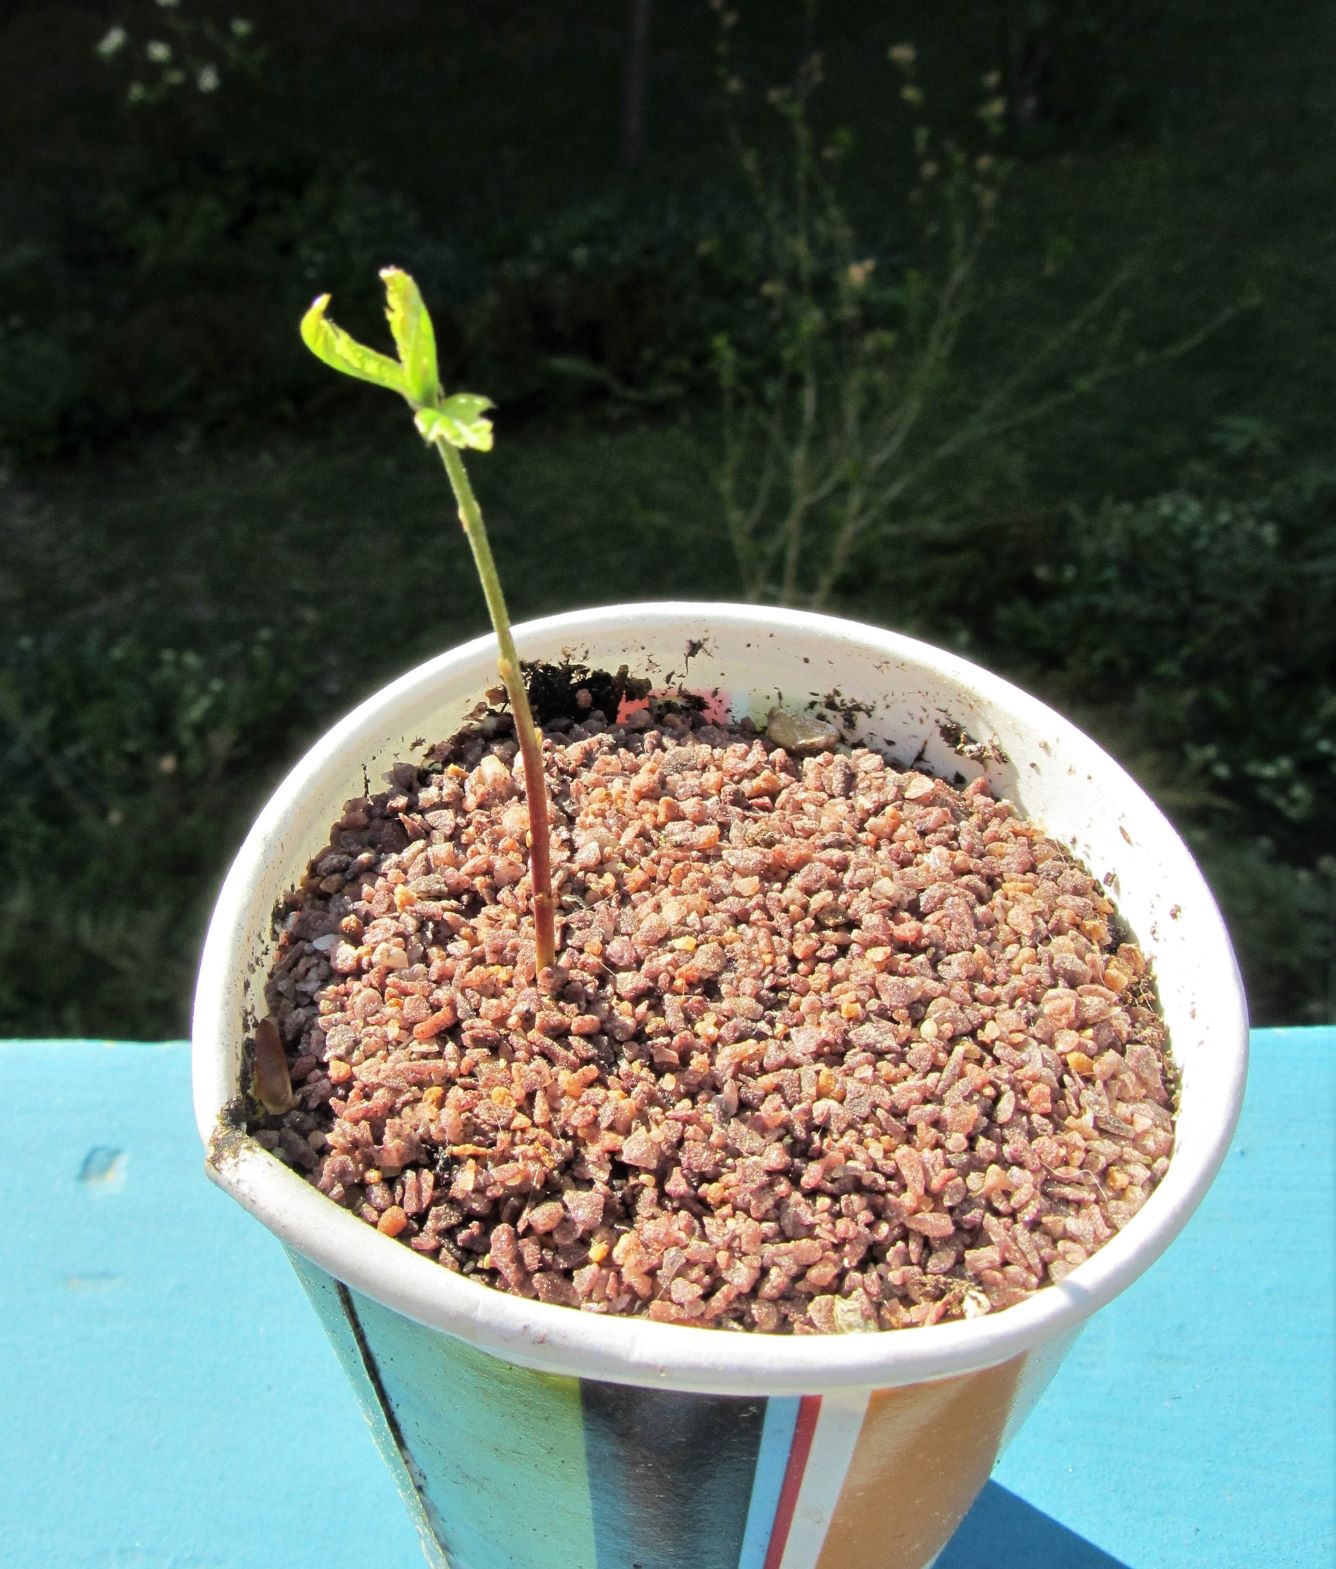
Red buckeye tree seedlings need to harden off in the shade before they are planted out.
Hardening Off and Planting Out
Weather remains a wild card for all outdoor gardening. Whether frosts come late or summer temperatures bake our new garden in April, it is something gardeners watch daily. Hardening off is a process of acclimating seedlings to outdoor growing conditions. Plants can’t go from perfectly controlled indoor conditions to early spring weather in a single day. Hardening off helps plants adjust outside conditions.
Hardening off means bringing plants outside into protected shade to acclimate to sun, wind, and temperature variations. It often means bringing the plants back inside before dusk when temperatures will dip too low overnight, then bringing them back outdoors the following day. Plants can move from shade to more daily sun as they grow sturdier. They toughen up fairly quickly and are ready to plant out permanently in a matter of weeks.
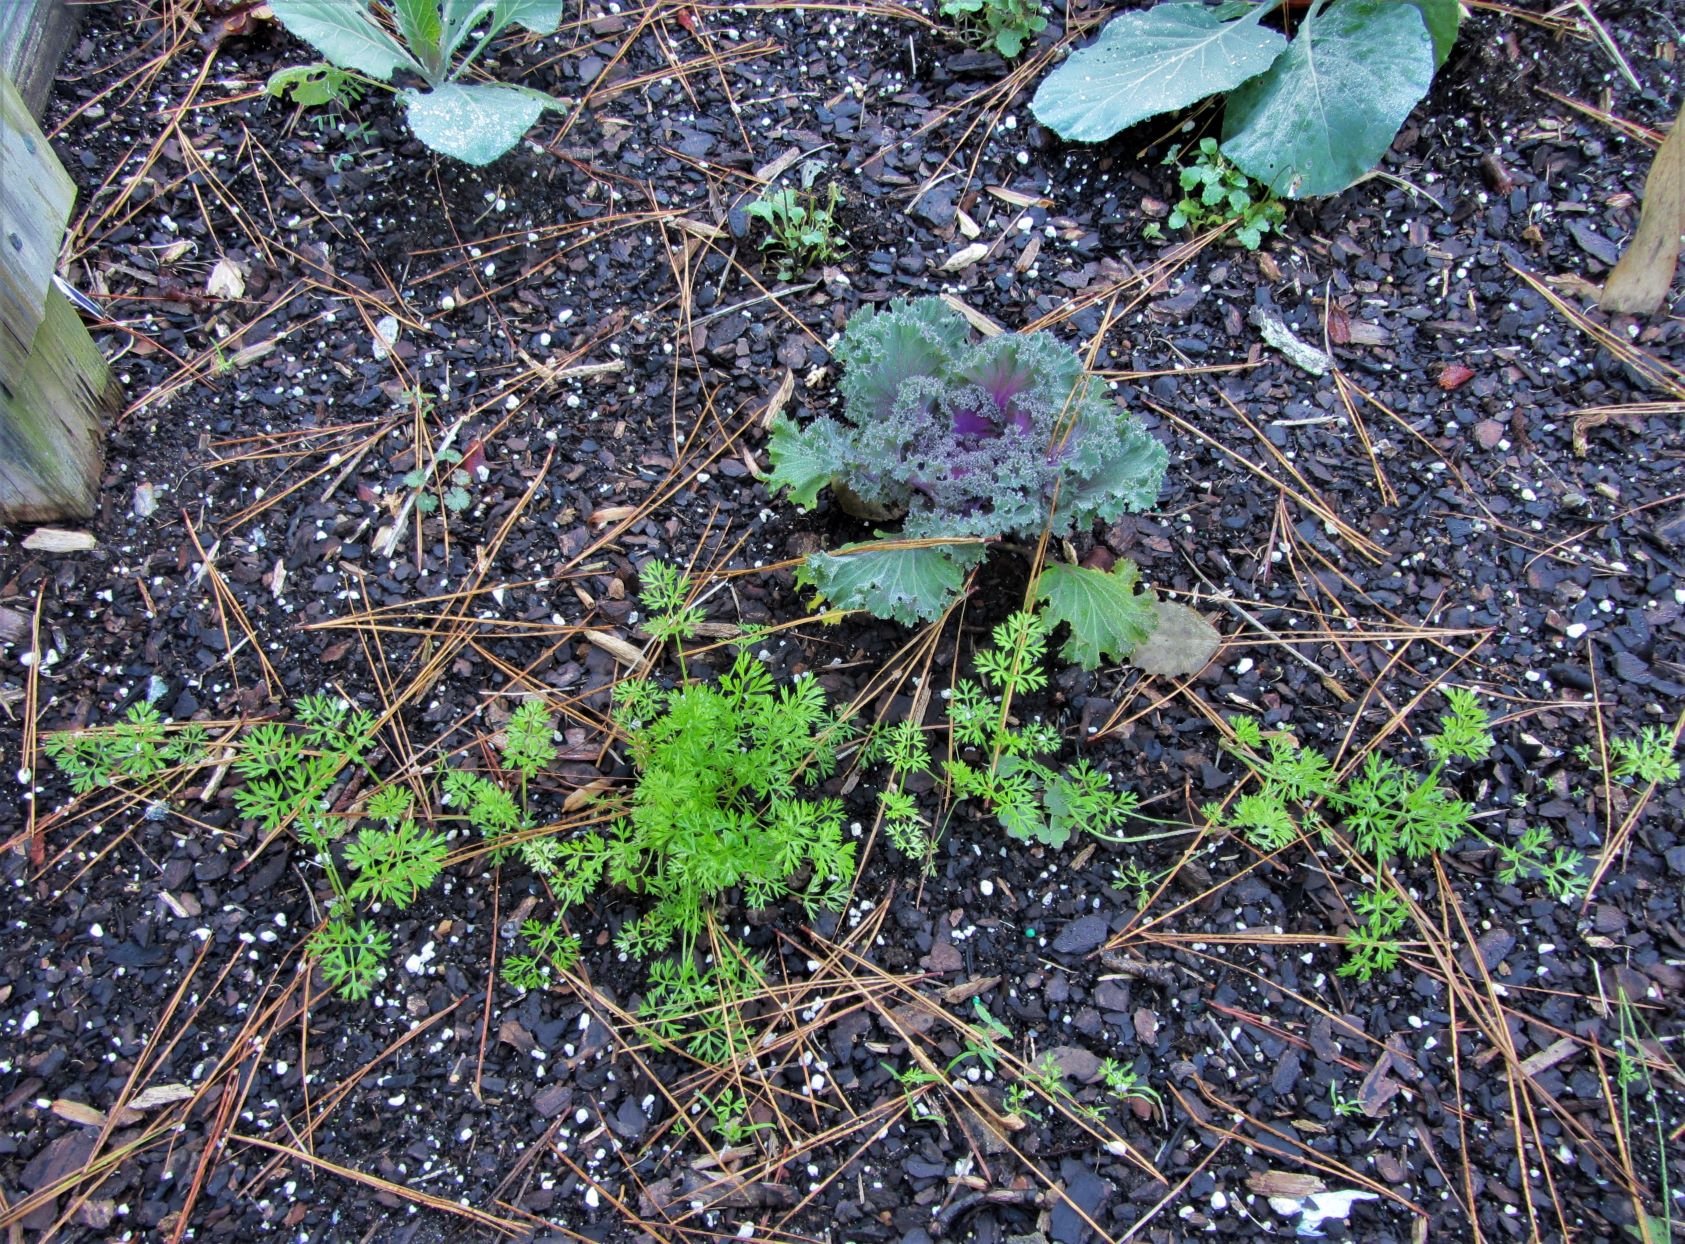
Thin carrots or radishes slowly, eating a few small ones while the remaining plants bulk up.
There are many methods to protect young plants early in the season so they can get a head start outside in their permanent garden spots. Black plastic can warm the soil, and row covers or tunnels provide some shade and a wind break. You can buy ‘Wall of Water’ devices for tender tomato plants, or make something similar with plastic jugs or liter drink bottles, filled with water and placed in a ring around tender plants to warm them. Sunlight warms the water each day, and the bottles radiate heat to protect the plants at night.
If you start seeds outside in a milk jug, you may begin opening the lid on nice days and closing the lid again at night. The trick is to keep plants alive as they adjust to outdoor conditions, and until the weather settles into the growing season.
We usually sow seeds more thickly than the plants can grow to maturity, and so seedlings will need to be thinned. Seedlings can be gently pulled apart once their first set of ‘true leaves’ has appeared and before their roots become hopelessly entangled. The seedlings are moved up to larger, individual pots so their roots can continue to grow before they are planted outside.
Seeds direct seeded outside may still need thinning. Crops like carrots can be harvested and used at a very young stage, making space for those left behind to grow more. Seedlings can be transplanted to space them more easily, or some seedlings may be discarded.
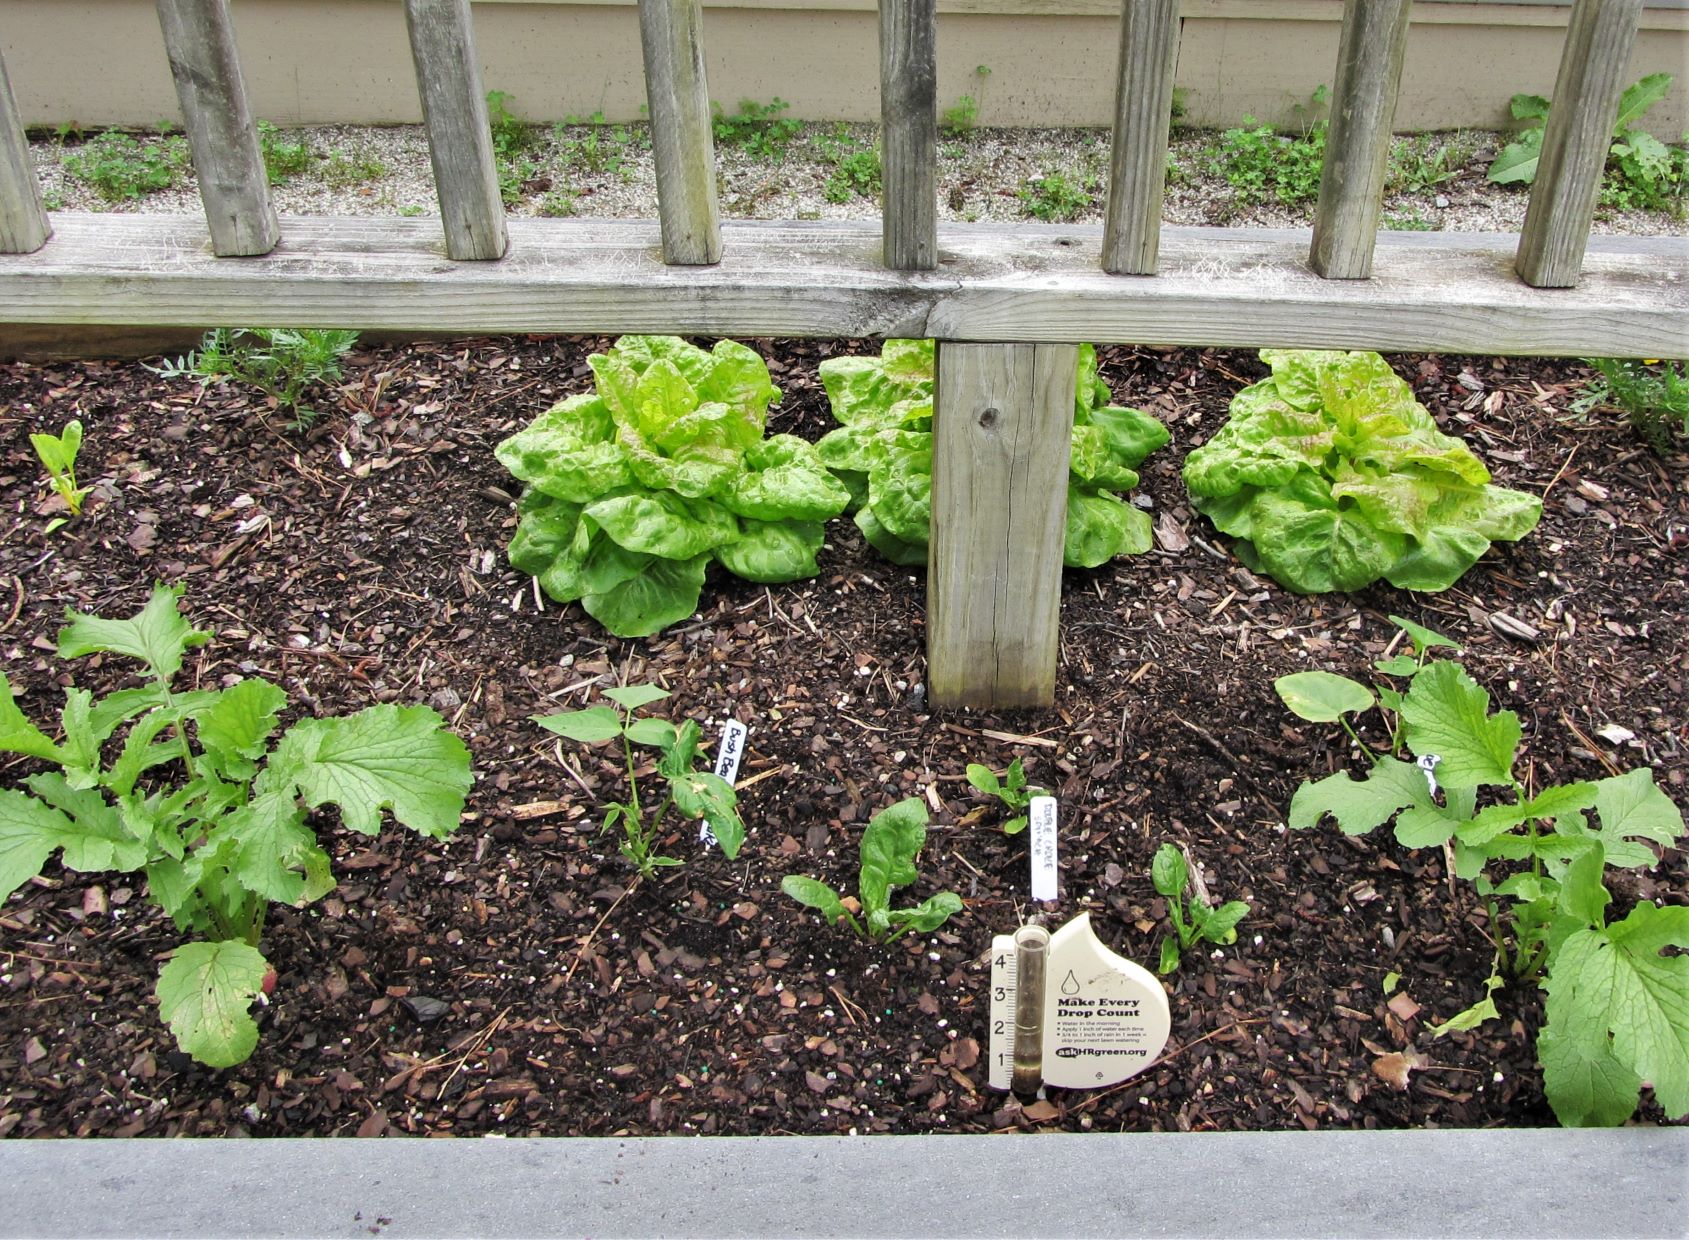
The Williamsburg Botanical Garden Therapeutic Gardening beds.
Raised Beds
Raised beds offer growing plants many benefits and ultimately mean less work for the gardener. They are a key component of ‘no till’ gardening, which is better for soil health and for the environment. A bed may be raised by just a few inches above the surrounding soil, or it may be raised by several feet to accommodate gardeners with physical disabilities. Either way, good quality compost or enriched topsoil are piled on top of the existing soil. No ploughing, double-digging, or roto-tilling is required to prepare the bed for planting each spring.
Raised beds improve drainage so soil doesn’t remain soggy after heavy rain. Top layers of soil are usually high quality compost. Anyone trying to grow vegetables in a yard of clay or sand understands the benefits of building raised beds with high quality soil to support their vegetables crops. Extensive tree roots may also interfere with traditional vegetable gardens of tilled up rows. Raised beds allow gardeners to grow crops without having to dig.
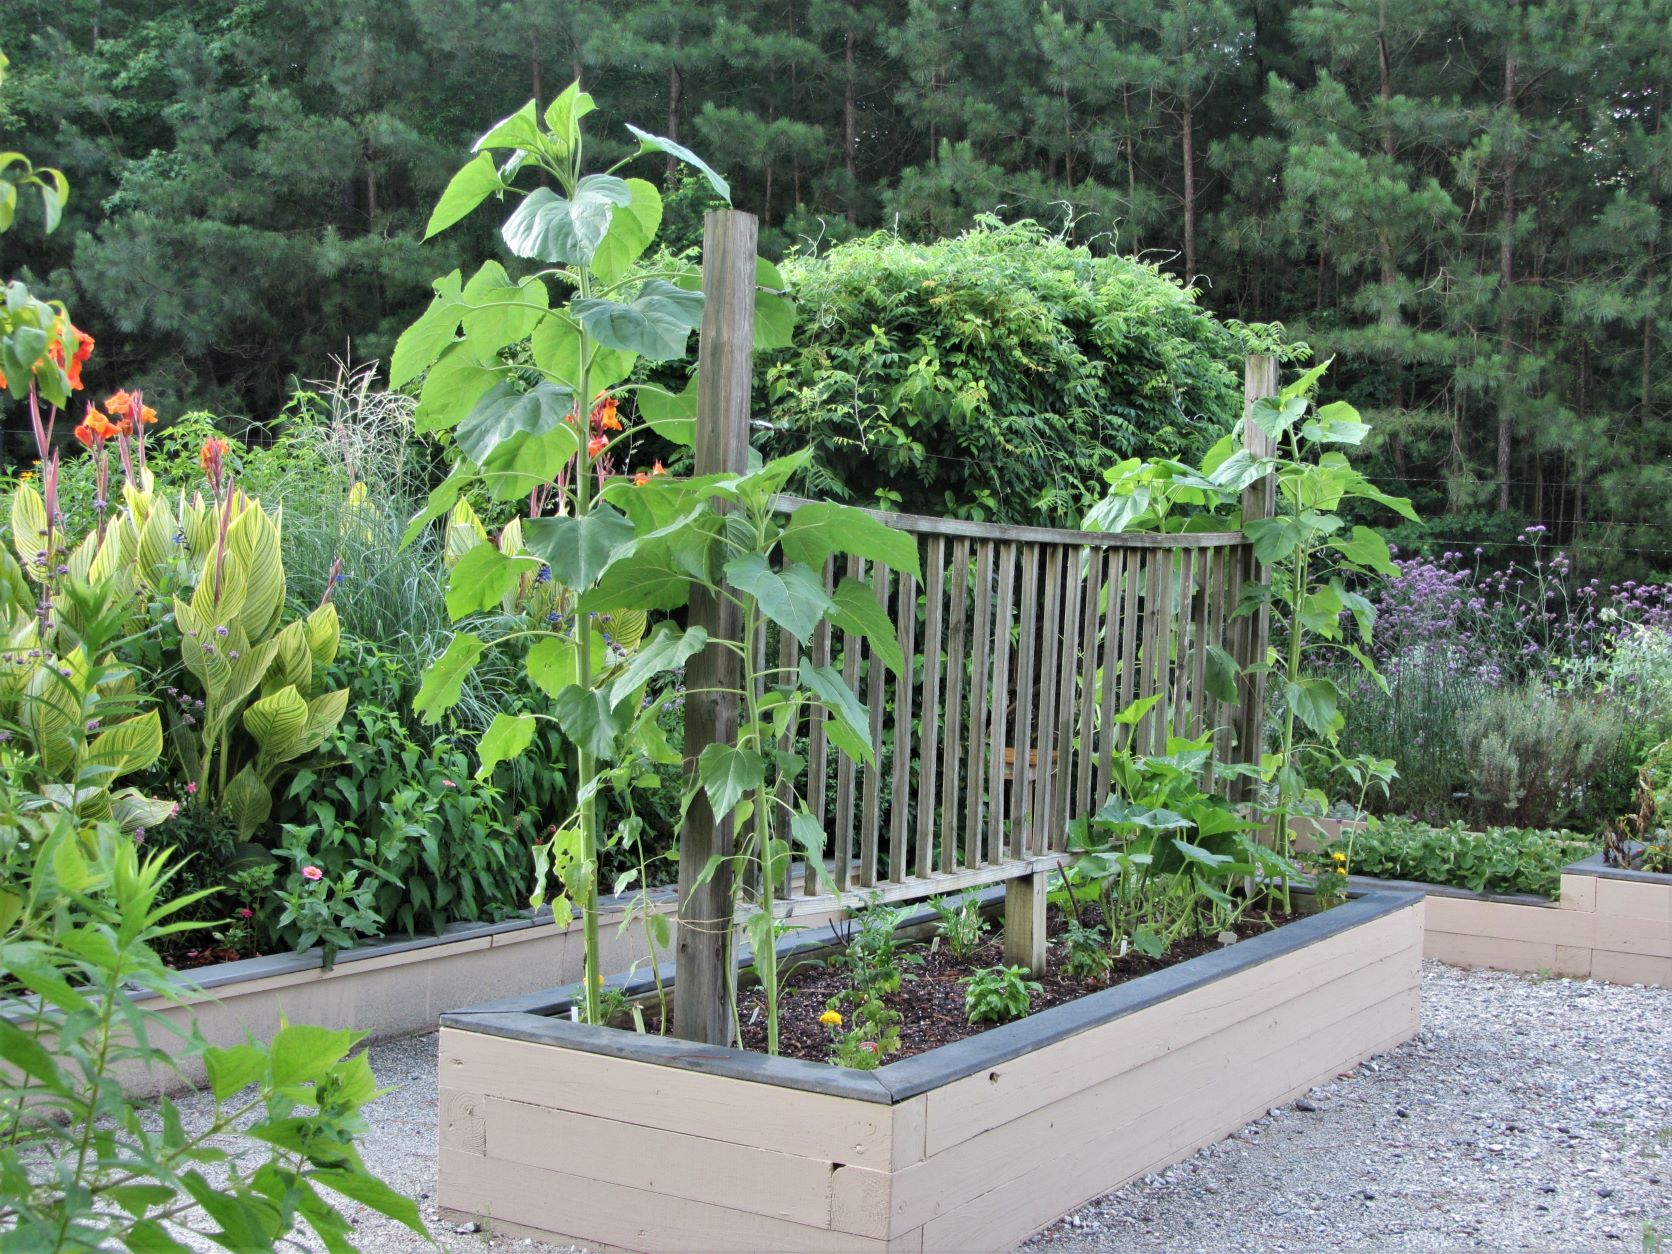
Raised beds are made narrow enough so all plants can be reached from either side. Paths go between the beds so the growing area is never trodden. Plants can be planted more densely in a matrix pattern. It is easy to install drop irrigation systems in raised beds. Wooden sides on a bed can support trellises in summer, and PVC pipe poles to build quick plastic covered ‘hoop house’ to lengthen the growing season.
Lasagna Beds
Some gardeners may prepare a ‘lasagna’ style raised bed beginning in the late summer or fall before planting. First, a layer of cardboard or heavy paper (newsprint or grocery bags) is laid over the entire area, and then composable materials or finished compost are piled on top of the paper. The entire mass seasons over the winter and the ground is ready for planting the following spring. This is a way to re-cycle chopped leaves and grass clippings, tea bags, vegetable trimmings, egg shells, banana peels, and other organic material without building a formal compost pile that requires careful turning and management. Edges can be built from concrete edgers, bales of hay, wood, bricks, recycled pallets, or even logs.
Hugelkulture
Larger constructions may be piled several feet high on top of logs, branches, sticks, hay bales, and leaves. Good compost or topsoil tops this construction to support roots while the larger materials below decompose. The whole pile can rounded like a berm, if more than a few feet tall, so the sides can be planted in vining crops. This system helps conserve water in the lower layers while providing good drainage for plant roots.

Direct seeding in a raised bed managed by the ARC Therapeutic Gardening project at the Williamsburg Botanical Garden.
Direct Seeding
Some crops, like carrots, don’t want to be disturbed once they begin to grow. Many crops are simply seeded where they will grow all season. Clear off the soil surface to remove any debris and make a shallow furrow to receive the seeds. Consult the seed packet for planting depth. Larger seeds can be deliberately spaced apart, but tiny, dust like seeds can be harder to control. Fold an index card in half lengthwise to make an easy gizmo for handling the seeds.
Some seeds should be planted in widely spaced hills or mounds instead of in furrows. These seeds are generally large enough to handle individually.
Brush soil or compost over the planted seeds, firm gently with your hand, and then gently mist water over the soil to settle the seeds into place and eliminate air pockets. I like to use a weak solution of fish and seaweed emulsion, like Neptune’s Harvest, to water in the seeds.
My paranoia of critters is born of long experience, and I would never leave new seeds unprotected outside. Protecting them may be as simple as a sprinkle of (organic) granulated Plantskydd to keep the squirrels and birds away from the seeds and seedlings. I may cover small areas with damp paper towels, held down with stones. The plants will easily push through the damp paper as they emerge. More professional growers may cover the bed or row with row cover fabric. These woven fabrics also keep insects away from seedlings and can be left in place for weeks, until pollination is required.
If voles are a problem in your garden, consider cutting the bottom out of a plastic nursery pot and using the pot as a protective collar for your new plant. Bury the pot where your plant will grow so that about an inch of plastic rises above soil level. Sow your seeds within the pot as normal. The pot can be covered with cling film secured with a rubber band to make a mini-greenhouse.
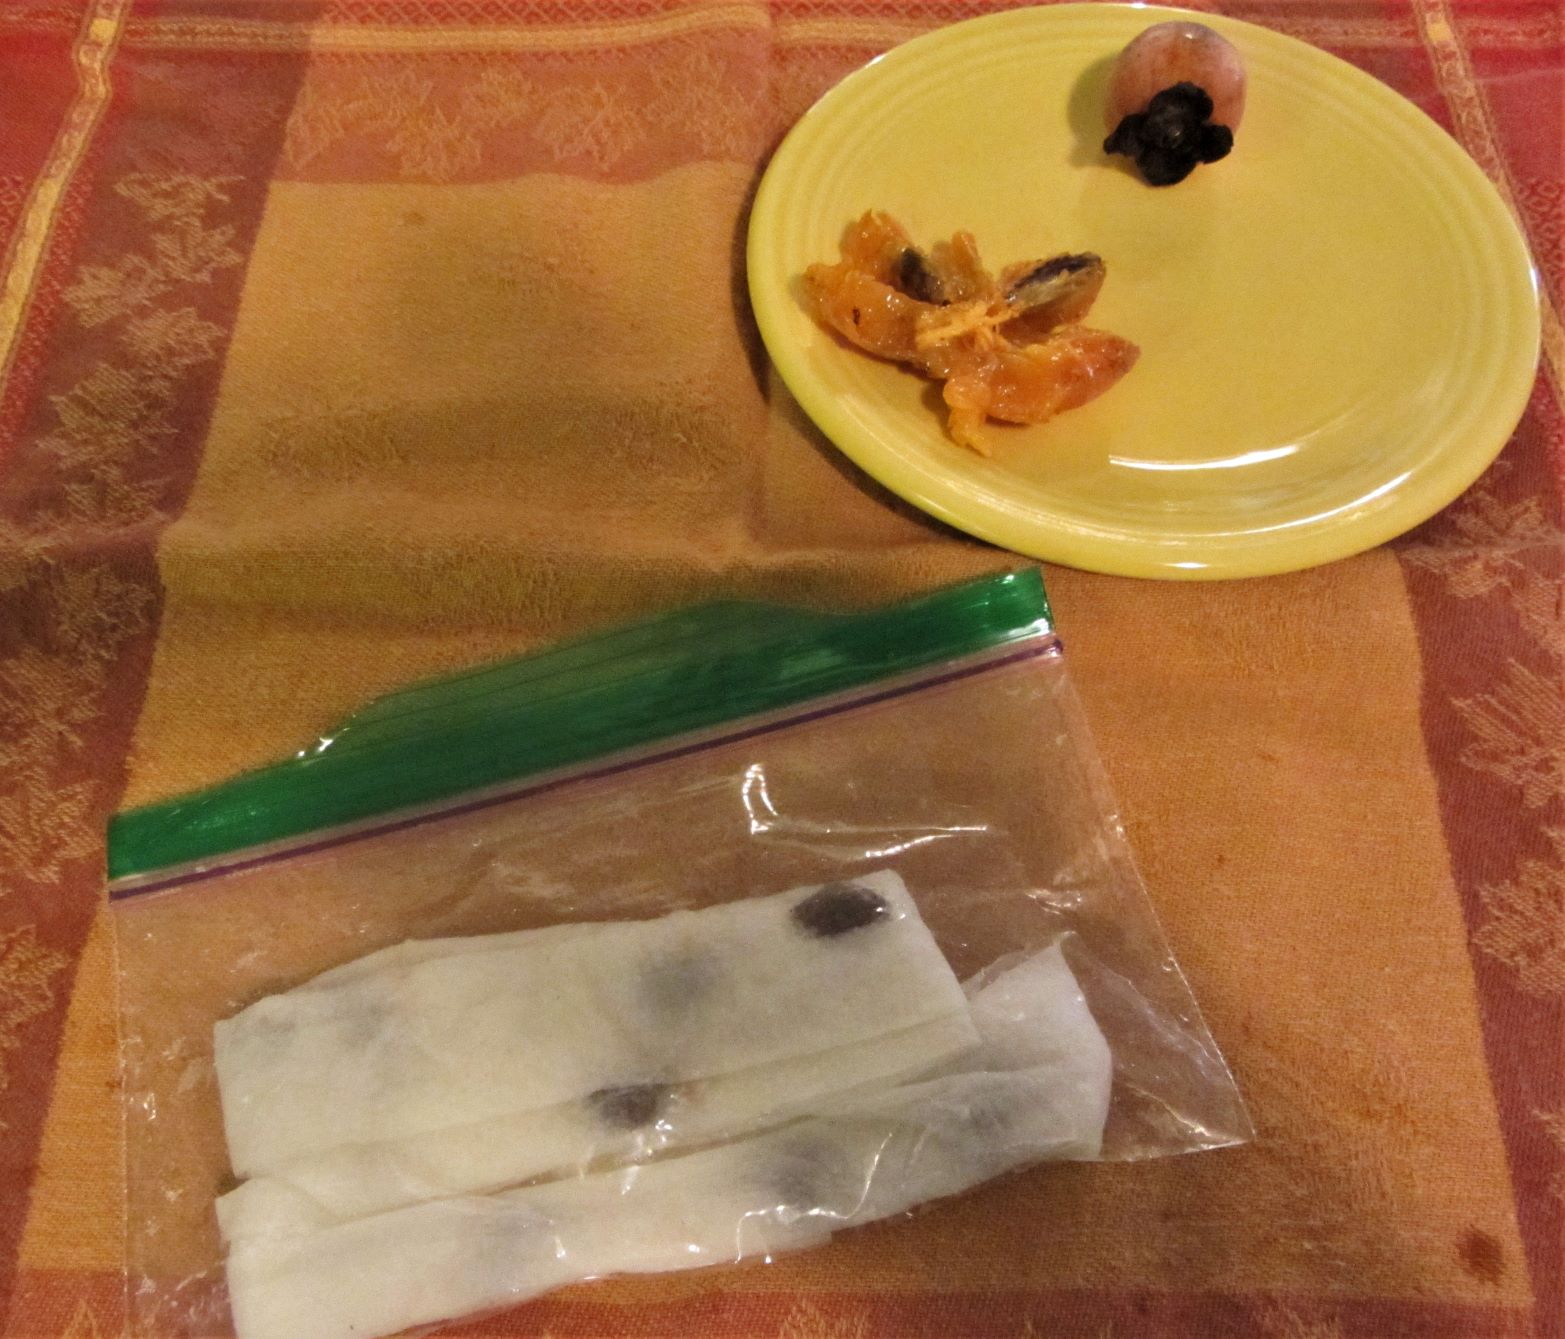
Layer cleaned persimmon seeds in damp paper towels and seal in a zip-lock bag. Keep the bag outside in a protected spot or in the refrigerator for several weeks. Once seeds begin to germinate, plant them in deep pots or in the ground where they will grow.
Keeping Track
Record keeping helps us through those ‘senior moments’ when we forget what is planted where, or forget which variety performed so well for us last year. There are several levels of keeping records that will make us more successful.
Label containers of newly planted seeds with the full name of the variety planted and the date sown. You can do this on a piece of masking tape on the container, or on a wooden or plastic stick. Make sure the ink won’t fade before the plants are ready to move. You might also note when you believe the plants should be moved outside.
Either draw and label a diagram of your planting bed, or put labels beside each crop when you plant it out. Include the name of the variety, date planted, and any other information you may want later. If you plan to grow several crops during the season, draw several diagrams of the space noting the changes you plan to make by harvesting early crops and planting later ones. That way you’ll remember to sow lettuce or spinach under your bean plants in late-August.
Keep all seed packets in an organized system. If seeds are left from sowing, keep the packet in a sealed bag or box to keep the seeds dry and fresh. Some people refrigerate leftover seeds. Empty packets may be kept in an album or notebook, so the information is available for future reference.
You may keep a gardening notebook each year where you note what you plant when, how quickly it grows, when you transplant it, harvest it, and any problems you experience. You can also make notes about yield and flavor. These notebooks require discipline to keep each day or week, but they also form a valuable resource to look back to as you shop for seeds in years to come.
A Delicious Panacea
Growing vegetables, herbs and flowers from seeds may keep our minds sharp, our bodies healthy, and our environment more sustainable. It may even be a small gesture towards world peace. Gardening won’t solve all of our problems and worries, but it certainly can bring us happiness. Every positive thing we do makes this world a better place. We can become those elders who pass on the best of the past to the young ones coming behind us. And we can enjoy a great tomato and basil sandwich while we do it.

Trombone squash, an old Italian variety, is ready to harvest in a Therapeutic Gardening bed at the Williamsburg Botanical Garden.
Good Sources of Seeds and Information:
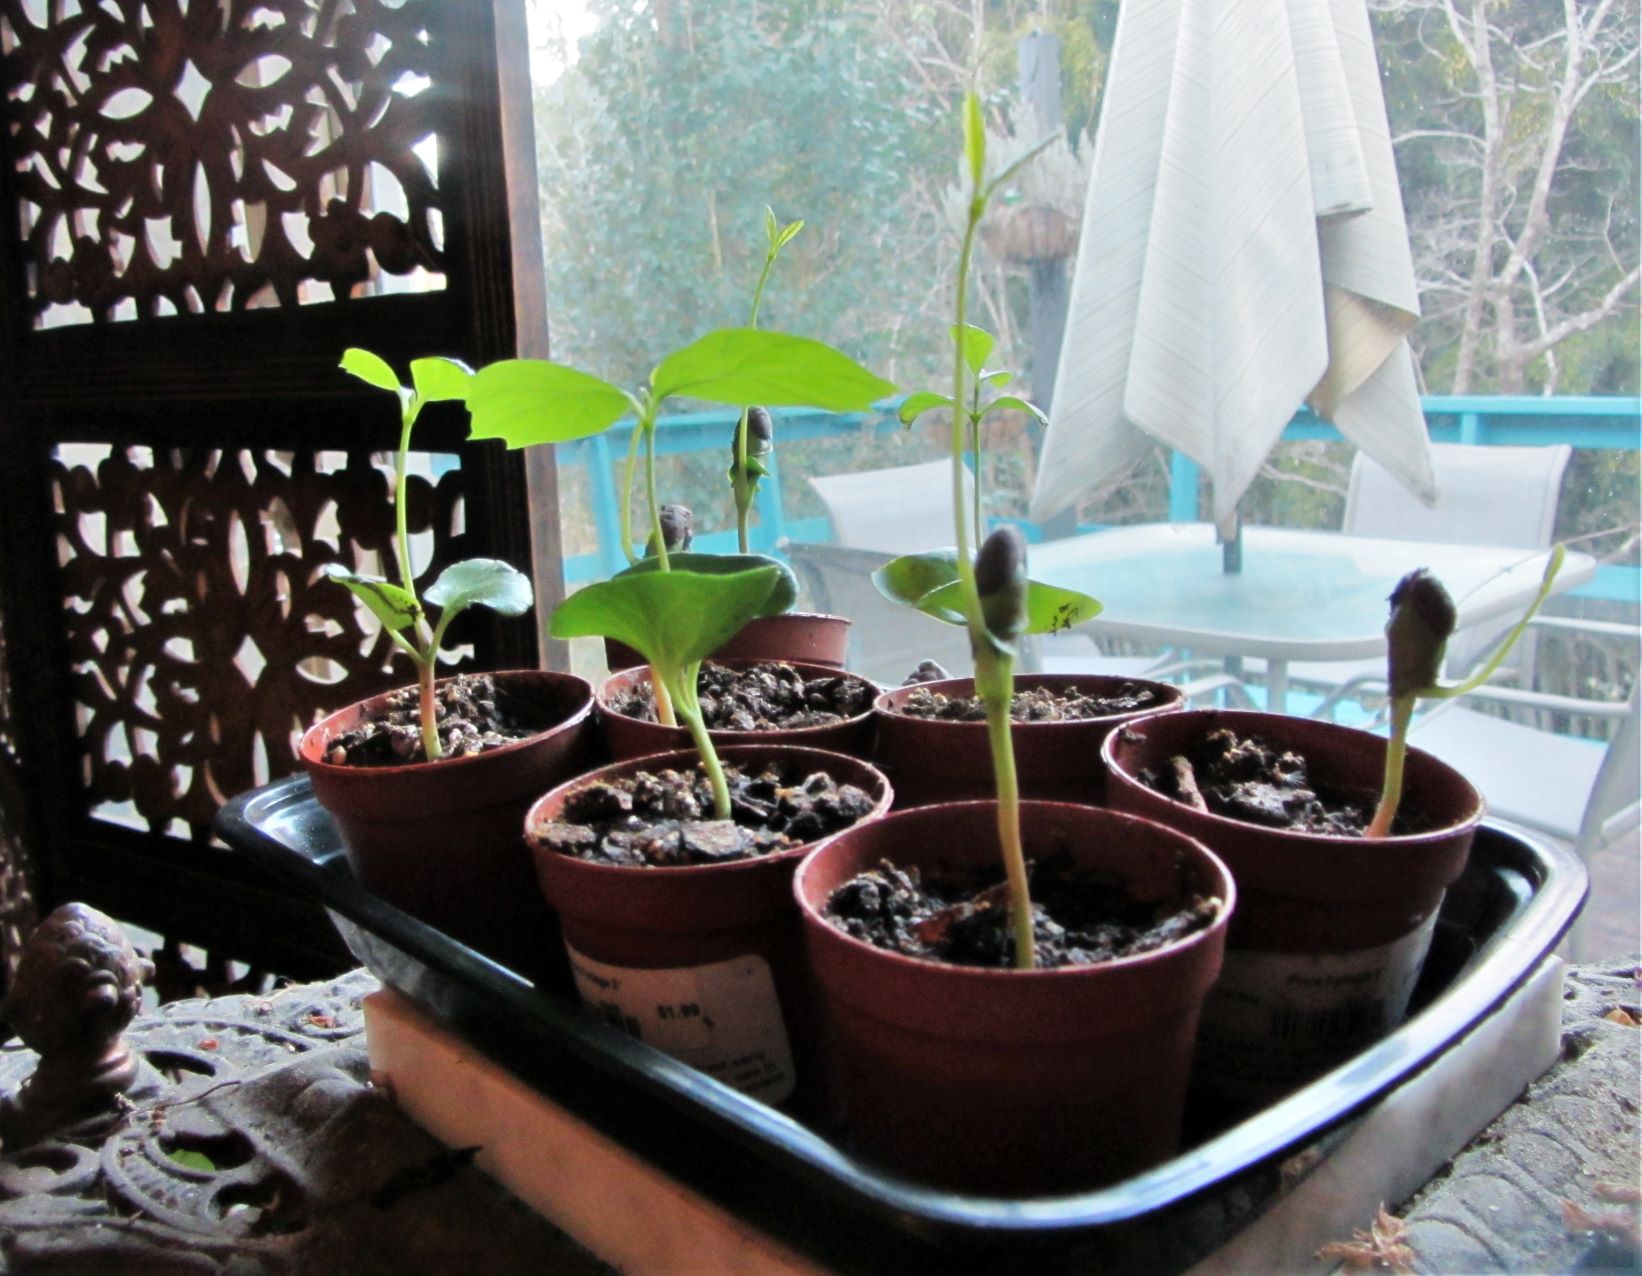
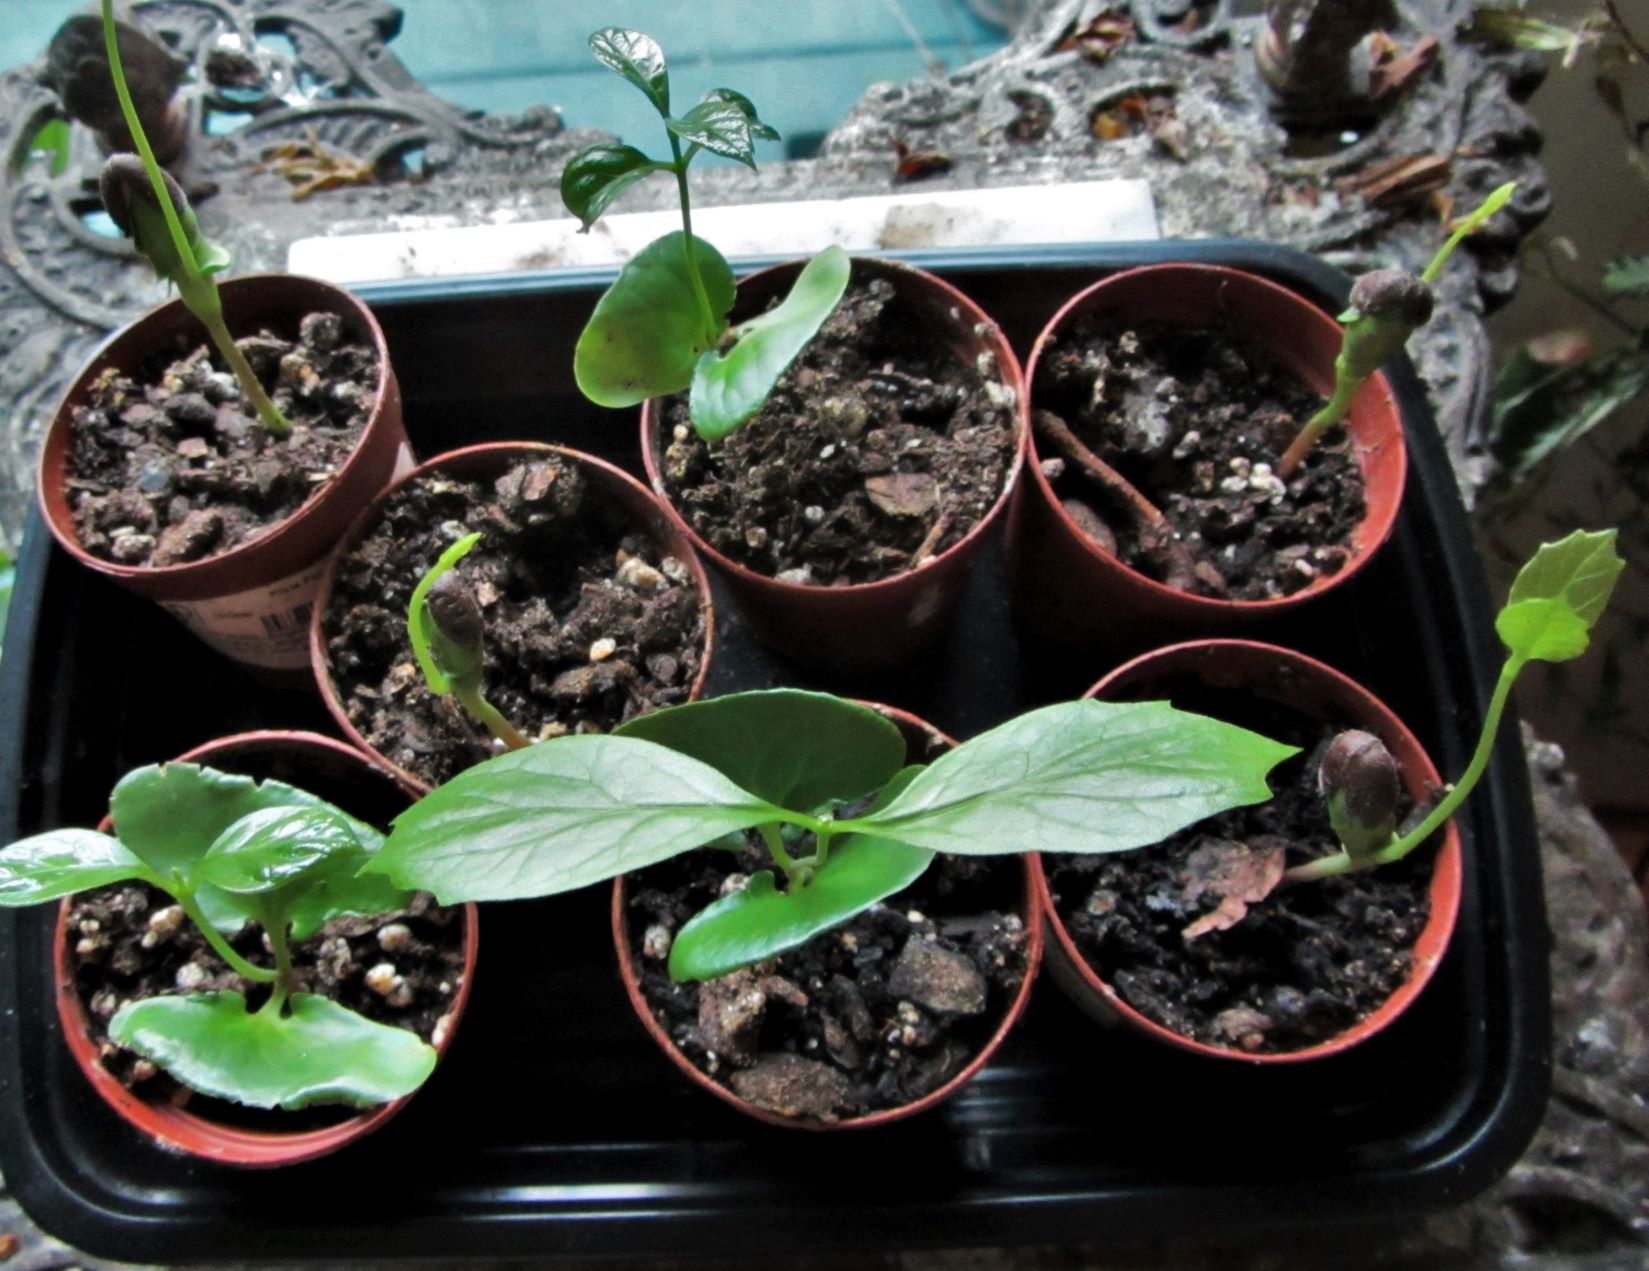
Lemon seeds germinated in damp towels kept near the coffee pot.
All Photos by E. L. McCoy