Unraveling the Mystery of Growing Ferns from Spores

Fern reproduction remains a bit of a mystery to me. A mystery that borders on the ‘magical’ when tiny ferns appear, growing from the mosses along the paths of our back garden. It feels magical because ferns grow not from seeds, but from tiny, dustlike spores.

The spores must find a moist, shady spot where they can grow into an in-between form that will later produce the reproductive cells necessary to mate, and form a zygote that will become an embryonic fern
This form of two-step sexual reproduction appeared on Earth untold millions of years ago, allowing the first plants to recombine their genetic materials to produce new generations of some algae, mosses, liverworts, and finally ferns, the earliest vascular plants.
A baby fern is called a ‘sporeling,’ because it is the generation that can produce spores.
Most of our familiar plants produce seeds after fertilization of their flowers or cones with pollen. The pollen may be carried from one plant to another by a pollinating insect or other animal, or by the wind. Ferns, and other simple plants, don’t produce seeds. The microscopic activities of their spores are all but invisible to our eye. So, I am curious, and am studying others’ successes with fern propagation so I might learn to propagate and potentially hybridize my favorite ferns, too.
I have been studying the Hardy Fern Foundation’s Spring 1998 Special Publication on Fern Propagation where a dozen experienced growers describe their methods for propagating ferns. Their essays explain reproduction from spores, and they also describe their own methods for collecting and sowing spores to successfully raise a crop of ferns.
Ferns have successfully propagated themselves in nature, with no human assistance, for millennia. So it shouldn’t be too complicated, right? These very knowledgeable writers describe strategies that lead to success, and also explain how inattention to detail can lead to failure.
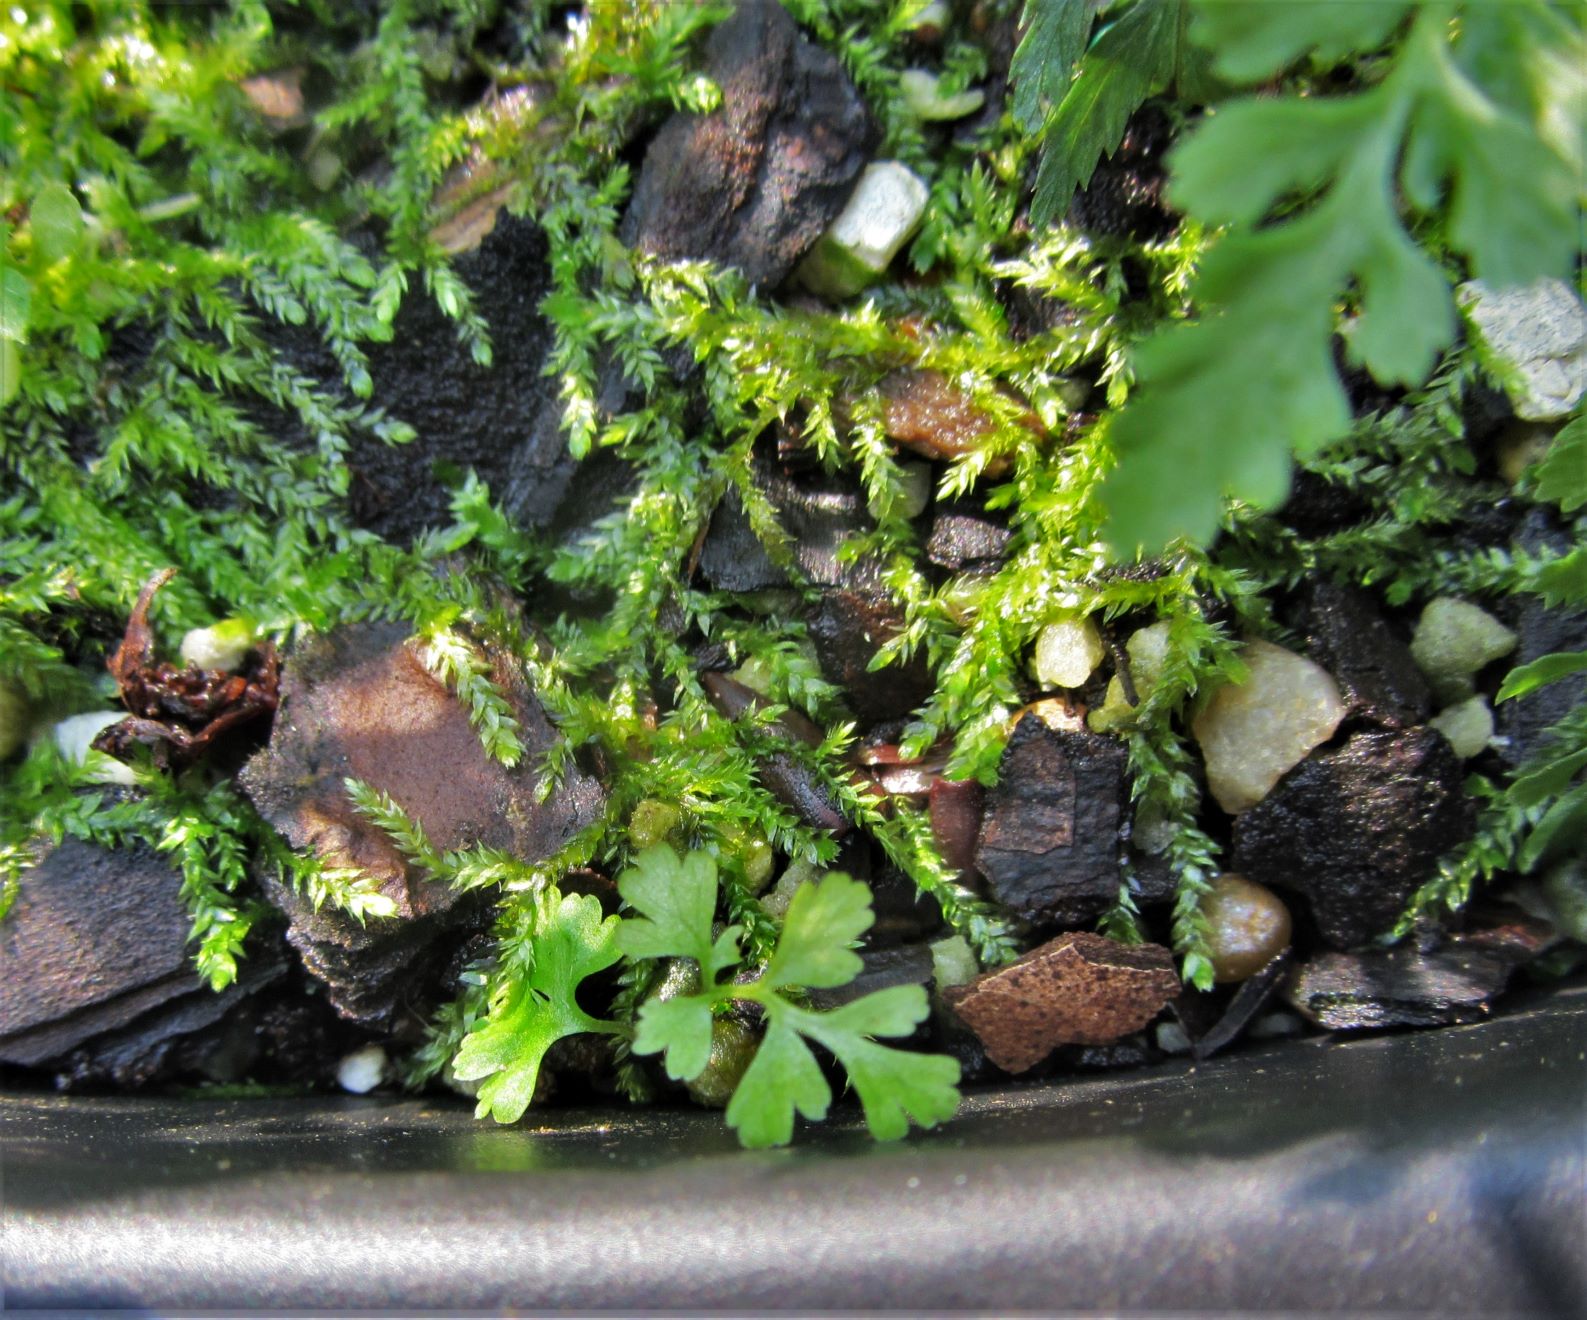
Baby ferns grow from potting soil. The flat green structures are the gametophytes.
My first successes in growing baby ferns from spore were entirely accidental. Spores from potted ferns on my deck fell onto potting soil that I sealed up in a zip-lock bag for the winter while I waited for some seeds I had sown in that shallow container of soil to germinate. At first, I thought a nice crop of moss was growing on the soil. As I kept checking the container every few weeks this spring, I was amazed and delighted to recognize tiny ferns growing from the green structures on the soil I had expected would grow into mosses.
The structures I observed, gametophytes, are the ‘in-between’ generation between one fern and its offspring. When a haploid spore begins to grow, its first visible sign of activity may be a thin, green thread of cells known as a prothallus. The prothallus has half of the parent fern’s genes. As cell division continues, it eventually thickens into a tiny structure, about the size of a pinkly fingernail or smaller. This structure anchors itself to the growth medium with tiny rhizoids, which also absorb water.
There is an area of meristem cells in a notch on one end of the gametophyte. As it continues to grow, it will produce the necessary male and female reproductive cells: sperm and egg. The eggs remain attached near the meristem cells at the notch, and the sperm are held on the bottom of the gametophyte near the rhizoids.

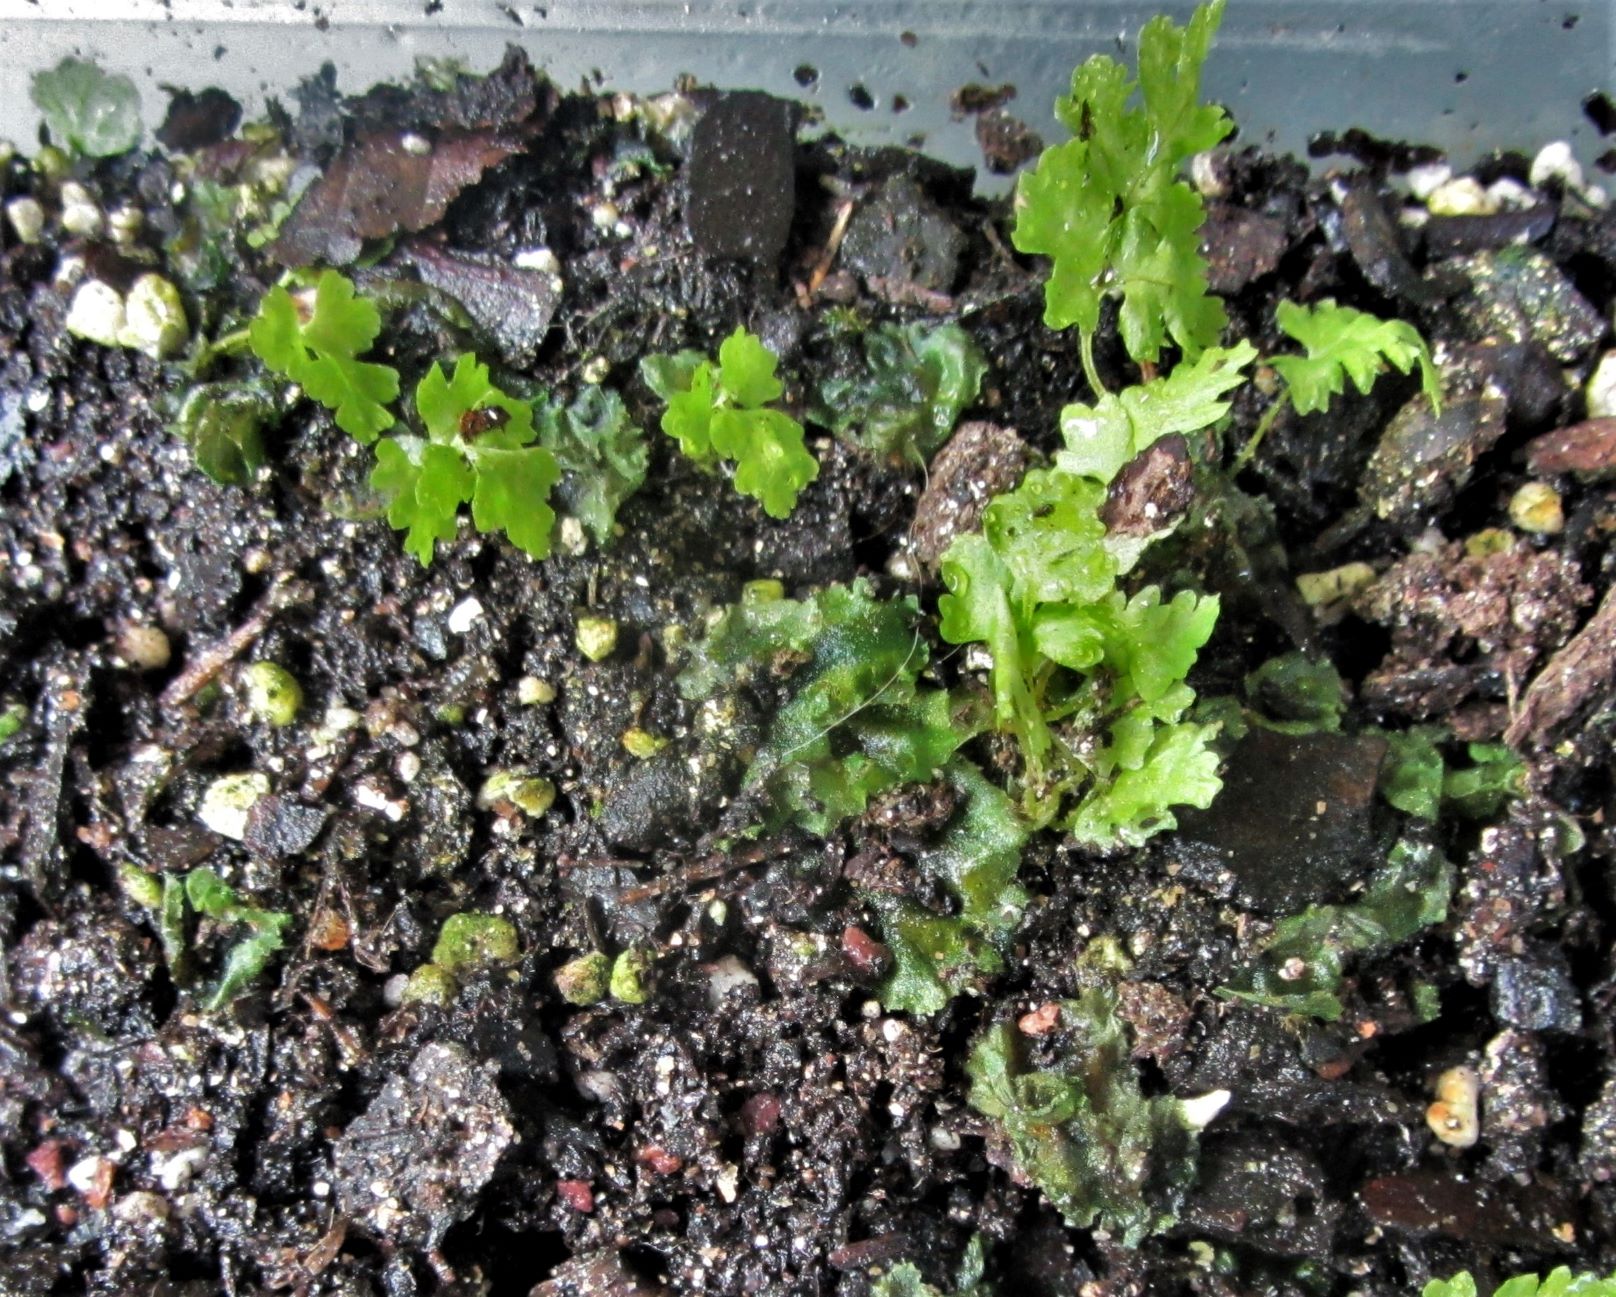
The first fronds on a sporeling are immature. Later fronds will develop the characteristic size, color and form of the mature fern.
All of this must occur in a damp, shaded environment. While the female cells remains attached to the gametophyte, the male sperm cells will ‘swim’ to locate an egg cell on another gametophyte. Each gametophyte will usually produce several male and female cells, depending on the fern’s genus. But once a female egg cell on a gametophyte has been fertilized, its growth tends to crowd out the potential of any other egg cell on that structure to develop. The gametophyte disappears as the sporeling fern develops.
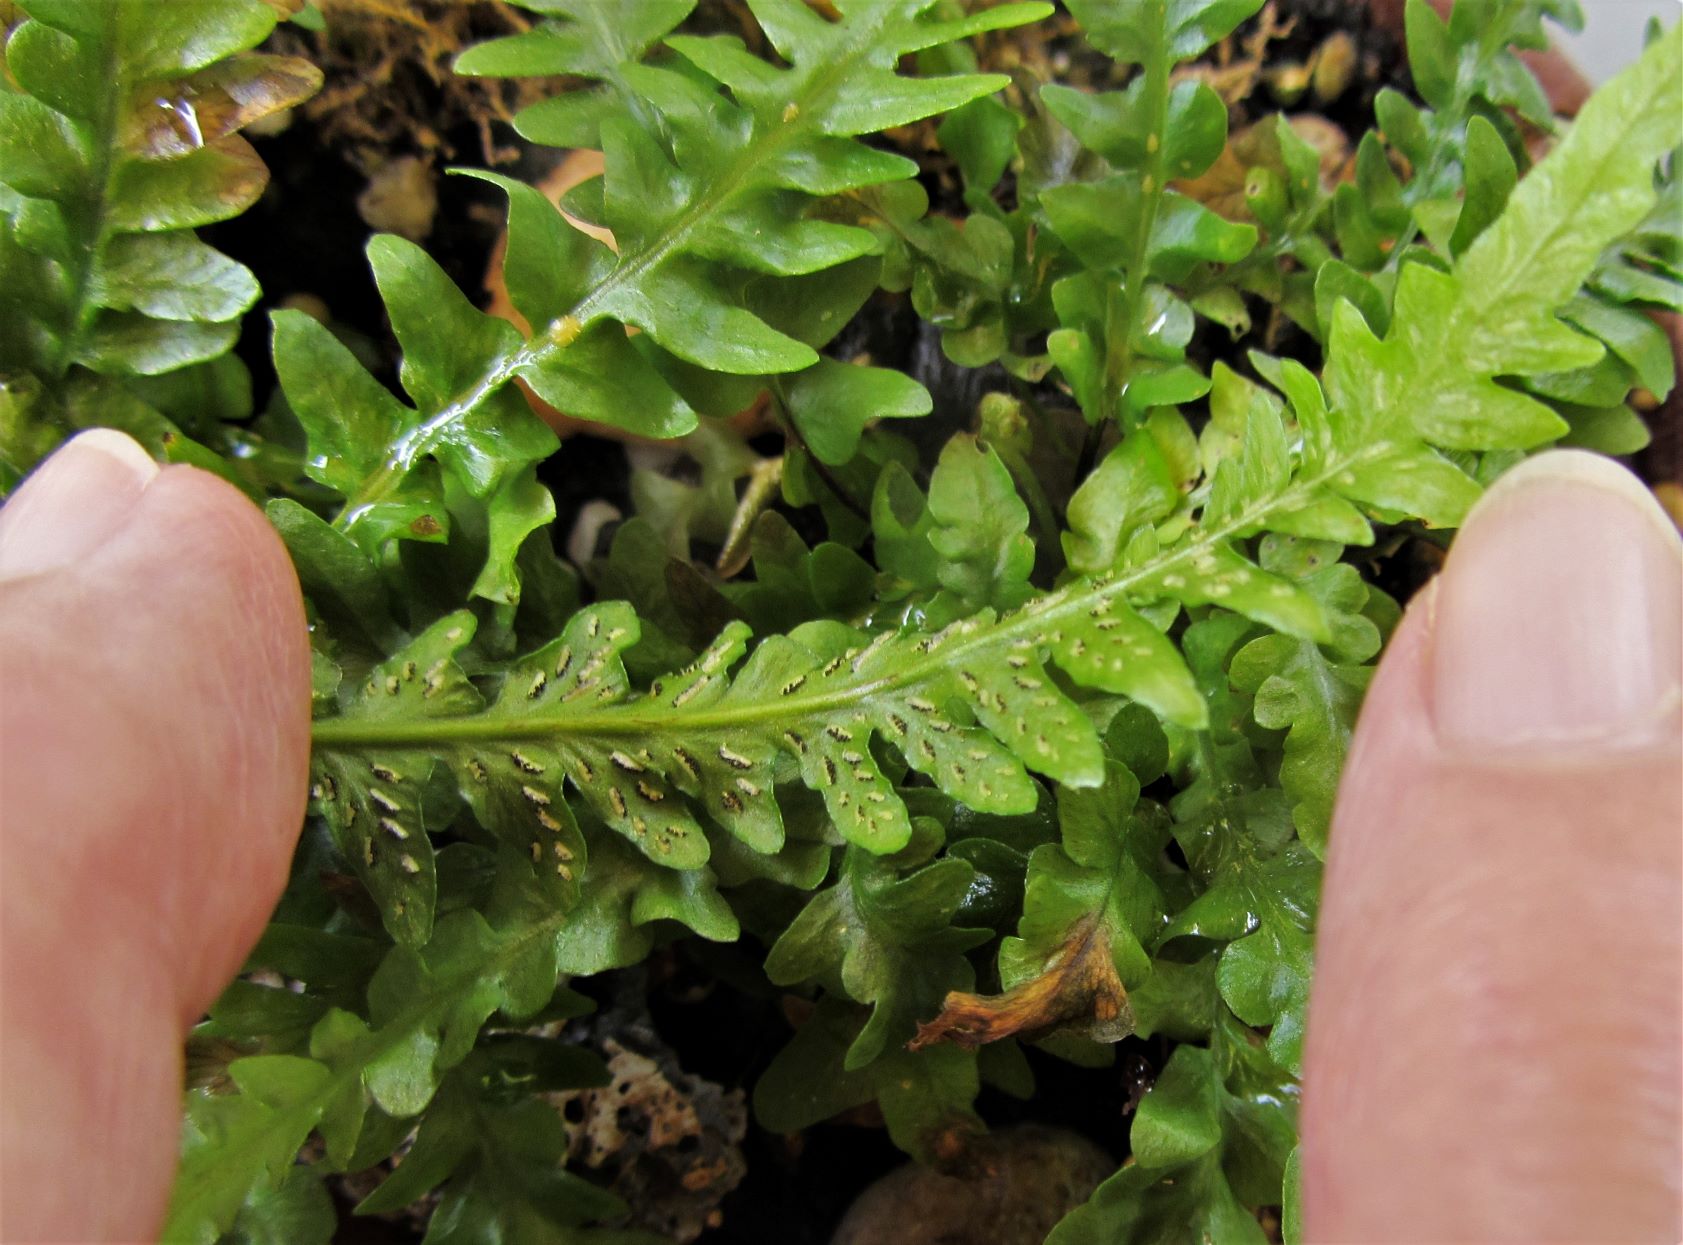
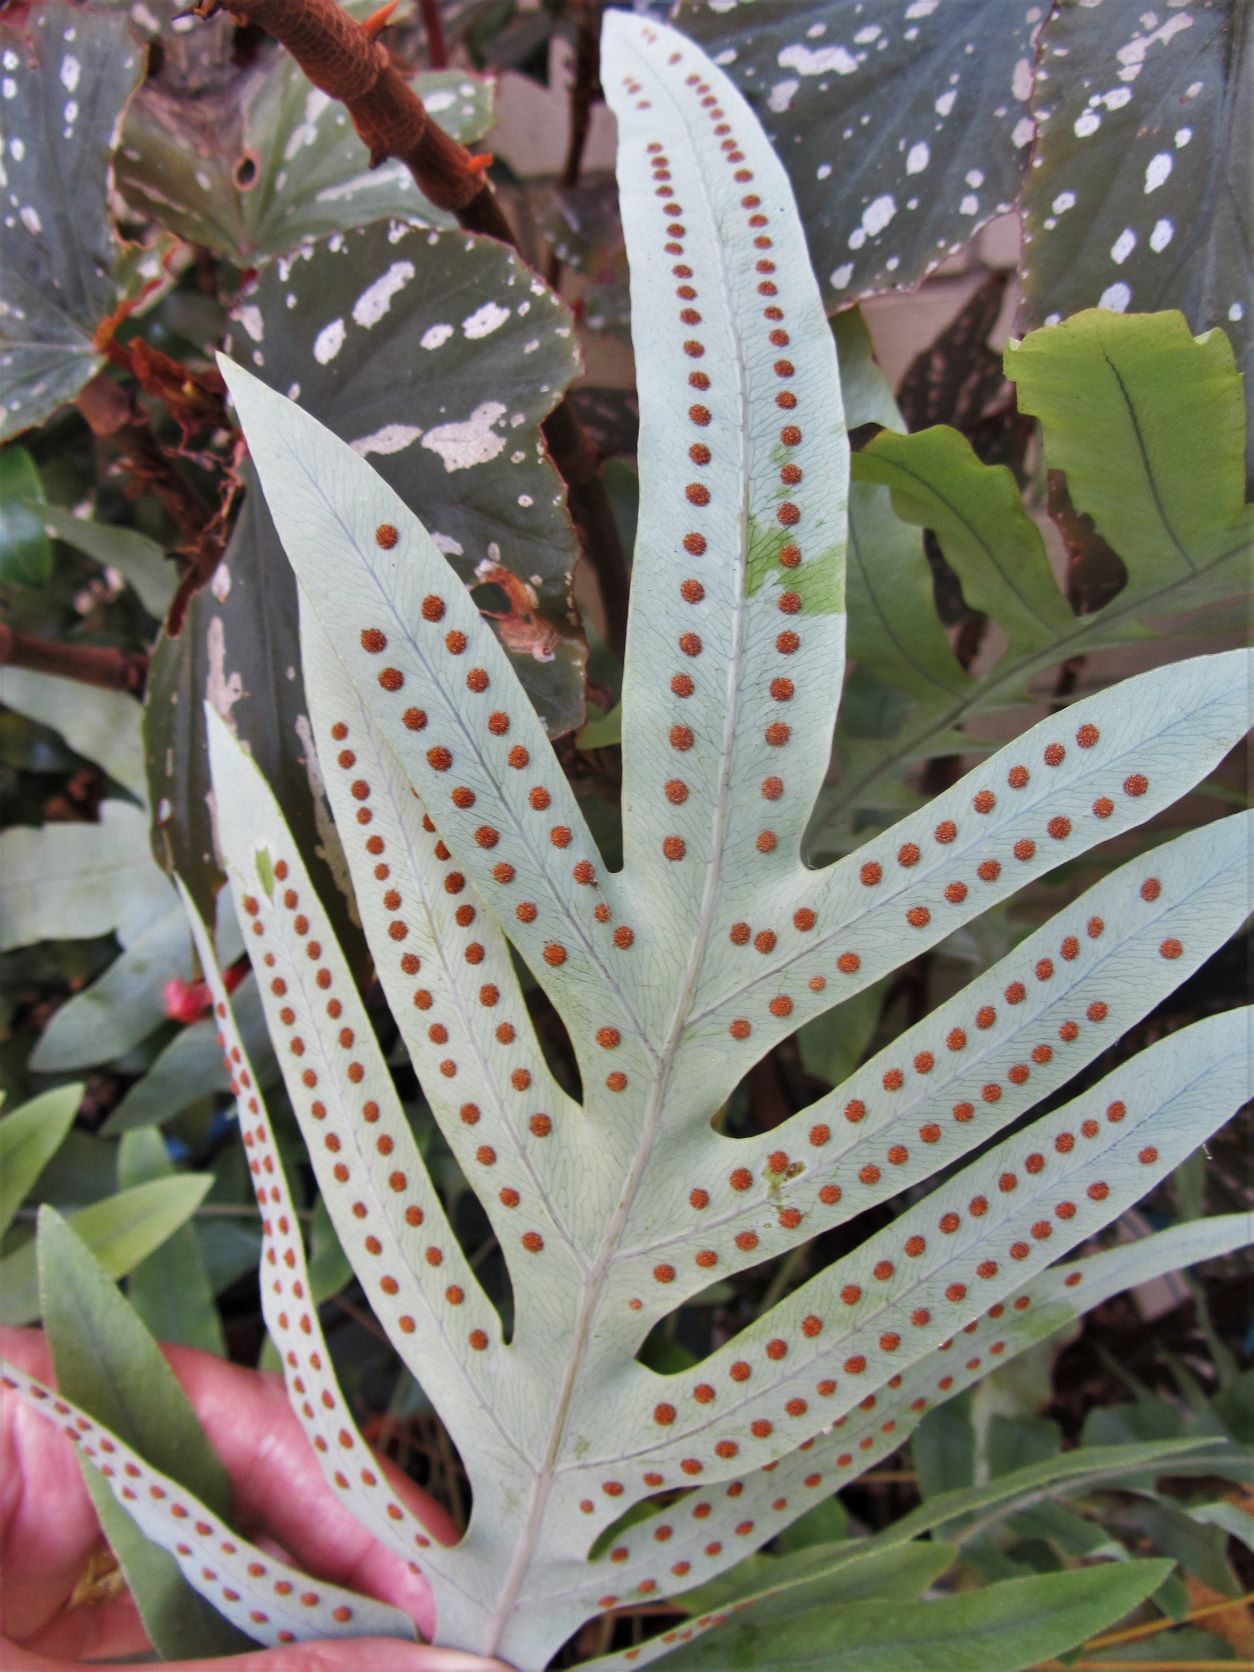
Each tiny, dust-like grain of spore is a single cell. Each tiny sporangia on a fertile fern frond contains 64 spores by the time it has ripened. Sporangia clump together into ‘sori,’ or the dots visible to the eye on a fertile frond. If you do even a bit of math, you realize that many thousands of tiny spores ripen together on each fertile frond.
Sori ripen on the back of an Asplenium x ebenoides or dragontail fern. This native, natural hybrid is rarely fertile.
The gardener’s task is to learn to recognize when the sori ripen and collect a bit of fertile frond before the spores are released into the wild. In most species, but not all, the sori darken from green to brown before they open. Each genus has a slightly different timetable during the season, so part of this art is to know when to collect a fertile frond to begin the propagation process.
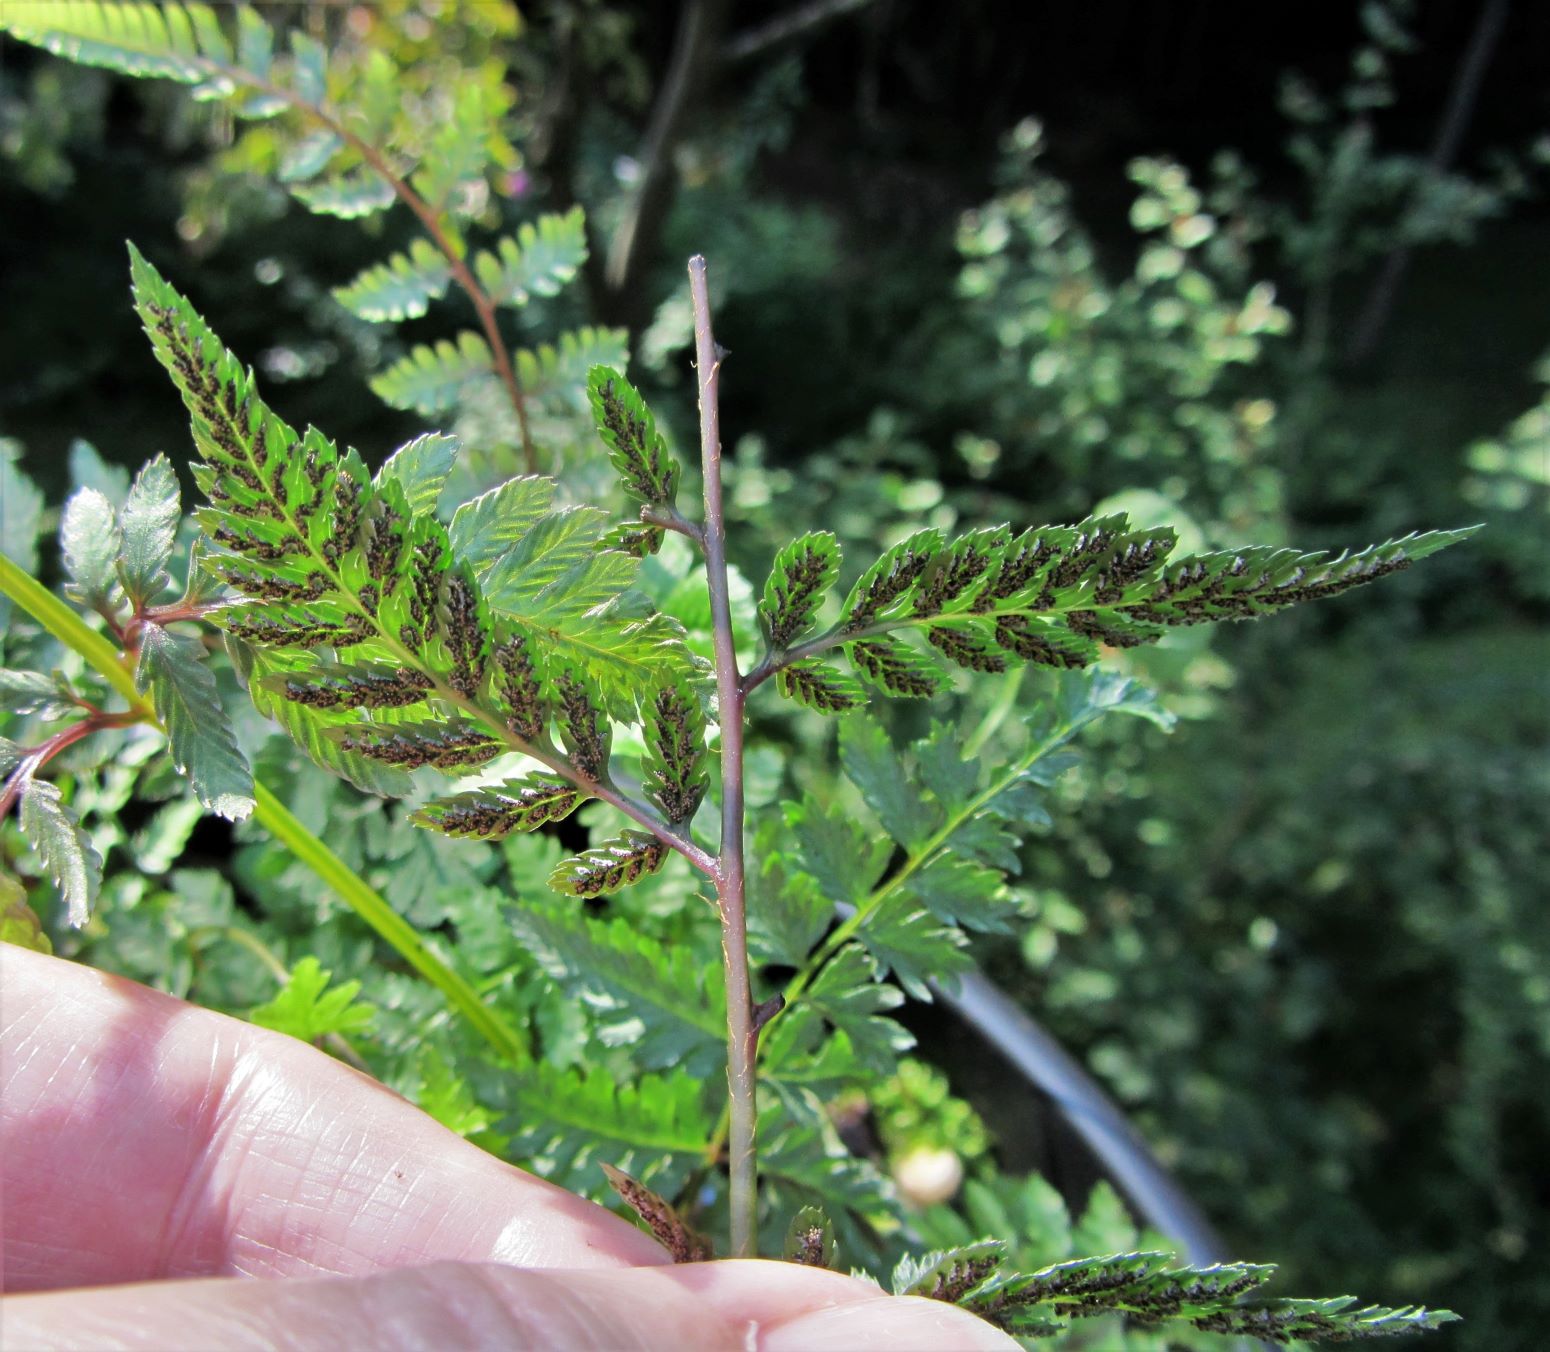
The sori are ripe and ready to collect on this Athyrium niponicum hybrid. I already harvested the top of this frond to collect and sow its spores.
Some gardeners suggest you collect fertile fronds in paper lunch bags. Others tell you to lay a frond on a piece of typing paper to dry. The spores will drop onto the paper so you can collect them and clean them before sowing them. Some growers filter the spores before sowing them onto the growing medium.
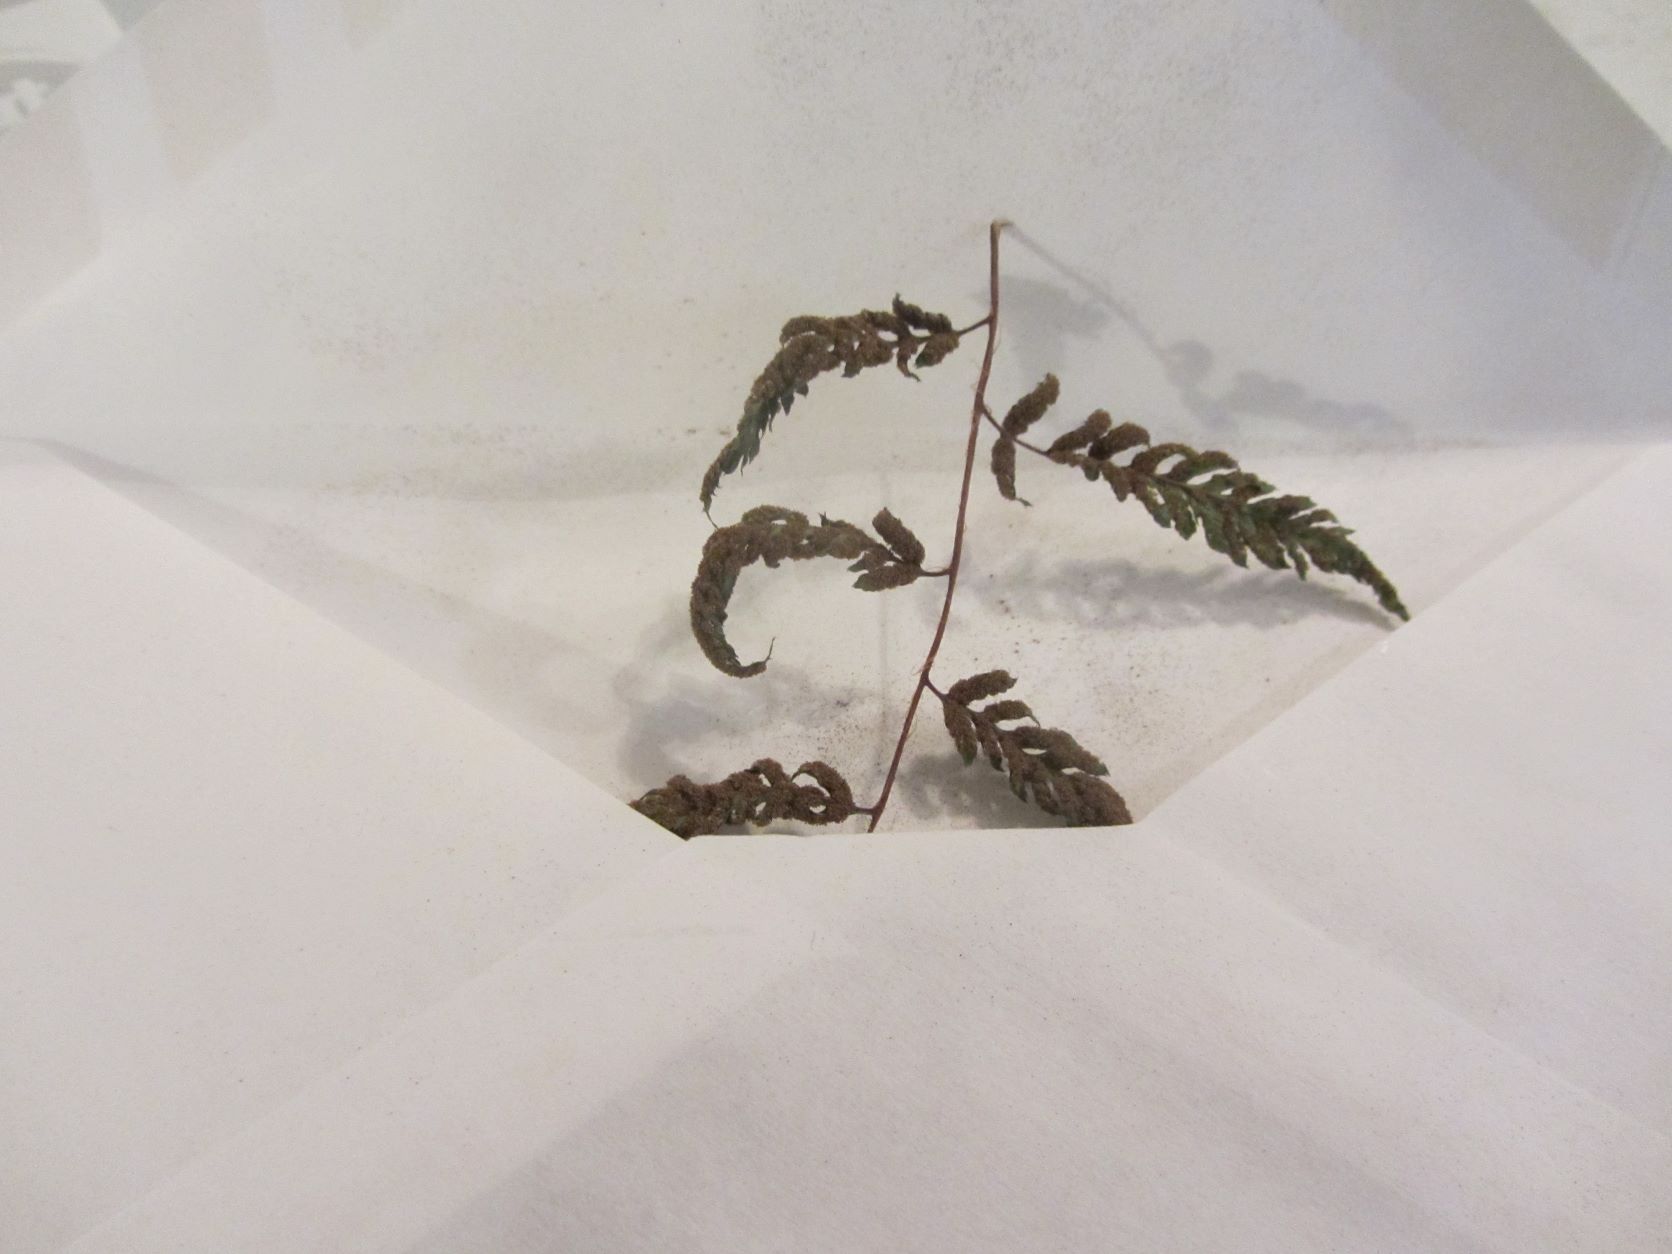
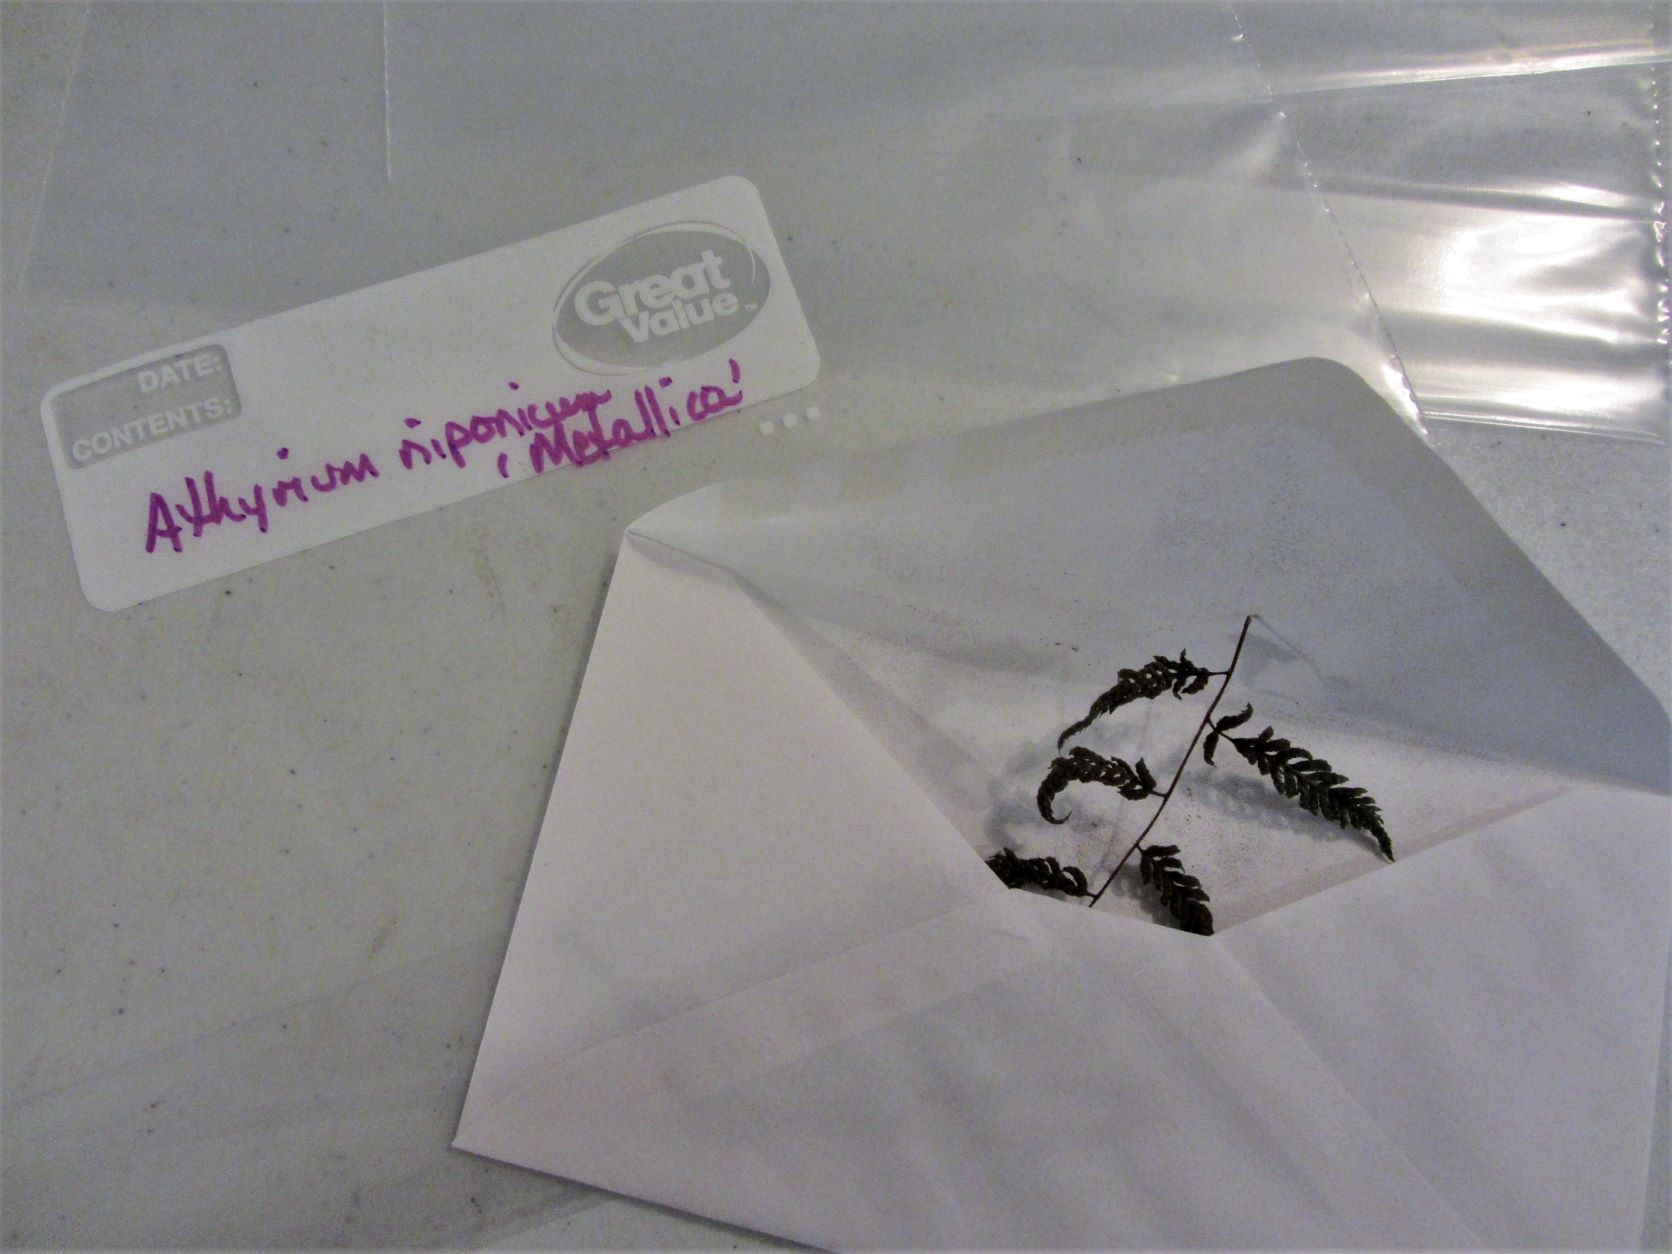
The method I’ve adopted, as described in the HFF booklet, suggests putting a clipping of a few pinnules from a ripe fertile frond into an envelope. It is easy enough to note the type of fern collected and the date on the envelope, and then seal it up until the frond has dried and dropped its spores. Sowing the released spores from the envelope is easier than some other methods of sowing spores. I’ve been resealing the envelopes to allow more spores to collect for a later sowing, or even to share. Depending on the genus, spores may remain viable for a few days or a few years.
The two constant threads in all of the gardeners’ descriptions of their methods involves sowing onto sterile media and keeping that media wet throughout the growth period. Some gardeners make up a soil mix, and then cook it in the oven or microwave to sterilize it. It may be as simple as bagged African Violet potting mix or as complicated as ‘Gorilla Gravel,’ made from cat litter, vermiculite, canary gravel and several other ingredients.
One gardener sowed directly onto clean pumice stones, which he kept in a shaded area of his greenhouse. One even sowed the spores into enriched water kept in covered petri dishes. The media needs to be sterile so that harmful fungi, bacteria, or algae spores don’t grow to ruin the culture of fern spores. Distilled or spring water is recommended, as tap water may contain chlorine or other chemicals which would inhibit spore growth. Rain water could be contaminated with algae or other microbes that would interfere with spore development.
I liked Dr. Peter Podaras’s procedure in which he sowed spores directly onto either floral Oasis foam or rockwool. Since rockwool is sold for propagation of seeds and cuttings, I am going to assume it is already sterile enough for spores. I cut blocks of rockwool to fit the bottom of gallon sized zip-lock bags.
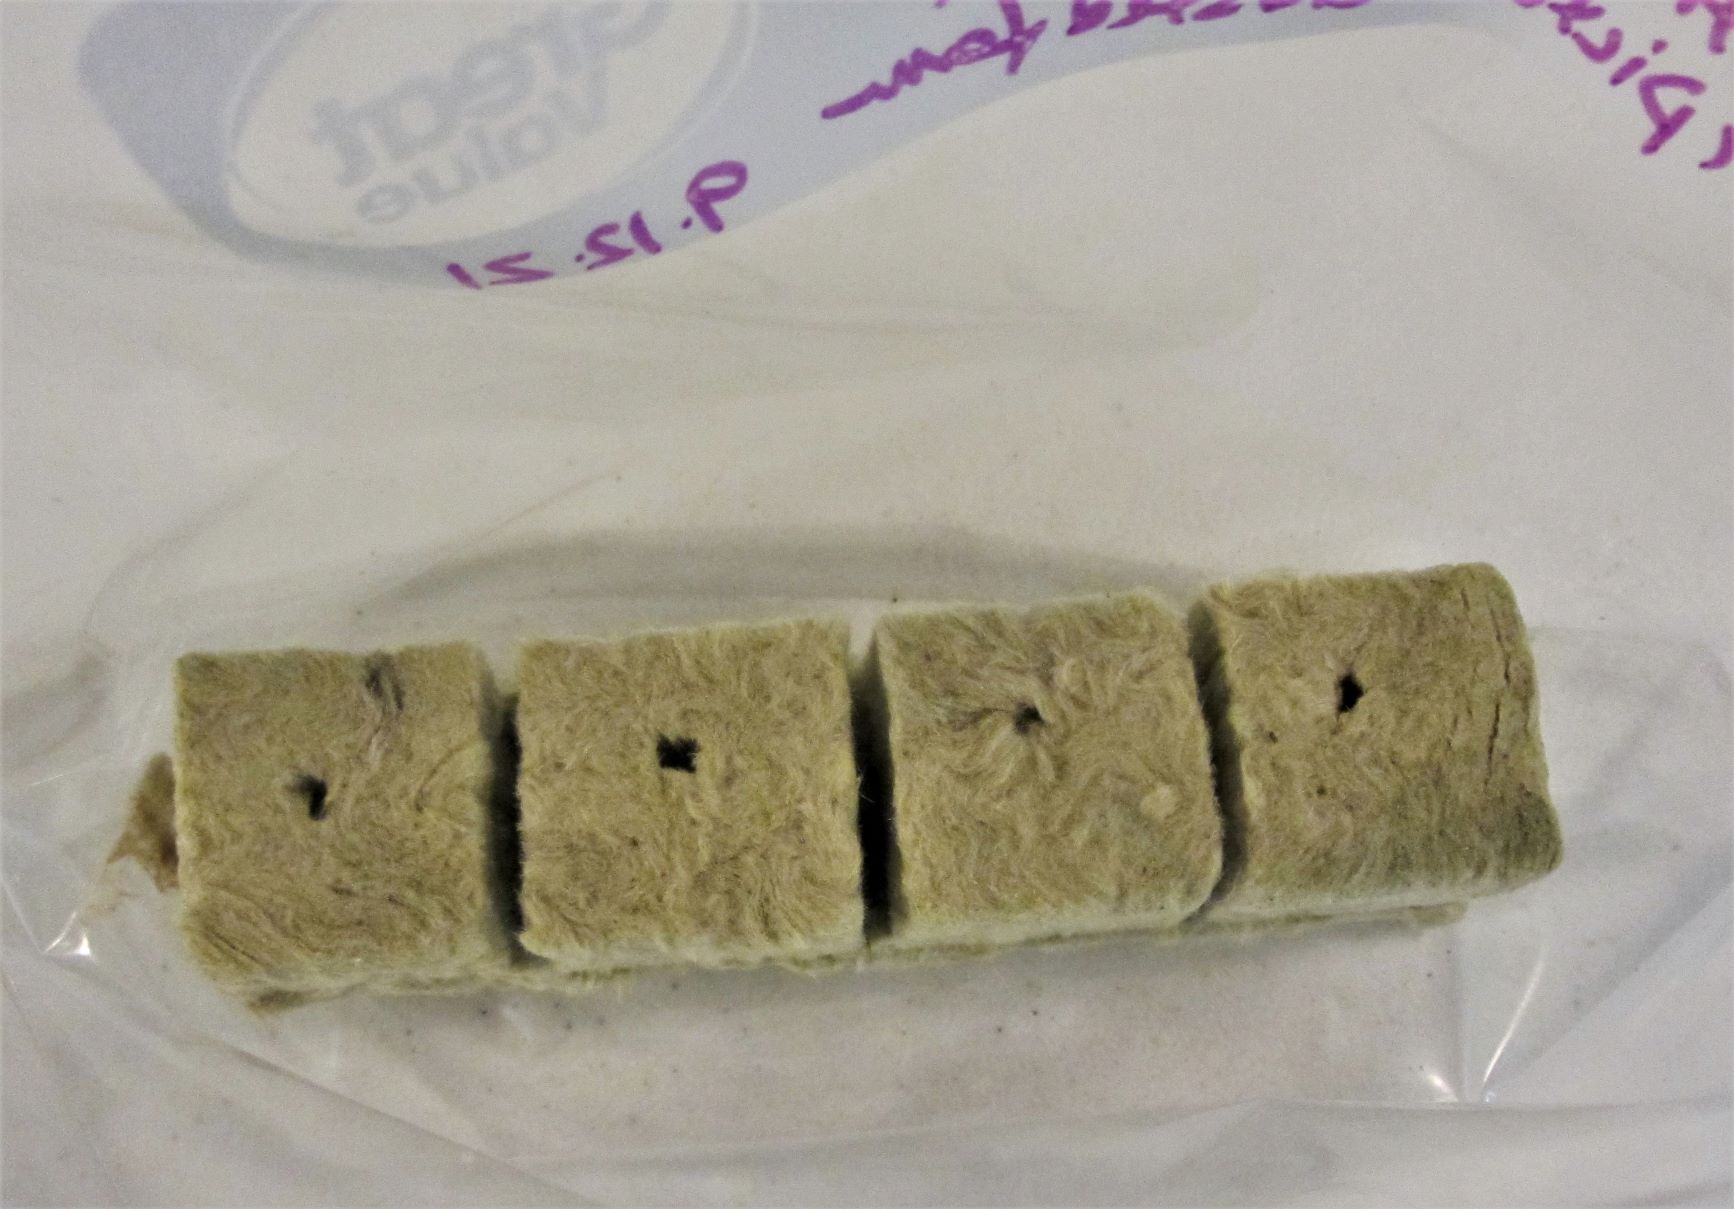
Dr. Podaras recommends saturating the inorganic media with a weak solution of fertilizer and a horticultural fungicide. I used what I had on hand and mixed up a half-strength solution of orchid fertilizer in bottled spring water. He instructs one to saturate the media, then sow the spores. Since another writer sowed directly into a similar water solution in a petri dish, I allowed for a bit of extra moisture in the bottom of the bag to support any spores that didn’t hit the rockwool directly when I shook them from the envelope.
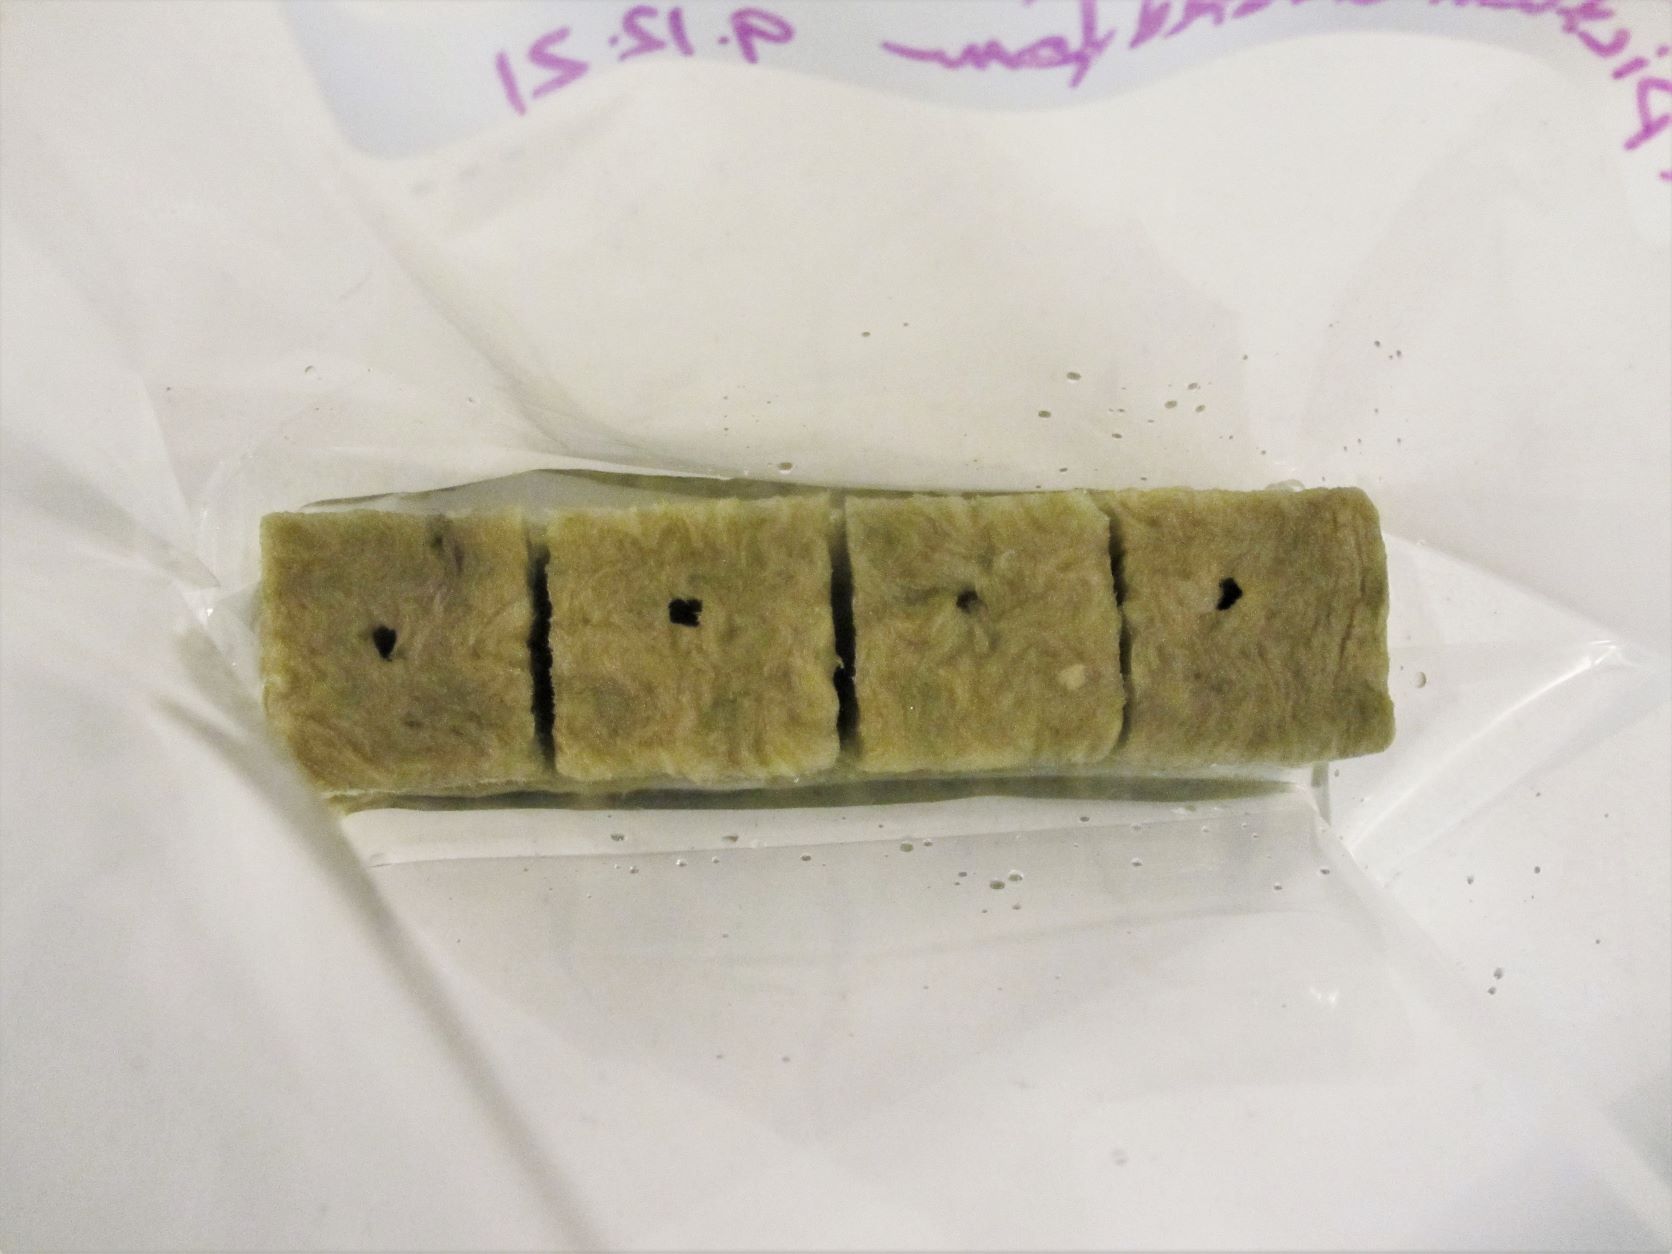
Finally, I sealed up the bags, labeled with the date and type of spores sown in each. Most writers suggested placing the container of spores under fluorescent lights for 14-16 hours a day while waiting for the tiny filaments of new prothallus growth to appear.
I have one bag of rockwool and spores in my office under a light, but I set the other bags out in a shaded and protected spot on the deck where they should receive sufficient light and heat to begin growth. I have about a dozen bags of spores started now, each with a different type of fern. The writers warn that the process from sowing spores to transplanting tiny ferns into their own pots can take several months to a year or more. I expect to bring those bags on the deck indoors and put them under lights once the weather turns cold.
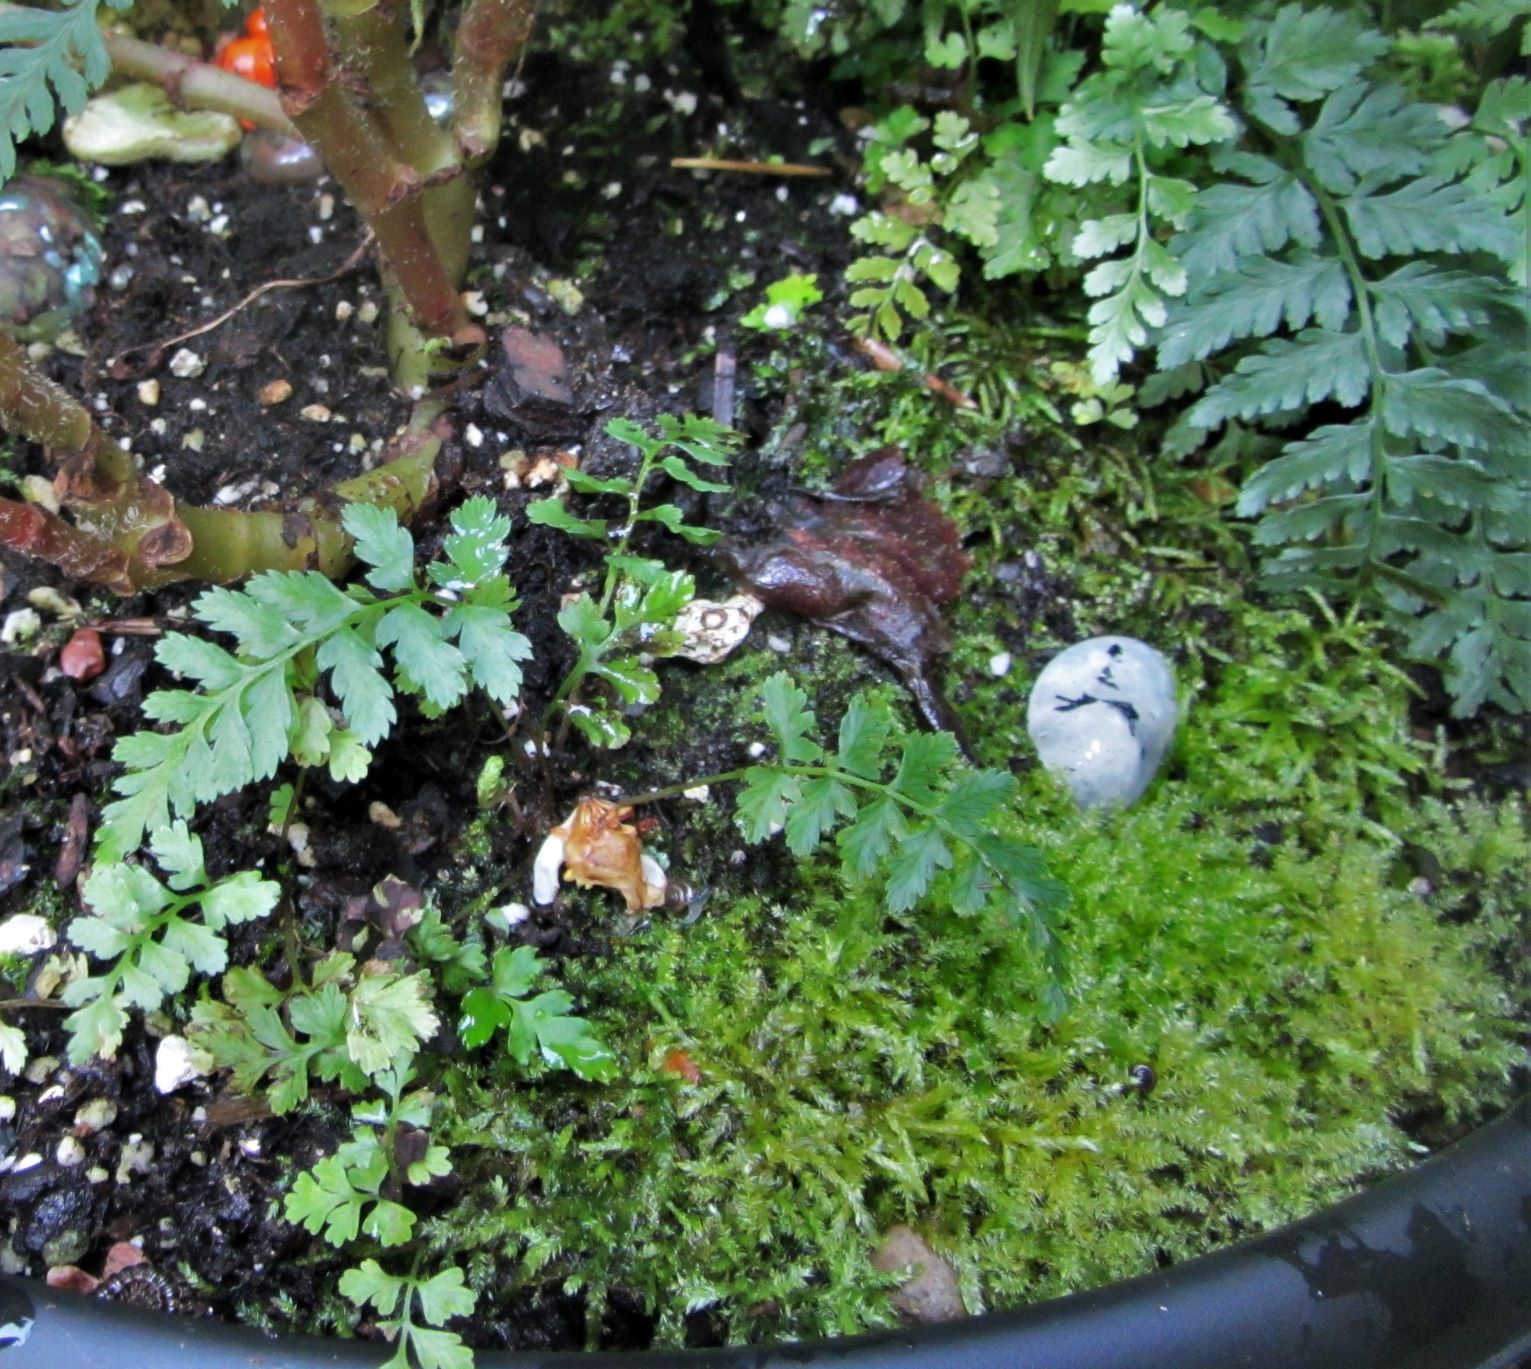
The sporelings growing in this pot come from spores dropped from a nearby fern. The same moist, shady conditions that allow moss to grow also allow ferns to develop from spores.
Nothing more is required until the heart-shaped gametophytes appear on the rock wool. When they have grown thick enough to begin to cover the rockwool, it will be time to water them again with the same fertilizer solution to facilitate the movement of the male cells in their search for female cells to fertilize. Since they swim in water, they require a wet environment and watering the whole mass will speed along the process. I assume that subsequent waterings will assist with the continued production of new ferns as each gametophyte develops on its own schedule.
The tiny new ferns are known as ‘sporelings,’ since they are the generation that will mature to produce a new crop of spores. Once the fronds of these baby ferns are a few inches high, and there are two or three fronds visible, it is time to gently lift them, with their tiny roots, and plant them into potting soil in small pots to grow on. Even then, the sporelings continue to require high humidity and consistently moist soil as they mature.
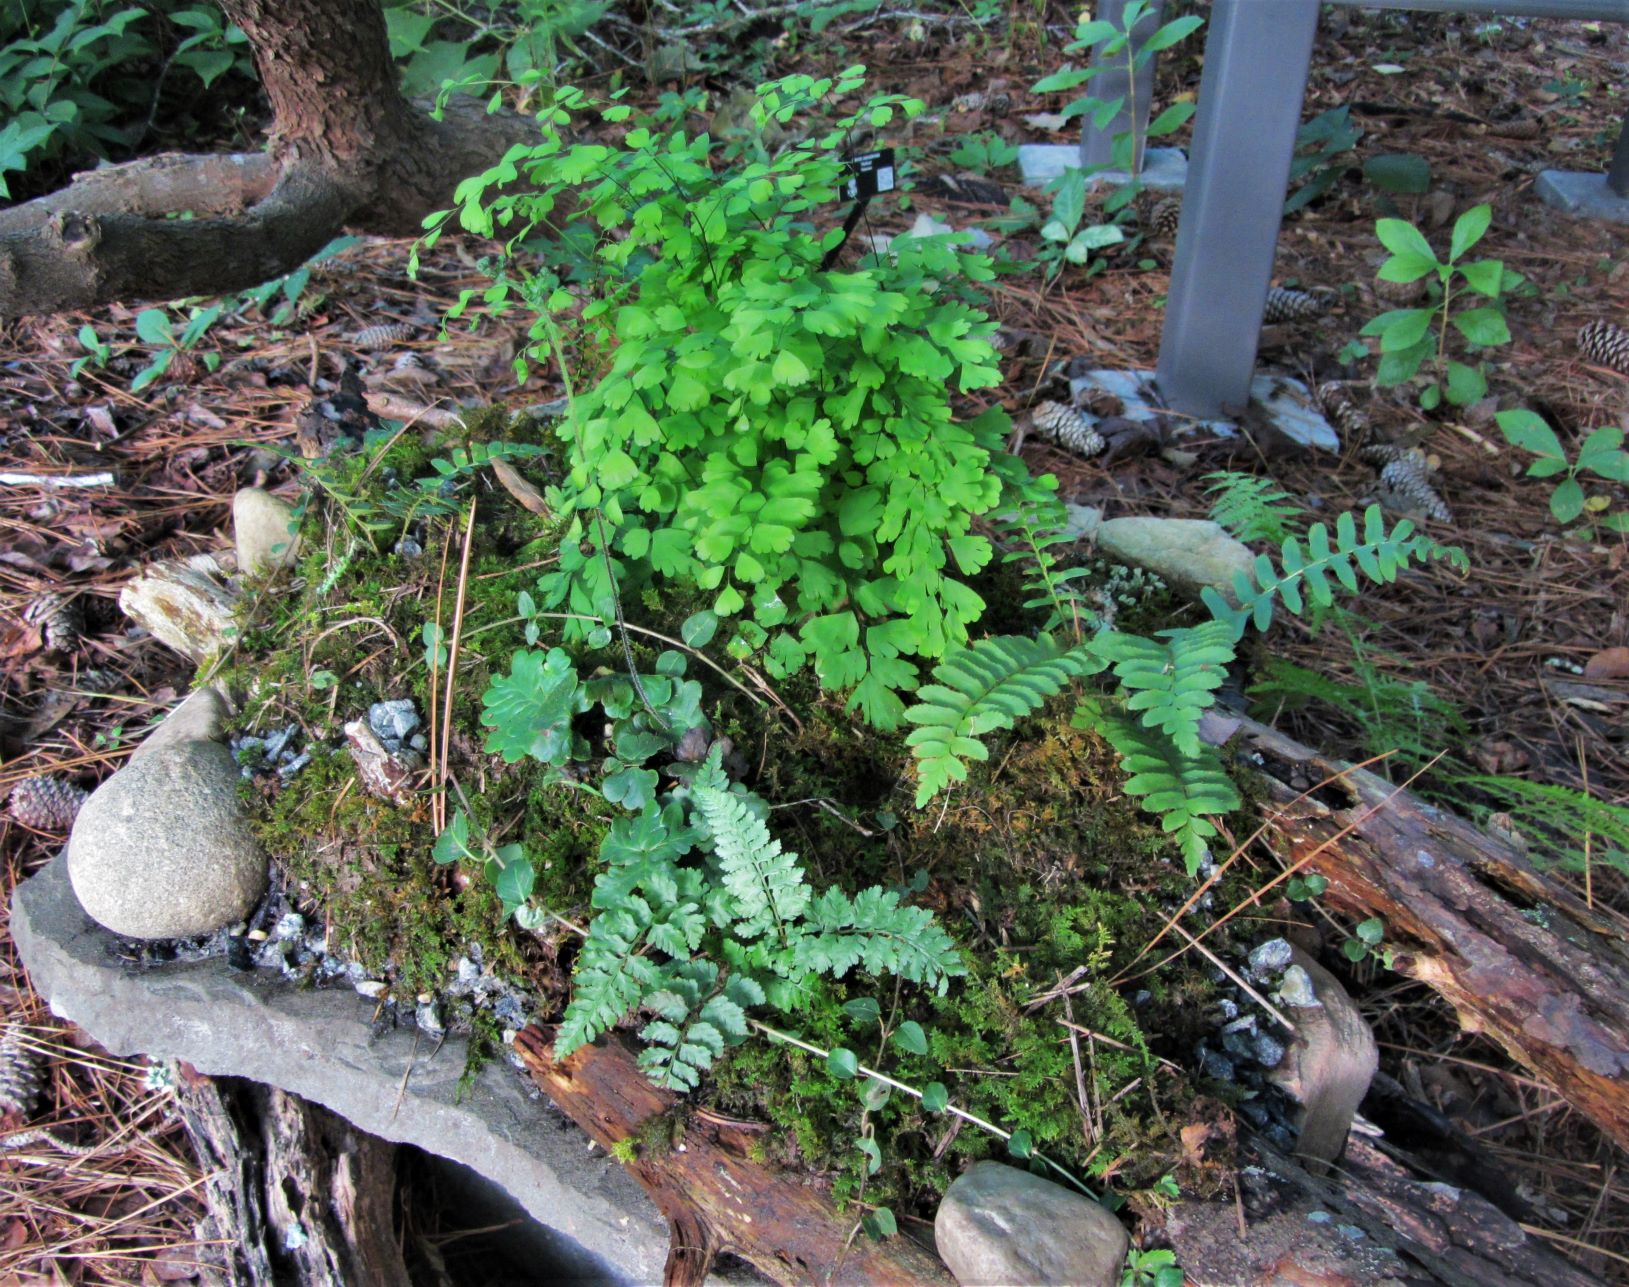
The fern bottom center in this fern table is a volunteer Athyrium found growing in our yard. Top right is a Christmas fern, Polystichum acrostichoides, volunteer also found growing elsewhere in our yard.
I’ve been lifting these baby ‘sporeling’ ferns from mosses in the yard, and from the plastic box where this all unfolded this spring quite accidentally, and then planting them into pots and around the garden. I used a few in fern tables I’ve built this summer, and I’ve given a few to gardening friends. Growing my own ferns is much like the luxury of growing one’s own summer tomatoes. Such a pleasure to raise them at home and not need to run to the store for every fresh tomato sandwich- or each new fern included in a potted arrangement.
I am looking forward to watching this experiment unfold. Without a greenhouse or dedicated light set-up, I’ll have to devise a method for caring for all of the stages of growth through the winter, as the ferns develop and mature. The next challenge will be finding homes for the many baby ferns I hope to have growing by this time next year.
Visit the Hardy Fern Foundation’s website for additional information on propagation.
All Photos by E. L. McCoy